
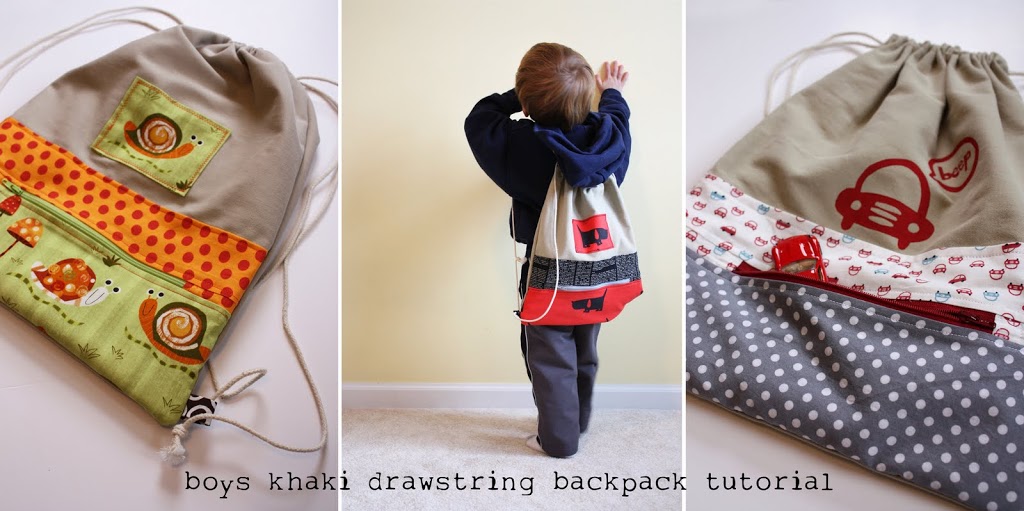
Have a few old pairs of khaki pants laying around? Maybe even some with a few stains on them? Here’s your chance to turn your husband’s old khaki pants into a super cool drawstring backpack for your little guy.
You’ll need:
one pair khaki pants (actually enough fabric for the exterior of 2 backpacks)
1/2 yard for lining fabric
scraps for front zipper pocket
1/8″ cotton cording (approx. 3 yards), I found mine at Home Depot – 45′ for under $3, but you can also get cording at your local fabric store.
one 8″ zipper
thread!


From your lining fabric, cut 2 pieces 13″ wide by 16″ tall. For the zipper portion of the bag cut two pieces 3″ tall by 13″ wide, two pieces 4.5″ tall by 13″ wide, and four pieces 2″ tall by 4″ wide.
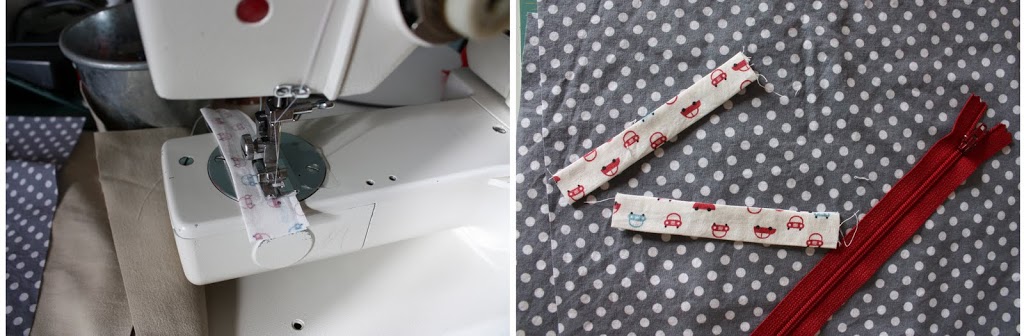
Then cut two tabs that will attach the cording to the backpack 2″ tall by 4″ wide. Fold them in half lengthwise right sides together and sew {1/4″ seam allowance}. Turn right side out and press. Set aside.

Sandwich your zipper between two of the four small pieces, fabric right sides together. Sew a 1/2″ seam being sure not to hit the little metal parts on your zipper. Flip the pieces wrong sides together and iron.
Topstitch with about an 1/8″ seam and then again with another line of topstitching about a 1/4″ from the first line. Add the same pieces sewn the same way to the other side of the zipper.
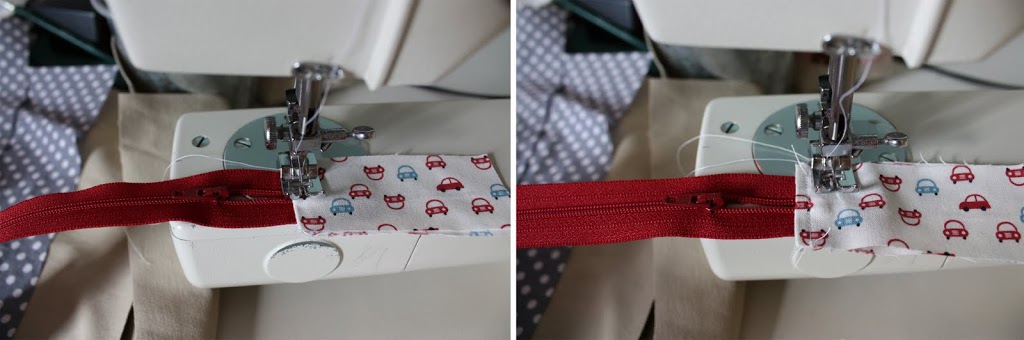
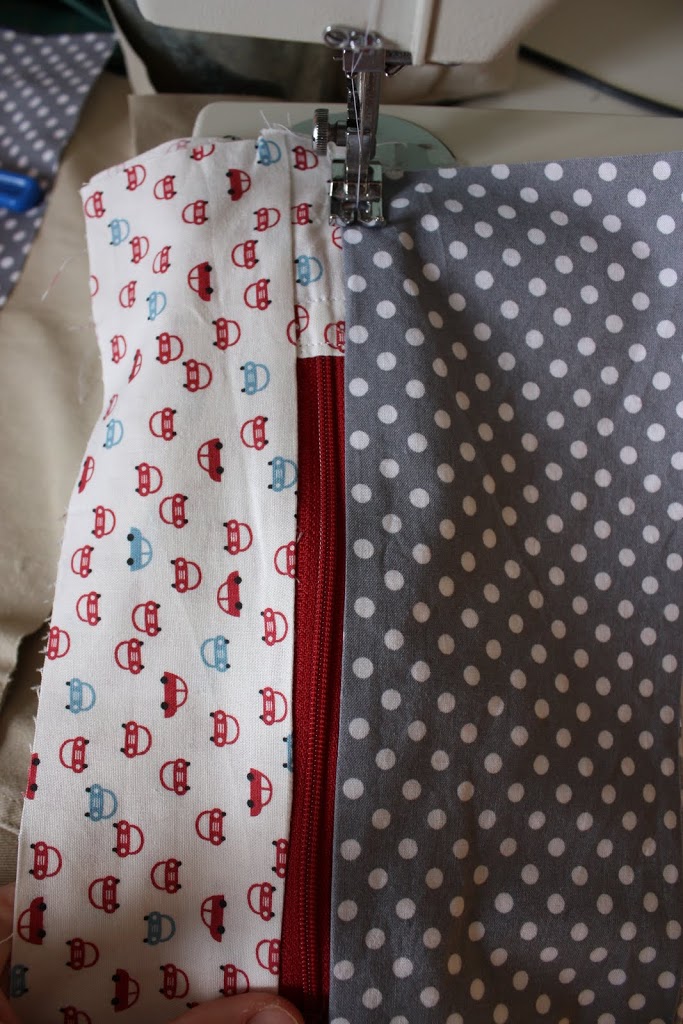
Now take the 3″ tall pieces and sandwich them around the top long edge of the zipper right sides facing together. Sew using a zipper foot using a 1/4″ seam allowance. Flip wrong sides together and press. Next take the two 4.5″ tall pieces and sew them to the bottom long edge of the zipper.
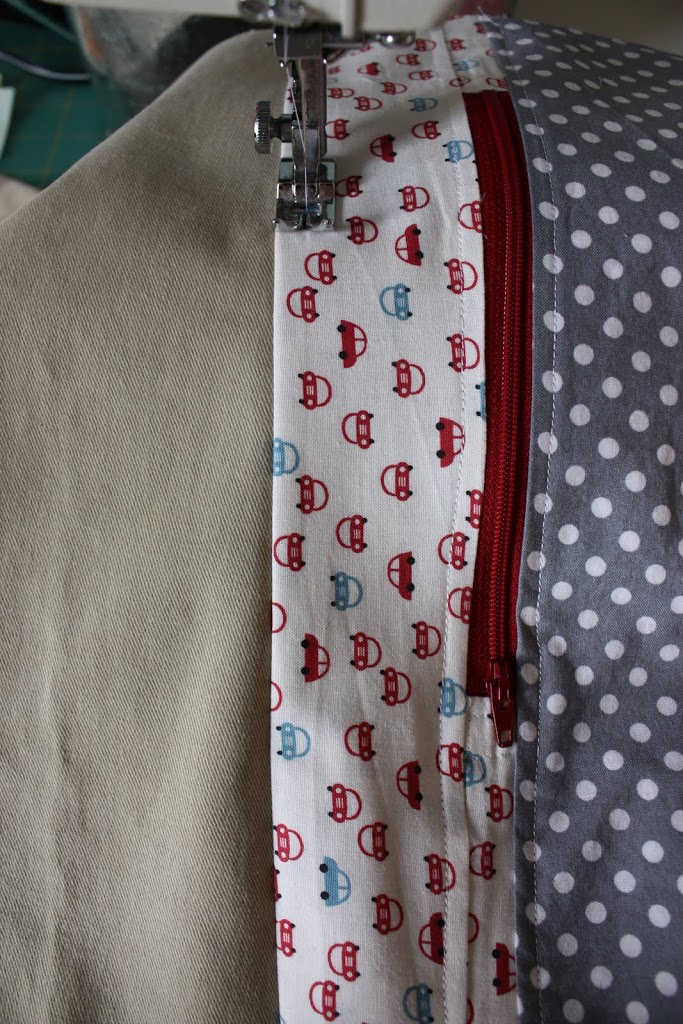
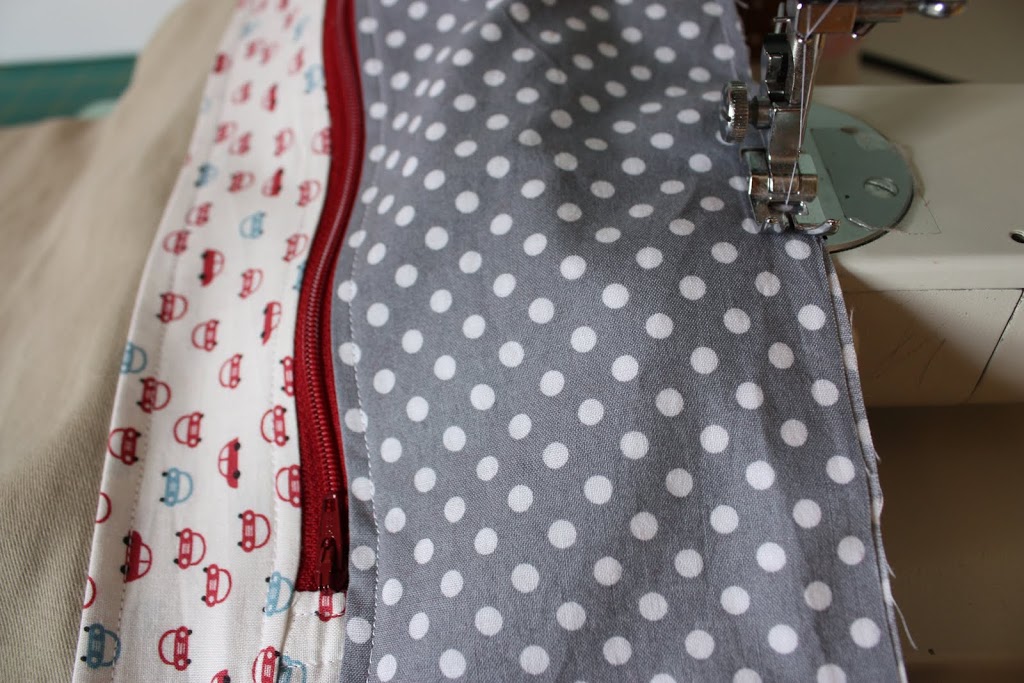
Flip wrong sides together and press. Switch back to your regular sewing foot and topstich on both the top and bottom long edges of the zipper using about an 1/8″ seam allowance.

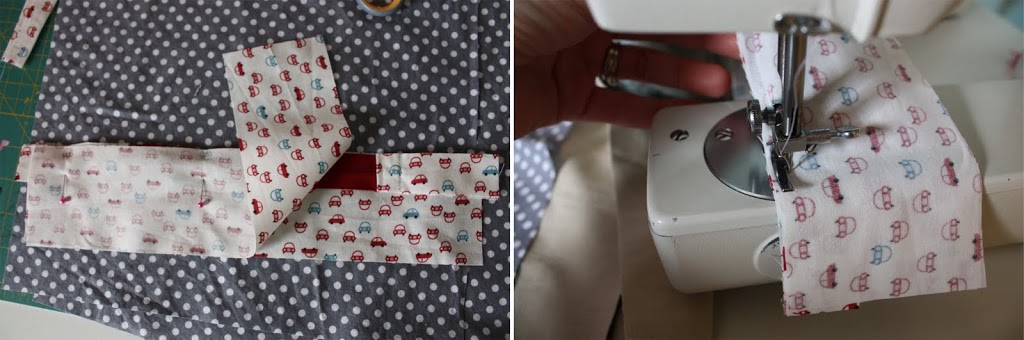
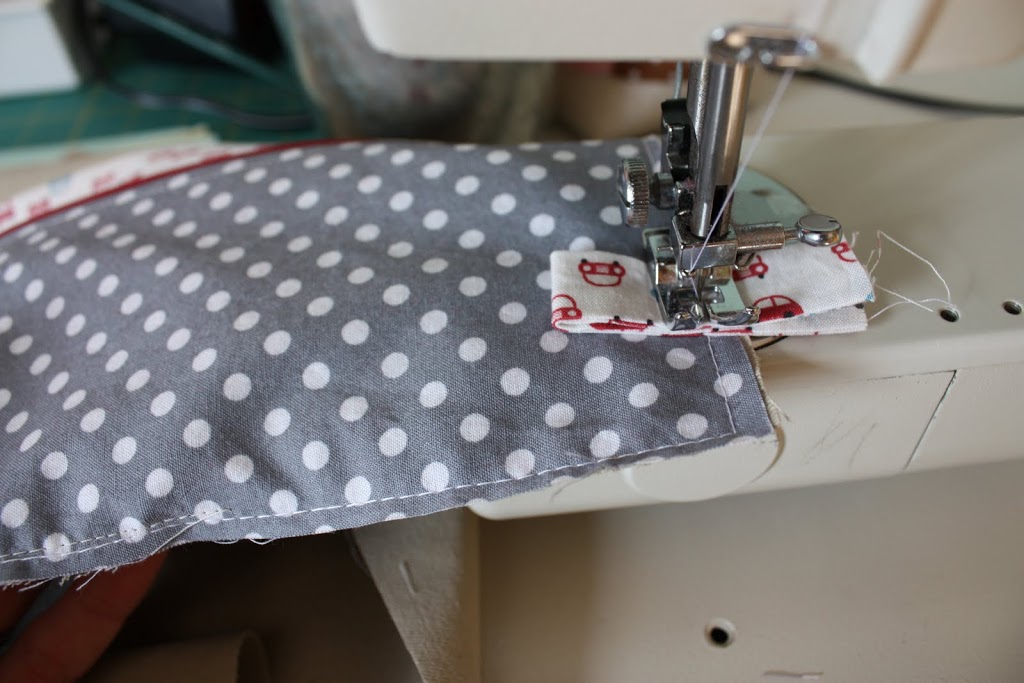
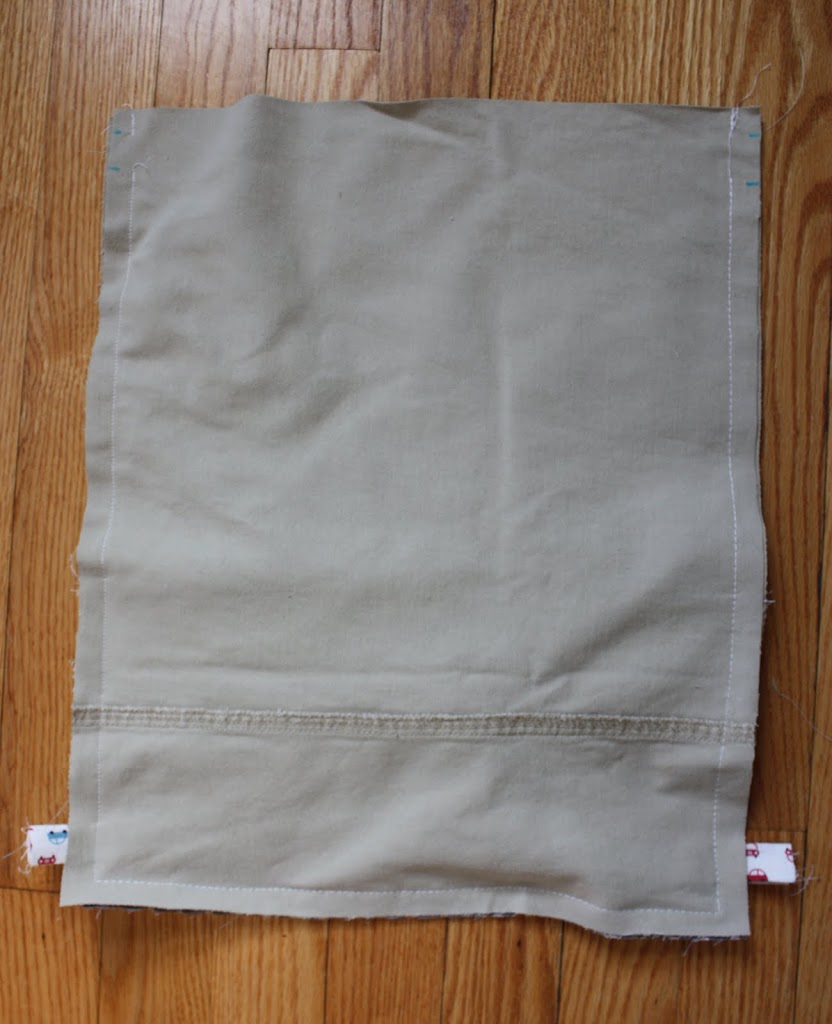
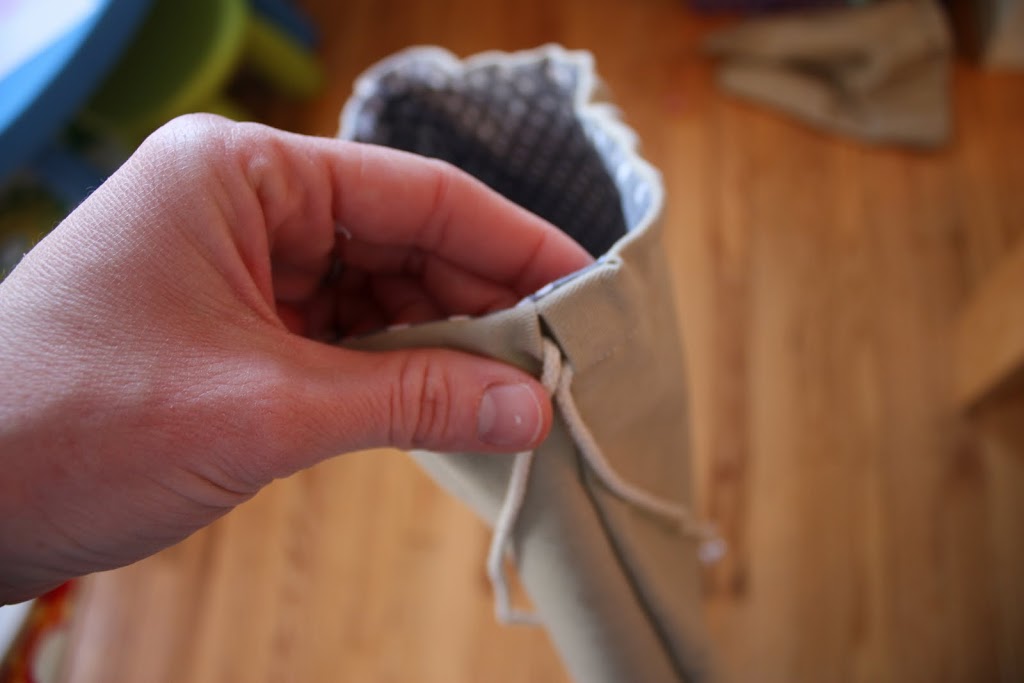
Take the top of your assembled pocket piece and press it down about a 1/2 inch. Open up the flap you just pressed (and making sure the bottom of the assembled pocket piece aligns with the bottom of the exterior piece) and sew the pieces together, sewing along that ironed crease.
Fold the pocket piece down and topstitch along the top edge. Baste your pocket piece to the exterior of the bag about a 1/4″ from the edge on the two sides and bottom. {Now is a great time to add some detail to the top of your bag such as a freezer paper stencil, applique or even a patch.}
Take the two tabs you made earlier and place them about 1.5″ from the bottoms of the bag on either side with the raw edges lining up with the raw edges of the exterior of the bag. Baste.
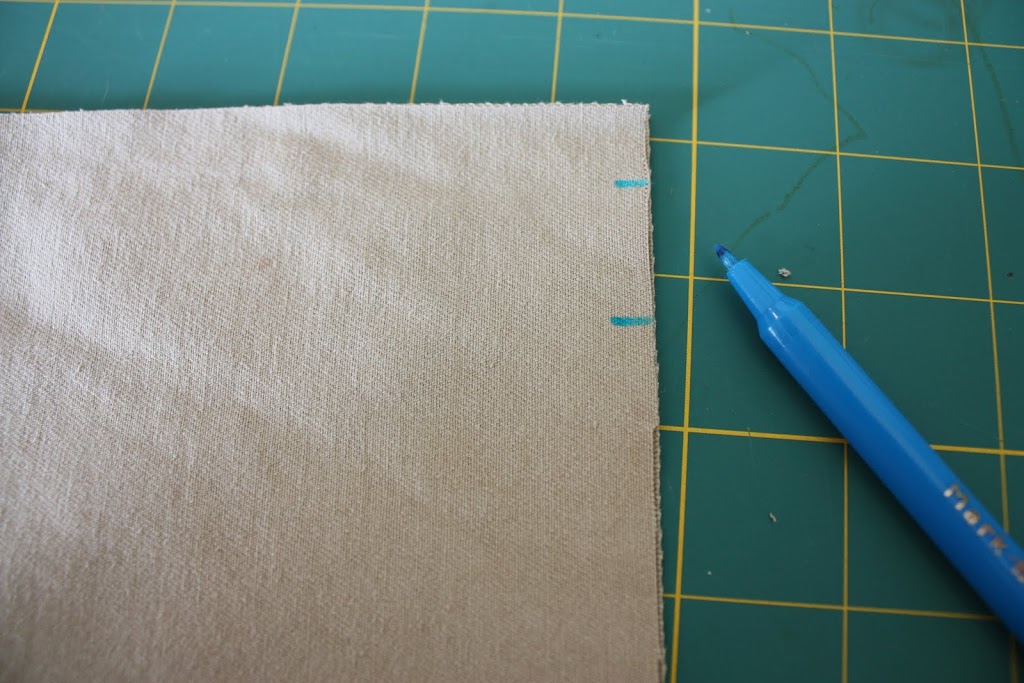
Then, make two marks on either side of the top of the wrong side of the exterior of the bag. The first mark is 1/2″ from the top and the second mark 3/4″ from the first mark. You will be leaving a gap in between these two marks — this will be part of the casing for the drawstrings.
Place your two exterior pieces right sides together. Sew together using a 1/2″ seam allowance, leaving the space between your two markings open.
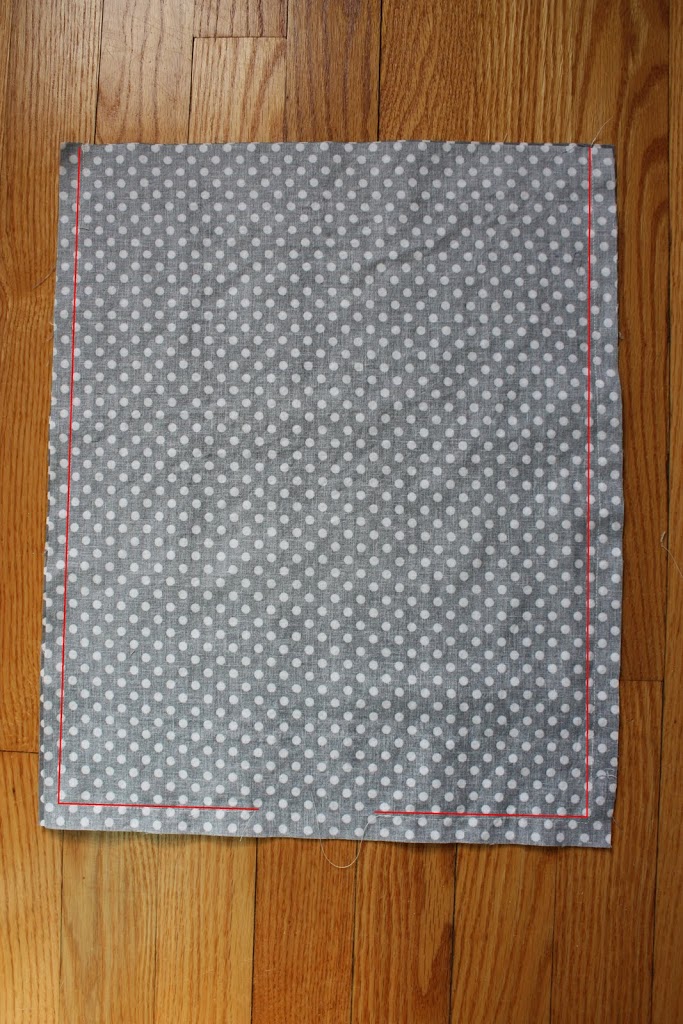
Next, place the lining pieces right sides together and sew using a 1/2″ seam allowance leaving a 4-5″ opening in the bottom for turning.

Flip the lining piece right side out and place inside the exterior of the bag (right sides facing together). Sew around the top edge of the bag using a 1/2″ seam allowance.
Turn bag right side out through the opening in the lining. Sew the opening shut using a small seam allowance. Press the top edge of the bag.

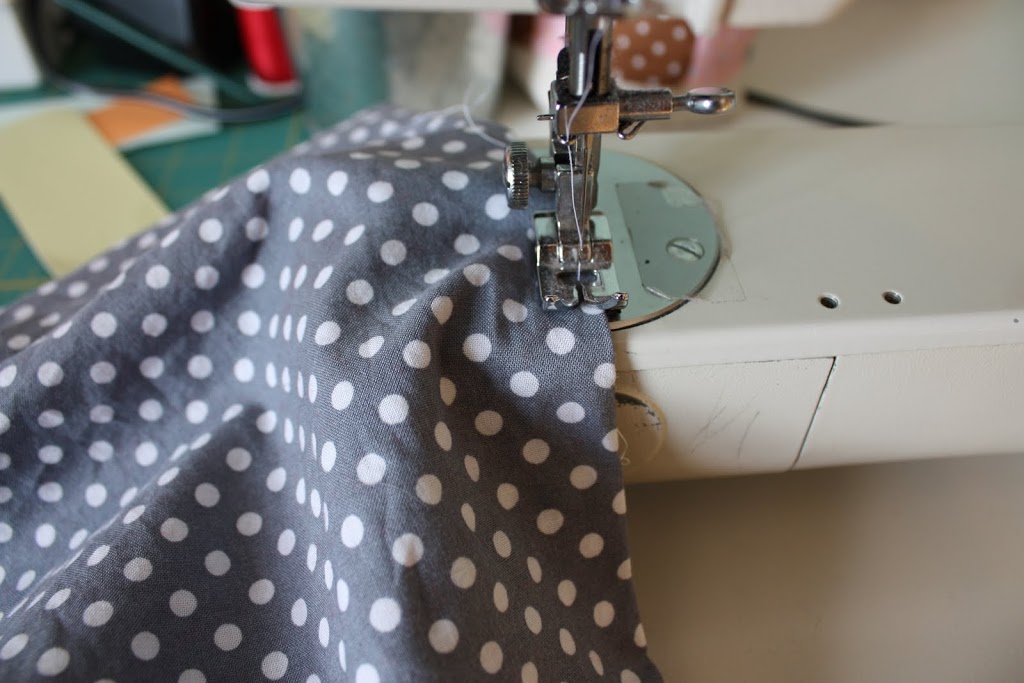
Sew around the top of the bag using about a 5/8″ seam allowance (this is making the casing for the drawstrings).
Cut your cording in half, each piece being approximately a yard and a half long (this length can be adjusted depending on how big your child is and if they’ll be wearing winter coats under the backpacks). Using a safety pin, thread each cord through the openings left in the seams of the exteior. Thread through one side and pull cording out through the same opening. Do the same for the other side. Tie the cords together through the tabs you made at the bottom of the bag. You’re done!
There a lots of options for this bag. Add a freezer paper stencil, an applique, or a patch to the bag to make it even more personalized. You can also use ribbon or cotton webbing in place of the fabric tabs at the bottom of the bag. Take this and make it your own!
This is so cute! I have been planning to make a bag for my son’s dance shoes, but wanted something very boyish and hadn’t found something I like. Thanks for sharing, the tutorial is great!
Very cool! Yours look super-sturdy and I love that they’re made from recycled pants….
this is incredible! sooo cute
LOVE it — so stinking cute! That zipper pocket is just plain GENIUS!
adorable!
A W E S O M E !!!
I’m checking out your blog for the first time and i really like what I see! 🙂
Greetings from Sweden.
Sent over here by Dana, love it the blog! You are soo going into my Google Reader!
Anna, the bag is fantastic!!
Zipper pouches make everything so much more fun, my kids love zips.
Great tutorial!
I LOVE YOUR BAG and your blog!!! So glad I found it!! I love that you are using pants we already have ALL OVER THE HOUSE!!! Great ideas!
I’m in love, this is so beautiful!!!
okay seriously?
you were cool before…
but you’re even way cooler now!
You’re totally on MADE Anna!! You’re so cool.
And I love this tutorial. You have helped me overcome my fear of zippers.
I thank you.
Can’t wait to try this! I am a mom of two girls too, but I have lots of friends with boys just waiting for a cool backpack like this!
Sarah
I had stumbled upon your blog a long time ago, but finally spent some time browsing through this morning. you have a beautiful blog– you make some amazing things. i’m going to add you to my list of craft blogs to follow– you are inspirational! thanks for sharing all the great things you create!
Such a cute blog. Inspiring, fresh, colorful, beautiful photographs and lots of love put into it. I follow Dana’s blog….got your link there. Thanks for the tutorials! My favorite is the cargo pocket bag.
Oh. My. Stars. This is SO stinkin’ cute!!! I’m so sad that I have to spend my day cleaning and grocery shopping, because I seriously want to drop everything and make a stack of backpacks now. Who needs to eat, right?
I blogged your tutorial over at Craft Gossip Sewing:
http://sewing.craftgossip.com/tutorial-boys-drawstring-backpack-from-a-pant-leg/2010/02/03/
–Anne
I am totally going to raid my husbands closet now…
Those are the cutest backpacks EVER!
Thanks for sharing this awesome tutorial 🙂
Love the bags. I wish I was better at adding zipper. I’ll have to give it a try again.
These are SO GREAT! I love your combination of fabrics. Awesome tutorial. Thank you!
Anna, this is darling. Thanks for the simple explanation on zippers. I’m so happy to have found your blog!
Those bags are amazing! Very clever. The fabrics you chose are awesome as well. Go Anna!
Where do you find your fabric??? I’m expecting baby #4 (my second boy) and I’m trying to find some cute new fabrics to make stuff for him!!
Ho Fun Anna! Nice to meet you! I just found your blog throught Made! I am amazed ! You have such a beutiful things here ! I am now your follower! Can`t wait to see what else you come up with!
http://www.ForeverYou.etsy.com
Love the bag. Can you tell me the name of the car fabric you used? My son would love it. Thanks.
Thanks everyone, I’m really glad you like the backpacks (my daughters even love them!) As for the fabric question, I got the car fabric from Crafty Planet in Minneapolis (I was lucky enough to shop there in person, but here is their online store link): http://www.shopcraftyplanet.com/store/home.php
They have tons of great japanese prints. The car one in particular is by kokka from the trefle collection.
I don’t see anyone else mentioning this, but I believe you mixed-up which fabrics to place at the top and bottom of the zipper. By looking at the photos, we put the narrower (3 in.) fabric at the top and the wider (4.5 in) at the bottom. Other than that a fun tutorial for my 13 year old daughter to make (with some supervision).
Oh, you’re right Kathy, they are mixed up. Thanks for letting me know, I edited them now. 🙂 I guess after 6 years no one noticed.
I LOVE this backpack. The fact that your using old pants is icing on the cake. Plus… one of the best tutes I’ve seen. Easy to follow directions and great supportive pics! I’ll be linking on Facebook. Thanks 🙂
Fantastic! Even my little girl would love one of these and it will probably have to happen or else she will most like steal her little brother’s bag to hoard “treasures” in! Thanks so much for sharing 🙂
Mmmmm…lovely tutorial!
Brilliant – way better than the toolbelt idea thrown your way 😉 You’re my sewing idol Anna!!
brilliant! can’t wait to try it out. Where did you get your cute fabric? Loved the cars!
inthegrove5 (at) gmail (dot) com
what a great tutorial Anna! I love the way you put fabrics together in your projects!
I was taking a look at your zippy wallet tutorial because I want to make my son a little wallet for his Birthday in March. And then i saw the car fabric with the blue polka dot fabric you used for your drawstring tutorial and I just love it and I was wondering if I could comission you to make a little zippy wallet for my son using that fabric,I would be willing to pay etc . . and I’m not a very good seamstress anyways. If you’d be willing to do it for me please email me and let me know. My name is Heidi heidiobarr@yahoo.com
I know your busy, so just let me know!Thanks!
This is a very cool project, thank you for sharing!
Fantastic Tutorial – tankyou – think that I wil make a few of these for Birthday gifts:)
Wow! I love your blog!
Congratulations on being featured, Anna! Love the bag – nice work! Can’t wait to see all the boys’ fun stuff.
Excellent tutorial and idea…love it ! My sewing machine has done nothing lately except repairs but oh, am I going to have some fun now that I have found your blog…thanks !
Lovely tutorial, and what a fun blog! Added to my favorites!
Take care.
I´m so happy I found your blog! You are inspiring!
Love it! So adorable, what a great idea!
This is such a fab idea and tutorial. I have an 8 year old boy that does not get things sewn for him enough!! I think I’ll have to tackle this one!
Thanks for the great idea, I love how you combined the brighter fabrics with the neutral background!!
Melissa
i have been thinking of this project all night! lol! I want to dive right in, but im having a hard time understanding one of the instructions. When you finish sewing the pocket piece and your instructions state to iron 1/2 inch fold…the sewing machine looks like (and instructions say) to sew on that fold…but then it says to fold it over and top stitch it. Thats confusing me. Can you clarify what that means? I really want to get this right…I want to make 2 of these for my boys (and THANK YOU for participating in Boys Month…as a mom of 4 boys, i am sooo happy!!!).
Rachel- I’m glad you’re giving it a try! You’ll just iron a fold to get the crease and then open the fold back up to sew along that line. The exterior of the pocket piece will touch the exterior of the bag, facing upward. then when you fold it down and topstitch it will line up with the bottom of the bag. Hope that helps!
I’ve stated this cute bag as well and am confused at this point as well. Do I iron the fold on the top section only then I’m not sure what the piece is that I am it to. Any other tips would be helpful 🙂 Thanks
I think I’m gonna have to make this fabulous little backpack. I have a good fried who’s getting ready to have her second child and I think her first child would absolutely love this!
P.S. Thanks for also showing how to sew a zipper. It’s one of the big areas of sewing I have yet to tackle b/c well…it’s kinda intimidating…
Thanks so much for this!!! I’ve been wanting to make a bag for my little guy for church to take all this little “distractors” in. This will be perfect! Very very cute!
I made one! Thanks so much for the zipper tutorial. Zippers give me nightmares but your instructions made it so simple. Thanks a bunch. If you want to see mine, it’s on my blog.
seamseweasy.blogspot.com
Thanks again!
Hi, what a cool bag for a boy! I`m a mom of an almost 4 years old boy and he made me sew! Thanx for the great tutorial. I guess I have to read it a few more times to understand every step but a great opportunity to fresh up my english!
Happy day,
kiki
thanks soooooo much for the tutorial. i just made one for my little girl (sorry, no boys yet, lol) and it turned out fabulously! awesome instructions!
Thank you so much! I made this for my 2 year old son and he just loves it!
LOVITY LOVE this tutorial. finished mine just in the nick of time for giftage purposes (a nephew’s big day), and i ended up having to make a few adjustments due to lack of proper planning (velcro instead of zipper, binding instead of cotton cording), but in spite of that it turned out beautifully. grazie, anna. you utterly rock.
This comment has been removed by a blog administrator.
Great tutorial! I have made a similar drawstring backpack for my son a while ago, but I love the way you’ve detailed this one- nice pocket and a great reuse/recycling project too! Thanks for sharing.
awesome idea, just made one for my sister to use as an extra little bag and she loves it 🙂
This comment has been removed by a blog administrator.
wow. i’ve been saving boxes of clothes to do things like this…and now I know what to do with them. my husband thanks you because he hates that i save boxes of old clothes…so nice to find a kindred spirit in hording clothes!
I LOVE your tutorial. I just made one of these bags and even reused the zipper and back pocket from the pants. I customized it slightly so I can easily access my camera even when I’m wearing the bag. Working on a second and third bag. 🙂 Thanks!
http://beckabowers.wordpress.com/2010/06/08/personalized-drawstring-backpack/
Love your blog and all the tutorials! I am always up for new projects! Thanks for sharing!
I just made two of these this weekend for birthday gifts…they came out great!!! I used an old pair of pants that had zipper pockets, allowing me to skip the whole zipper process. On the bottom I sewed a strip of flip flop material and the lining was coordinating summer material, making these perfect for the little ones to carry their stuff to the pool! I also used heat n bond to attach their initals as an applique. Thanks for the inspiration!!!
Great tutorial! I used it to make a fun soccer bag for my son who is just starting to play on a team this week. Your instructions really helped and now I’m a “drawstring backpack” making machine! Love your blog – Thanks! http://tssimplecreations.blogspot.com/2010/09/soccer-bags.html
Thanks for the super tutorial. I made some for my girls:
http://polkadotjes.blogspot.com/2010/09/turnzakjes.html
I dont know why I cant figure this out. Can you please tell me which fabric is the 3″ piece and which fabric is the 4 1/2″ piece in your tuturial. (the dot or the cars) I really appreciate it because I’m looking forward to making this bag. Thanks! 🙂
Yes, this is what I am confused on as well. It looks the opposite of what it says in the tutorial?
the cars! 🙂
hi, i made a drawstring backpack using yours and some other tutorials, you can see it here http://liz1611.blogspot.com/2010/10/new-drawstring-bag-from-old-jeans-kinda.html
Love this pattern… you made it look so easy and it is. I linked you on my blog: http://callmecraftymomma.blogspot.com/
Lots of free tutorials there. check it out.
thanks so much!!
great tutorial!! i just sewed one up as a christmas present for my daughter. making two more for her cousins. it was super easy to follow and came out great (i’m new to sewing too, so that says something)! love your site, by the way. i have a bunch of your tutorials bookmarked!
I just sewed up two of these babies 🙂 I’m getting my kids Zhu Zhu pets for Christmas and these bags are deemed their homes.
Thanks you for the cute tutorial, I made one for my 18 months old baby and I love it! super cute thanks you so much!
Great tutorial. I made one for my son for his school things and as soon as I gave it to him he started to fill it up with toys. He was really excited about the toy pouch. Later this will be a pencil pouch. Thank you
Thanks for the tutorial! I made one for my 3 year old son to put his toys and books in when we go out. Here’s a link to my flikr photo: http://www.flickr.com/photos/97897707@N00/5528293158/
Katie
I made it! I hate zippers, I read your instructions on that part about eighty times, at last I got it and it worked. Mine is a robot version. You can see it at zusjeb.blogspot.com
Thanks for the tutorial. I made a whole lot of them for birthday parties:
http://oontje.blogspot.com/2011/03/drie-uit-een-halve.html
http://oontje.blogspot.com/2011/07/nomorenoodleheads.html
Great tutorial – they turned out beautifully!
Thank you for tutorial!
All your tutorials are sooo helpful for me! Thanks!
Thanks so much for sharing Anna! I’ve just finished a bag for my son starting nursery in 3 weeks using an old pair of my husband’s cords and green turtle print fabric – so proud of it!
Thanks to share your Tuto !!!
You’re tutorial came in handy for figuring out the construction of this type of bag. I took the concepts and applied them to the backpack I made for the nephew for Christmas. I featured it on my blog and linked back to you.
http://www.freshlyhandmade.com/2012/12/drawstring-soccer-backpack.html
Thanks!
Sooo simple…thanks for sharing.
http://1001craftystyles.blogspot.in/
This is great! I love it! I came across your blog via this post …http://stiktastic.wordpress.com/2013/03/03/rounding-up-the-week/comment-page-1/#comment-44
Thanks!
~Jen
Thank you! Just finished a soccer version for my cousin… he’ll love it.
Katie
Just finished one with apples for my little daughter. It’s great! Thanks for the tutorial!
This is really cute! c:
So So happy with this Tuturial, ik was only my 3th project (been sewing for 3 weeks now) and I had to read it 10,12 times to understand everything – being such a newbie. But when I tried it it actually worked very well, and I was able to make in in just a few hours.
I’m using this to make a backpack for my new middle schooler. They can only use a drawstring type during school. She s picking out the fabric. Maybe I will have her sew it too. 😉 Thanks for the tutorial!
Thanks Anna, just used your awesome tutorial to make a cute bag for my son. He wanted it for his video games, DS, etc. He is older (12 years old) so I used some Pokemon Fabric and a dark pair of old Khakis. Turned out very nicely!
I am making Disney bags for my family and really want a zipper pouch on the outside of each to stow their easy access items and I’m having the hardest time wrapping my head around what is separating the zippered area from the inside of the bag? I have all my pieces cut and I’m afraid to sew them together because it looks like it’s going to be 6 layer thing 🙁