
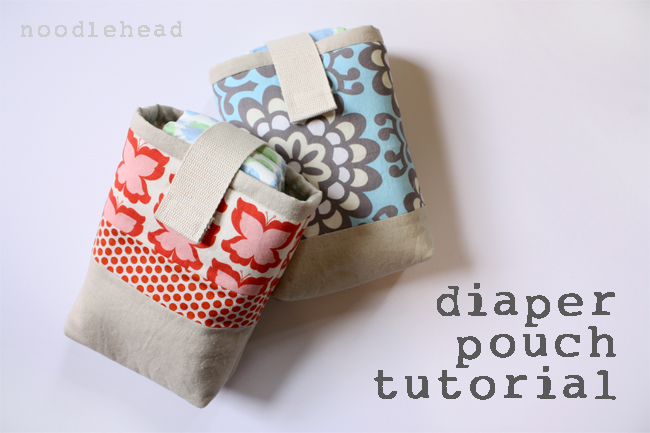
I’m happy to be a part of luvinthemommyhood’s baby bonanza today, with a nice little break from all things kitchen!
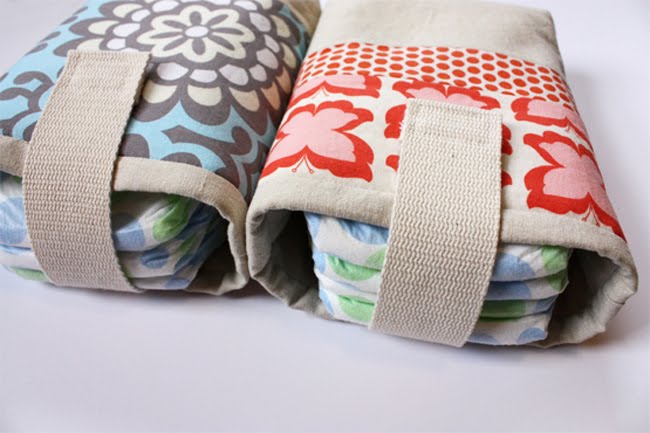
yes, this would be my version of a diaper keeper. I made this one with myself in mind. I just needed to be able to actually see how many diapers I had in the pouch, otherwise I’d get down to one diaper and be on an all-day outing. Not good.
Materials:
1/3 yard linen (you’ll have plenty of scraps leftover)
fabric scraps
cotton webbing 1.5″ wide – 8″ long
velcro (3/4″ wide by 1.25″)
fusible fleece – you could also use cotton batting
sewing machine, thread, pins, etc.
I was surprised at how quick this project is, so definitely churn some out for friends and family!
Cut the pieces:
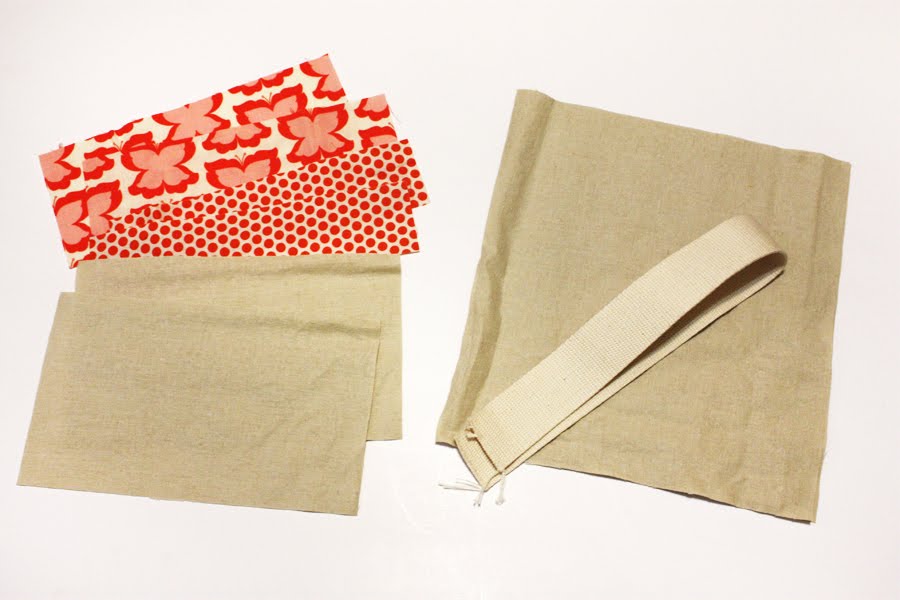
{pictured above are the materials for the butterfly print version – but you get the idea}
From the linen cut 2 pieces 8.5″ wide by 5″ tall. Also cut 2 pieces 8.5″ wide by 10″ tall – this will be your lining. From your scraps (and feel free to make these strips patchwork, too) end up with 2 pieces 8.5″ wide by 3.5″ tall and 2 pieces 8.5″ wide by 2″ tall for the version shown with the butterfly print.
{For the blue version cut 2 pieces 8.5″wide by 3.5″ tall of linen and 2 pieces 8.5″ wide by 6.5″ tall of the blue print – sew these two together and they make up the exterior of the pouch.}
Cut 2 pieces of fusible fleece 8.5″wide by 9.5″ tall.
Make the exterior:
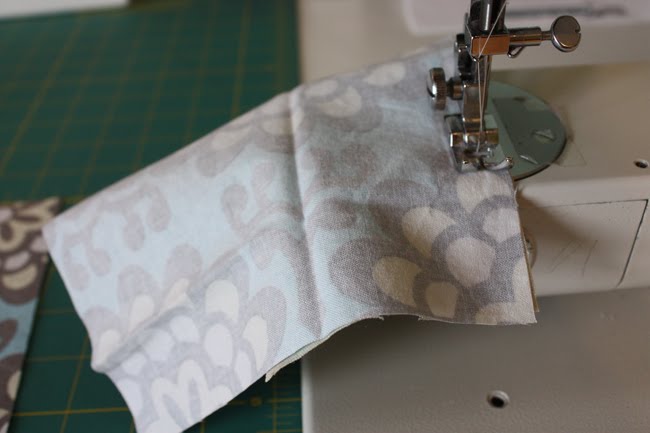
Sew the strips and linen pieces together using a 1/4 inch seam allowance (making two finished pieces 8.5″ wide by 9.5″ tall). Press seams open. Fuse fleece to WRONG side of both exterior pieces.
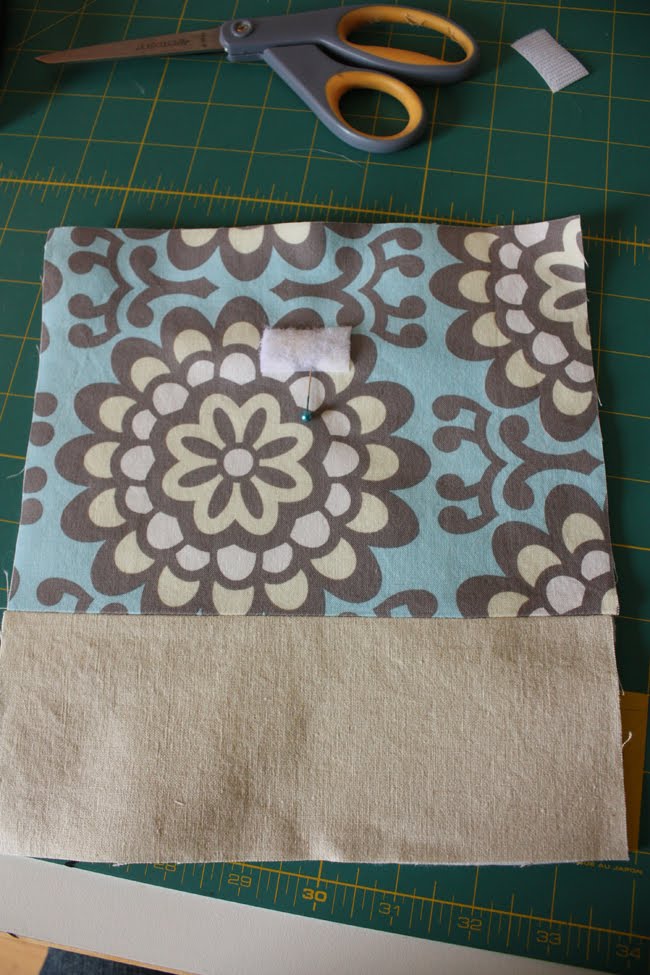
Sew on the fuzzy piece of the velcro about two inches down and centered on one of the exterior pieces (this will be the front of the diaper keeper).

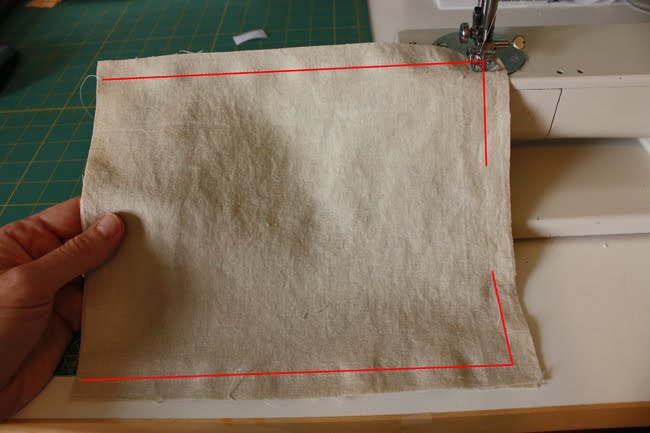
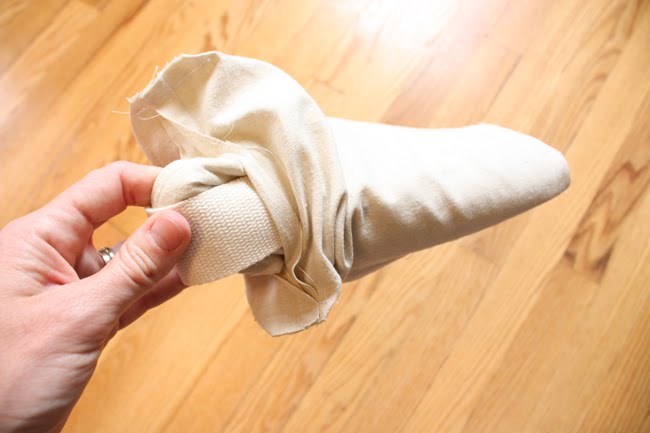
With RIGHT sides facing, sew the two exterior pieces together using a 1/2″ seam allowance around both sides and bottom.

Pinch the corners together and sew a straight stitch 1″ from the point. Do this for both corners. Clip corners.
Make the lining:
With RIGHT sides facing, sew the lining together on the sides and bottom, but this time leave a 3″ opening at the bottom (this will be for turning later). Box the corners as you did with the exterior.
Attach the cotton webbing:
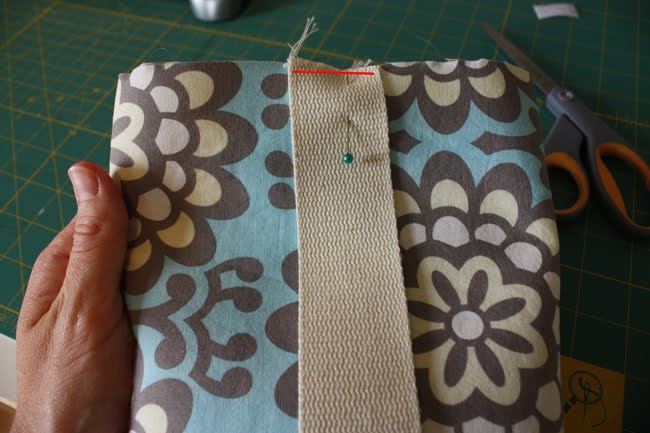
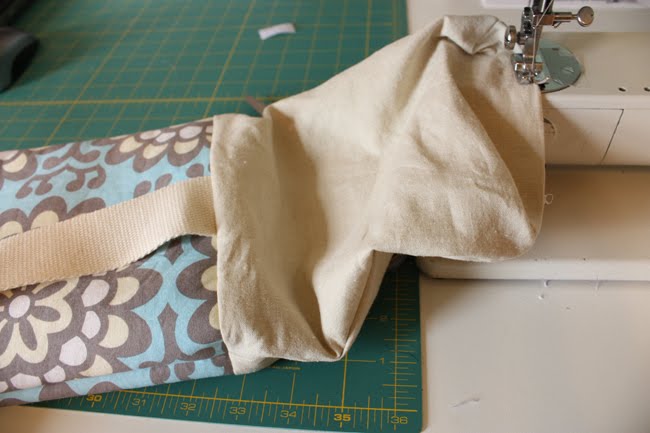
Baste the cotton webbing to the RIGHT side of the exterior piece at the back of the diaper keeper. Another option on this step would be to make a fabric strap. If you do use the cotton webbing I would recommend getting a fairly thin one (mine was from Hancock Fabrics), some webbing is much thicker than others.
Assembling the diaper keeper:

With the RIGHT sides facing, slip the exterior into the lining, matching up the top and side seams, pin and sew all the way around the top with a 1/2″ seam allowance.
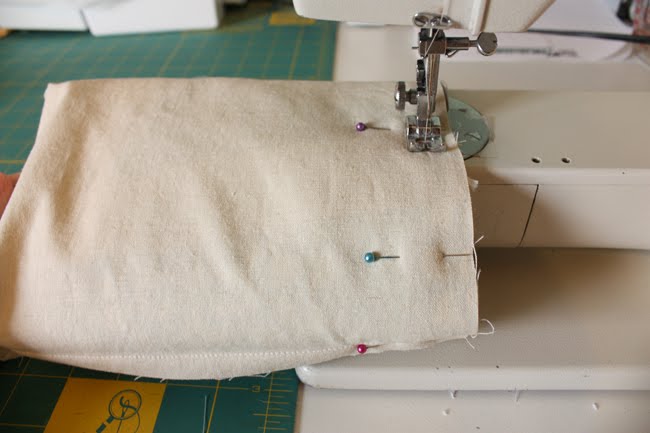
Be sure to tuck the cotton webbing down into the diaper keeper.
Pull the exterior through the opening you left in the lining. Poke out corners.
Sew the opening shut with a very small seam allowance, or sew by hand.
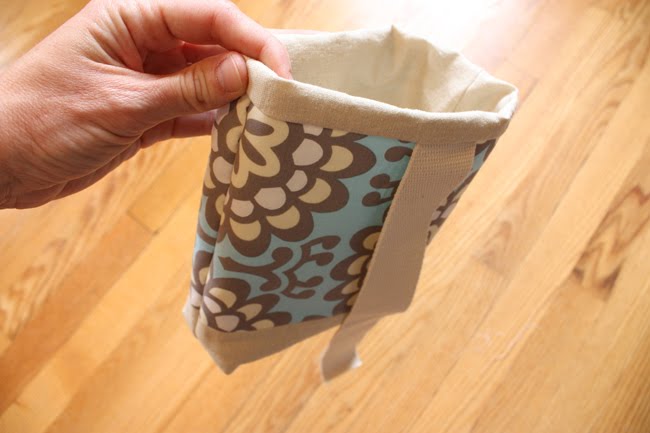
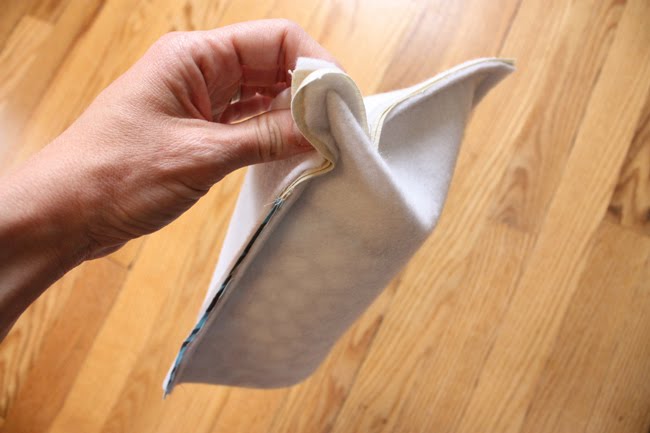
Push the lining into the diaper keeper. Since the lining was a 1/2″ taller than the exterior, it’ll form a nice border along the top edge of the diaper keeper.
Press and stitch “in the ditch” all around the diaper keeper.
Finish the strap:
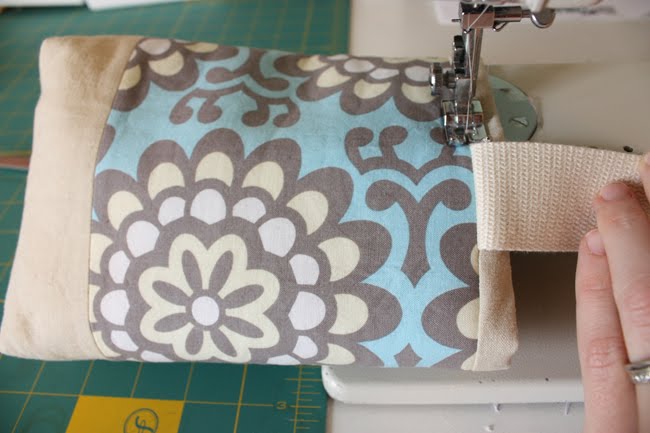
Pull the cotton webbing around to the front and adjust as necessary to line up with the fuzzy part of the velcro.

Turn under the webbing twice and pin on the vecro. Take your time and sew on the hook part of the velcro at the end of the strap.
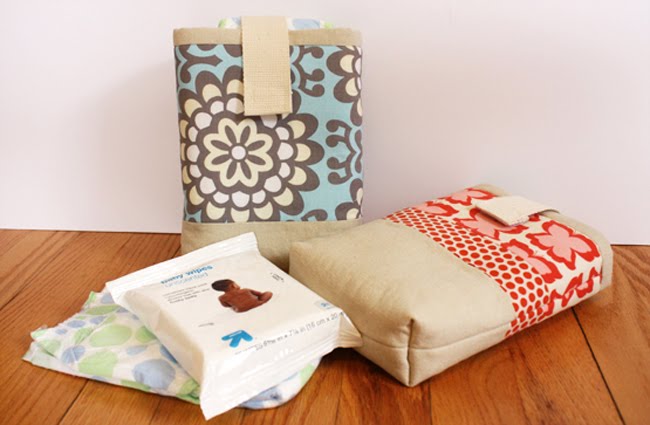
Fill with 3-4 diapers, travel wipes, and maybe even a tube of diaper cream and you’re all set!
{I think this would also hold 2 cloth diapers depending on how bulky they are. I use a few cloth diapers while we’re at home and they fit in the diaper keeper reasonably well.}
Olá, Anna.
Sou uma fã brasileira que admira o seu trabalho.
Adorei este tutorial.
Estou colocando no meu blog um link para o seu blog, tá ?
Beijos.
Love this! I will have to make one and give it to my friend to add to the baby gift I made for her.
Loving the Spice Up Your Kitchen Series as well!
You have been awarded the Beautiful Blogger Award from spools! Here is a link to the post. I tried emailing you, but my computer does not seem to be in the mood to comply with me… sorry. ) :
http://spools.wordpress.com/2010/05/28/wow/
they’re so stylish, love’em. Thanks for sharing this tutorial!
Love!! I’ve never been tempted to make diaper pouches… until now!! Yours are so cute!
This is cool, Anna! I think this will be a great gift for my friend who’s expecting a baby! thank you!
I love to shop especially dress materials and thus I have initiated for the setting up of a boutique near my home. I love to get more updates from in the mere future. I have bookmarked your page. Thank you.
hopewellcarinsurance.com
Anna, this is really, really REALLY cute.
I always love your simplistic/classy style.
Well done! Maybe I’ll need to make one down the road…..for myself….? we’ll see 🙂
I’m beginning to make things for my daughter-in-law and son for when they do finally have a baby (no, no, I’m not in a hurry for it to happen) and this is so cute! it’s on my list! oh, it’s my own little baby hope chest I’m keeping and everything I make will be a surprise!
Look at you, busy lady! 🙂 This is a great idea and I may have to give it a try. Thanks for yet another fabulous tutorial!
When virtue and modesty enlighten her charms, the lustre of a beautiful woman is brighter than the stars of heaven, and the influence of her power it is in vain to resist.
That’s a great idea to leave it open at the top. The linen and prints go so well together too, I always love your fabric combos and choices!
The real sin against life is to abuse and destroy beauty, even one’s own even more, one’s own, for that has been put in our care and we are responsible for its well-being.
I think this is the cutest diaper keeper I’ve seen. Looks like it could be used for other stuff once you’re past the diaper stage.
Oh my gawd, these are so totally adorable, what a great idea! Thanks so much for sharing with a great tutorial!
What a great idea. It’ll be a perfect baby gift for all of my very fertile cousins. Thanks for the tutorial.
This is the best diaper keeper I have ever seen. Great work.
these are perfect for those quick trips or to keep in the car for emergencies.
thanks for the tute!
Just a quick note to let you know that a link to this post will be placed on CraftCrave today [28 May 02:00pm GMT]. Thanks, Maria
Love these cute diaper pouches! And they look so easy 😉
Love this! I have a pattern for one, but I think I like yours better because of how much bigger it is. I’m so making one of these with my leftover fabric from my diaper bag that I made. (I’ll be posting that soon!)
ok, so i’m due ANY day now… and i just put up my sewing machine, but now i’m trying to figure out how i can crank one of these out before i have this baby! love it, anna. super snazzy.
Very cute! I love the fabric. I am going to try & make this soon!
Dana is right. You are an impeccable sewer.
Maybe a silly question but what size diapers have you put in this? We currently have 3 diaper sizes on our kids ranging from size 1 to size 6 and those sizes are quite different. Would 5’s, 6’s and pull-ups fit? how about the travel wipes container that comes with huggies wipes boxes?
Thanks
heather~ I designed it to fit 4 size 3 disposable diapers. With the diaper brand I use the diapers usually only seem to get taller with each size increase, so you’d just have to make the exterior and lining pieces taller. I only use a small package of travel wipes but I’m pretty sure the other box types of travel wipes would fit.
Those are so cute!! They would really make such nice gifts to add to a diaper bag.
I just love your blog. I think I read every post and many of your tutorials are on my “to-do” list. Thanks so much!
littlesproutgrowing.blogspot.com
so smart Anna! being able to see how many diapers you have is so clever.
That is so great! Thanks for sharing! I’m out of the diaper phase, thank goodness, but have quite a few expecting friends…
Love your blog!
Great blog you have here! I host a link up party every Tuesday called Tot Tuesdays where you can link up crafts, activities, teaching resources, parenting stories or tips, recipes and things you’ve made for your toddler. I’d love it if you’d stop by sometime & link up!
http://www.mydeliciousambiguity.com/
Cheers!
So cute! You did a great job!
Thank You!!! Finally and diaper keeper for cloth diapering moms. I can’t wait to make this. I also really enjoy reading your blog
Julie
Thanks for the tutorial! The diaper keeper is so cute and clever. What brand of diapers do you use? I like that they’re polka dots!
You’ve done it again. Super super cute and so stylish. Love it!
Oh, I loooove it! I want one!
We use the same polka-dot diapers! Teehee. 🙂
How handy & it’s super cute!!! Aren’t those Target diapers wonderful? Wish I had discovered them sooner!!
I like this so much better than the other diaper clutch patterns out there. The pattern I tried made it difficult to insert the diapers. This one looks much better! I will definitely be giving this one a try. 🙂
I love the fact that you can see how many diapers you have in there! Great idea? Where do you go ti find such great fabric?
I loved this so much I had to make one to match my new bag! If you wanted to check it out you could visit this post http://craftedbymama.blogspot.com/2010/06/pleated-bag.html
I also wanted to let you know I link to you through my blog, if that’s ok with you.
thank you for the tutorial! just made one last night, and now that i’ve made one, i’ll be making a few more for friends (…and myself 🙂 )
what size wipes case do you keep in yours?
Very cool, def going to try this one.
Oh Anna this is just what Im looking for. Thank you 🙂 My son rang me and told me Im going to be a nan (again lol) and I want to give my DIL something different and special to make for her 🙂
I made one! Thanks for a great idea and tutorial!
Thanks for the tutorial.I understand about the “not good” part.
hugs. Jackie.
So happy I found your blog because it is pure awesomeness! I LOVE this tutorial–and I love the amy butler fabric you chose! I am your newest follower and I WILL BE BACK–bookmarking this tute for an upcoming feature on Little Miss Momma 😉
stop by anytime
ashley
http://www.littlemissmomma.com
one more thing…I use the target diapers too 😉
OMWord! This is ADOR.A.BLE!!!! I was directed to your blog from Twitter – I am now a follower of your blog! I hope you come and visit me too at http://sewnso.blogspot.com
I wanted to let you know that I featured this amazing tutorial over at Little Miss Momma!
http://littlemissmomma.blogspot.com/2010/07/tutorials-im-loving-now.html
Feel free to grab a button if you want 😉
happy crafting!
Have had this on my list for a while, and finally made it today- even cuter in real life! Thank you very much. Maybe I misunderstood, but are the cutting instructions for the blue keeper correct? I had to cut them differently, but it was simple to figure out.
Hey Farrah, thanks for pointing that out, you’re right, but it’s actually the red/pink version that I messed up on measurements. (I fixed it now.) Either way you’ll want the lining to be 1/2 inch taller than the exterior pieces – it’ll give you a sort of faux binding on the top of the pouch. Hope that helps!
So cute! I love this tutorial. 🙂
I’m a beginner sewer, like only made 3 other things since I bought my machine and these went together in a whip. Although I was a little confused about when to sew or fuse the batting on and also that the blue instructions were sizing for both the front linen and pattern, just wasn’t too clear, had to make some cuts afterwords but I LOVE these, so cute and can’t wait to fit some baby diapers and essentials in them and give them away fom some baby shower gifts.
Did you prewash the linen fabric? If I did wash it will this make the linen less stiff therefore it will lose its purpose? Or is the pouch meant never to be washed but spot cleaned?
These are so cute!!! I just bought my materials and can’t wait to start. Thanks for sharing :). My baby is due Feb 7!!
Hey Celina-
I do always pre-wash my fabric. The fusible fleece will give the pouch it’s stability. And yes, definitely throw it in the wash, mine has washed up great. 🙂
Love, love, love this tutorial. I have been trying to find a small project to add to making a car seat cover for a friends shower, this will be PERFECT! I since I am stil diapering I might as well make on for me too!
This is such a beautiful gift. Just is time as I am visiting a friend with a new baby this week. I know what I will be taking.
I don’t have any webbing and the local store doesn’t have any good quality……so I am going to try this with some matching fabric to make the strap part…hope it works…..
Just found your blog and I’m loving it! Just made this diaper keeper. Directions were easy to follow and pictures were helpful! Thank you for this tutorial!
i found this tutorial when i was still pregnant and made a pouch for myself. i have loved it so much, i have made one for my sister and 2 sister-in-laws for their babies. the only thing i did different was cut a longer piece of the velcro for the closing piece so that it will fit snugly with different amounts of diapers/wipes inside. love this tutorial, thank you for sharing your talents!
I finally got to make one of these!! What a fun quick project! I love the pouch, I will definitely be making them to throw into baby shower gifts!
Your tutorials are amazing! Please keep them coming. Also, if my fabric store doesn’t carry linen like you use, what could I substitute for it?
hey anonymous, I think a nice replacement would be a fabric called Osnaburg (it should be right next to the muslins – or just ask)
Love this! I just finished mine today and I’m so excited to use it. Thank you!
Do you sew your velcro on by hand. Mine was all sorts of messy on my machine…any tips? The bag I made turned out so cute. I put it with a couple of zip pouches to go in my sister’s diaper bag. Love the tutorial:) Thanks!
I machine stitch on the velcro. You might want to try adjusting the tension on your machine, the stitching isn’t going to be super perfect on the velcro, but I think that’ s just the nature of the beast!
Thanks for this! I made one recently. Here is a photo of mine.
http://re-groovenate.blogspot.com/2011/04/project-14-diaper-pouch-for-babyshower.html
Thanks for a great tutorial! I made one last week and blogged about it here: http://seaschell.blogspot.com/2011/06/what-are-odds-ill-use-all-this-stuff.html
Thanks for the tutorial! I just finished making mine, in cute pink and brown. So excited to use it, especially in the diaper bag, it will be nice to reach in for wipes and be able to slide them back in without dealing with a huge flap! Thanks again!
I love this idea and will add it to my list of things to make for my daughter. I’ve added this tutorial link to my blog. I would love to sign up to receive email notifications from your site, but didn’t see the option. Blogger does have a gadget now for that. If you decide to add it, please send me an email to let me know. kelly@CouponsCraftsandCauses.com.
Thanks and have a great holiday weekend! 🙂
I am not very good with fabrics yet and wanted to use something I already have. I don’t have muslin or osnaburg so I was hoping you would give me some other ideas? And could the fusible fleece be replaced with thick fusible interfacing? Thanks, this is SO cute!
hey kat! you could use any fabric really, whatever suits your style. A pair of really cute quilting cottons would be really fun to put together. 🙂 And yeah, you could probably use a heavyweight interfacing instead of the fusible fleece. Hope that helps!
Very nice! I’ve added this link, as well as a few other of yours to both of my websites.
About Me
Great tutorial, it is useful for go out and more. thanks for sharing
Thank you so much for this tutorial! I just made one for my friend who’s having a baby shower next weekend. it’s so cute!
Just want to tell you I made two of these (one for each child) and I LOVE LOVE LOVE them. Thanks so much for the tutorial!
This is cool thanks for this tutorial. I’m a new in sewing but looks like very useful with your step by step instructions.
Thanks again!
Anna, thanks for all the wonderful tutorials that you offer! They are great! I just wanted to let you know that I made this sweet diaper pouch for a friend’s shower. She loved it and so do I! Thanks for this cute gift idea. If you’re interested, you can see pictures on my blog.
This tutorial is great! I used it to make my friend a shower gift, which I blogged about today. You can see it here:
http://craftanyway.blogspot.com/2011/11/baby-gifts.html
My best friend’s baby shower is this weekend, so I plan to make her one too. Thanks for sharing!
Thanks for the tutorial!!!
shubie.mohan@gmail.com
I just finished making this – i have only been sewing for 8 weeks and this is my biggest attempt at a solo project yet! and i was successful! yay! its because i could easily follow your instructions and pictures. Thanks so much for posting this!
I just finished making this,thank you so much for the tutorial. I saw it on Pinterest. I made a baby quilt and had leftover material. This was the perfect project to use the scraps and very practical, also. I may send you a picture via your e-mail!
Great tutorial! You’ve been featured on the Quality Sewing Tutorials blog.
We hand select only the best free tutorials and patterns for home sewers.
Grab a brag button!
Thanks so much for the tutorial! I made one for a friend and it came out LOVELY! I saw your tute pinned on Pinterest and just had to give it a go. I blogged about it today – giving you credit for the tute!
KZK
thanks so much for this tutorial. the idea was ingenious. i am loving my diaper pouch! your tutorial was well written and easy to follow. the project came together quickly and without a hitch. i blogged my pouch here if you are interested:
http://www.stitched-together.com/2012/02/diaper-pouch.html
thank you again!
Thank you for posting this – I made a few as gifts. They turned out so cute!
this is a terrific tutorial that is incredibly well written. whipped one of these babies up this morning, absolutely love it!
thank you!
This comment has been removed by the author.
A feel to be proud after read your article. Actually its a need of human and Developing is must for us successful in life.
Trampoline Enclosures
Thank for sharing this tutorial. Here’s mine http://charmingstitches.blogspot.in/2011/07/hands-full-and-diaper-case.html
Thank you for the tutorial! 🙂 I am just starting to sew and I am proud to say that this is the first project that I have completed on my own 🙂 I thought I would start small 😉 And it turned out rather well. I want to try the clutch or wallet next :)Thanks again! Love your blog!
very nice thank you so much ^^
Just found this and I love it … gonna make one tonight fro a friend who’s just had a tiny baby boy! Thanks!!
Excellent post.The post is written in very a good manner and it entails many useful information for me. I am happy to find your distinguished way of writing the post.
paid to post
Oh, Anna, this is a great tutorial! Thank you so, so much for it!!!! I made one of these with bright patchwork and linen, and I looooove it!
When the diapers leak, they do it in one of two ways which allows you to troubleshoot a bit. When my baby was small, they’d leak around the thighs. Every time I put the diaper on, I’d slide a finger along the thigh and make sure the elastic was snug, no gaps. This helped a lot.
I enjoy a couple of from the Information which has been written, and particularly the comments posted! I will definitely be visiting again!
I am happy to find this post very useful for me, as it contains lot of information.
Excellent post.The post is written in very a good manner and it entails many useful information for me. I am happy to find your distinguished way of writing the post.Web Design Manchester
amazing tutorials well done
This is first time that I visit here. I found so many exciting matter in this particular blog, One thing I would like to request you that pls keep posting such type of informatics blog.
I recently found many useful information in your website especially this blog page. Among the lots of comments on your articles. Thanks for sharing.SEO Liverpool
The breakfast slimes, angel food cake, doughnuts and coffee, white bread and gravy cannot build an enduring nation. ~Martin H. Fischer
easy recipes
I am interested in looking for more of such topics and would like to have further information. Hope to see the next blog soon.Franchises UK
This is a nice post in an interesting line of content.Thanks for sharing this article, great way of bring this topic to discussion.
Excellent post.The column is accounting in actual a acceptable address and it entails abounding advantageous advice for me. I am blessed to acquisition your acclaimed way of autograph the post. jogos de moto
I made one of these for my cousins baby boy using linen and an upcycled blue and white oxford shirt. It turned out sooooo cute and she really loved it. Thanks so much! for the tutorial.
You must know by now, your article goes to the nitty-gritty of the subject. Your clarity leaves me wanting to know more. Just so you know, i will immediately grab your feed to keep up to date with your online blog. Sounding Out thanks is simply my little
Green Coffee Bean Max is best weight loss product. If you want to burn your fat & lose weight without exercise and dieting, recommended by Dr. Oz. Visit -> http://puregreencoffeebeansmax.com/
This is a very good story I wanted to read something like this approximately two months ago, please continue putting in here articles like those.
Very Useful information, this is both good reading for, have quite a few good key points and I learn some new stuff from it too.
Cerrajeros en Barcelona
mimi jogo
This is my first time i visit here. I found so many interesting stuff in your blog especially its discussion. From the tons of comments on your articles, I guess I am not the only one having all the enjoyment here keep up the good work.
partytent
Love this pouch…its so cute!! Thought u should know these are being sold for profit when ur blog said personal use only…
https://www.etsy.com/shop/UrbanChicBaby?ref=l2-shopheader-name
I just made this and it came out great- thanks for the tutorial!
Sometimes when you innovate, you make mistakes. It is best to admit them quickly, and get on with improving your other innovations.
the arrangement of free amazon gift card codes on this webpage is marvelous and i must say great work…
Thanks for a very interesting blog. What else can I write that kind of information in such a perfect approach to get? I have a company that I’m just now working on, and I look for more of these.
Very nice! I’ve added this link, as well as a few other of yours to both of my websites.
That is so great! Thanks for sharing! I’m out of the diaper phase, thank goodness, but have quite a few expecting friends…
Love your blog!
I really be grateful for your blog, you have completed the great job. Thanks for the bunch of excellent resourceful site.
I have made several of these diaper pouches to match homemade baby quilts. I have even had requests to make them from other new moms at church that didn’t receive one. The thing is, it’s usually a few months or so in between pouches. I can never remember if a 1/2″ seam or 1/4″ seam is needed for the lining. I have all the pieces cut and am hoping to start tomorrow! Thank you so much for this tutorial! 🙂
I can’t thank you enough Ana for teaching me this pattern. I’ll leave a link to my blog post here to show you what you taught me but the real message is one of thanks. I couldn’t have made this without your instructions. Thanks!
http://themaverickseamster.blogspot.com/2015/03/the-on-go-go-go-diaper-bag.html
It looks like a great post.
Recruitment Agencies in Pakistan
Thank you for this tutorial. I’m going to make this for my daughter-in-law and add a pocket so she can also carry a plastic bag or two for diaper disposal.
Very useful information, I learn some new stuff from it.
I wish you had a youtube video of you making this… I am new at sewing and would love to make one of these but I am afraid I would mess it up. Super cute idea, perhaps I’ll try it some time.
Its a great pleasure reading your stuff. This is the best site, here i found some knowledge able stuff which is very easy to understand. Keep posting stuff like this. I would like to thank for the efforts you have made in writing this post.
I feel it necessary to write a review of this website which I have been a regular visitor of your website for many years. I would gladly recommend this website to someone looking for these kinds of stuff. Thank You!!