
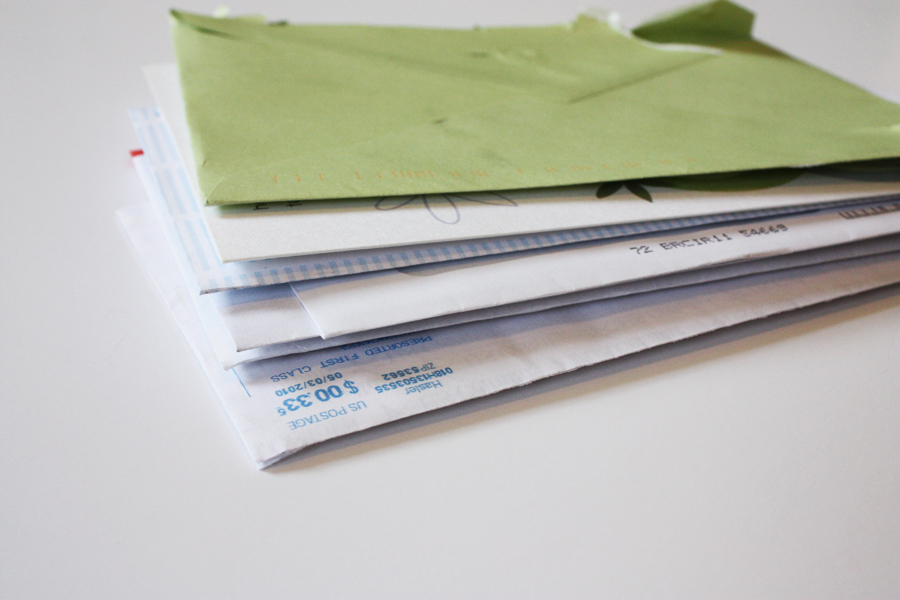
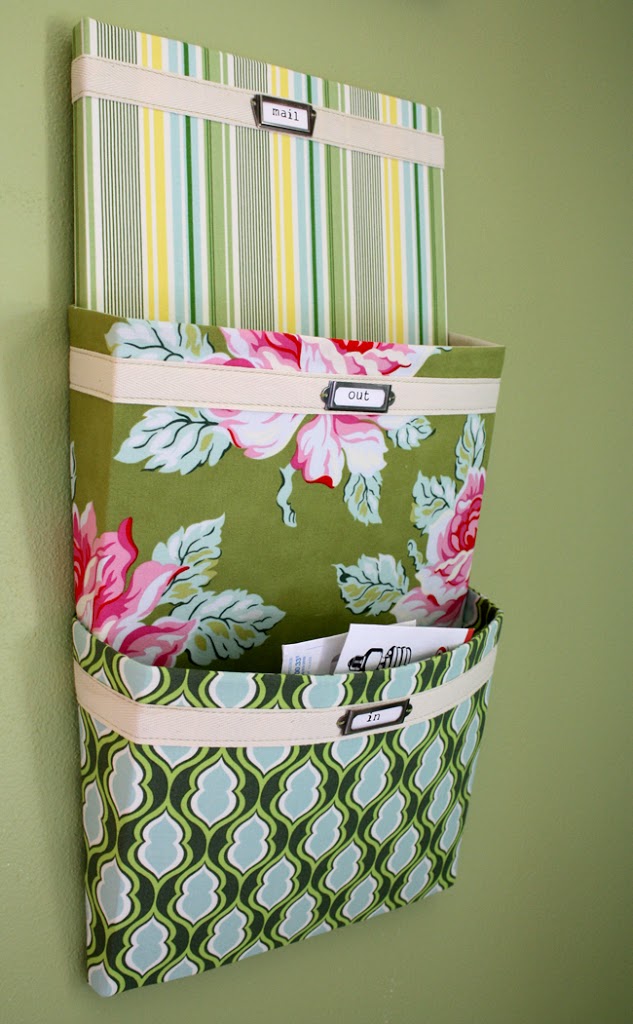
To kick off Spice up your Kitchen, I figured I should start things off with a tutorial to help you get organized. You know all that mail that piles up on your kitchen counters? Come on, fess up.

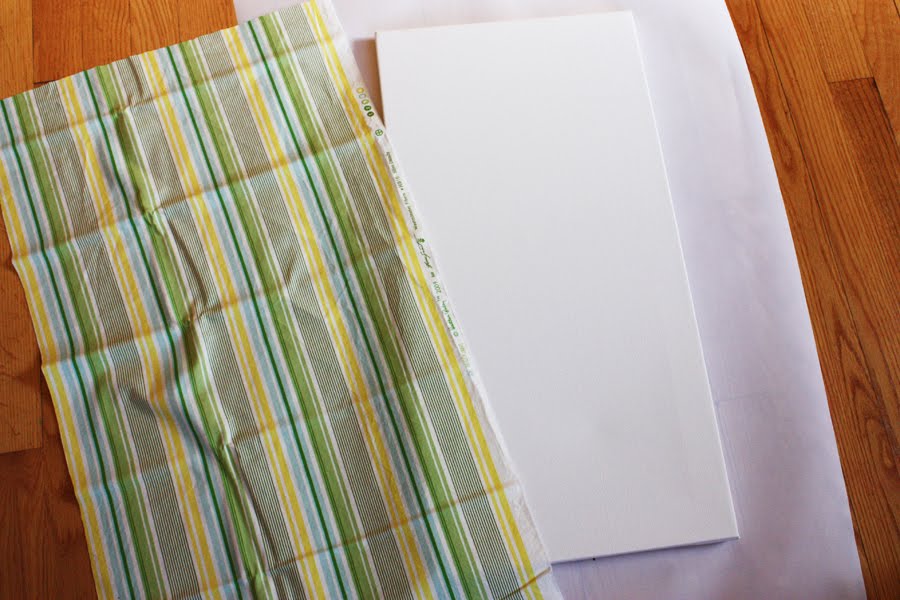
- 12″ x 24″ pre-stretched artists canvas (mine came from Hobby Lobby)
- 1/2 yard fabric for covering canvas (more if you have a directional print)
- 2 fat quarters coordinating fabrics, for exterior of pockets
- 1/2 yard for pocket linings
- 2 yards 1″ cotton twill tape
- heavy double sided fusible interfacing (both sides will be fusible) – I used Peltex 72F, found at Walmart/joanns
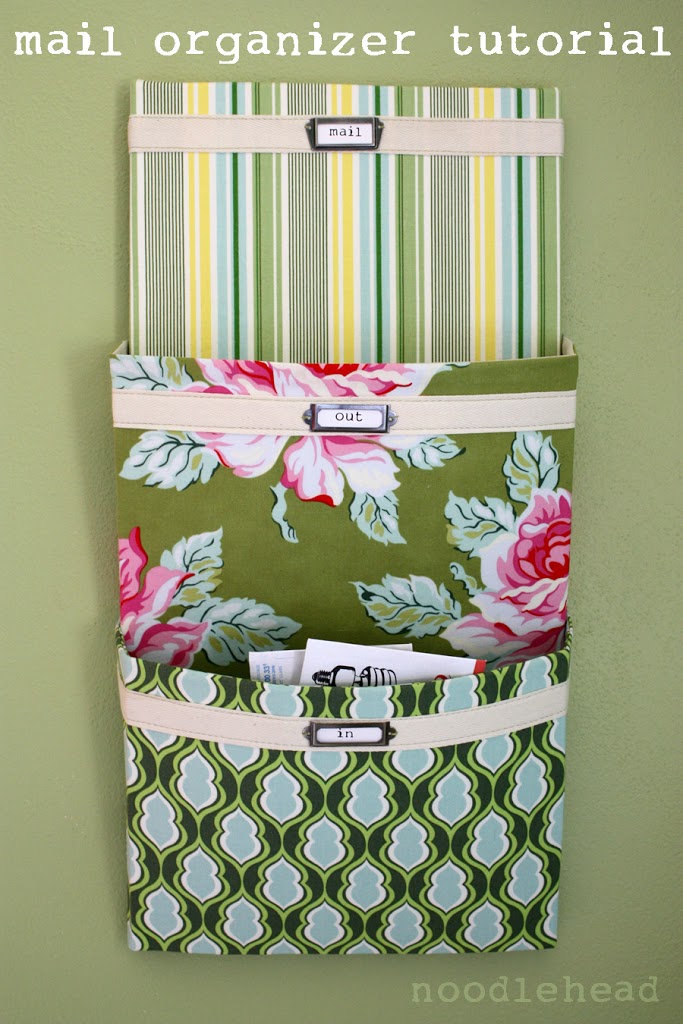
- 3 metal label holders (from the scrapbooking section)
- stapler
- spray adhesive
- hot glue gun/glue
- thread, pins, etc.
- mail organizer pattern (updated 2012) Please use the measurements as a guide to create your own pattern piece(s)
Cover canvas:
I used Elmer’s spray glue and a piece of fabric cut about 4″ bigger on all sides. Lay out a sheet of newspaper or scrap paper under the canvas. Spray the whole top of canvas and sides with the adhesive.
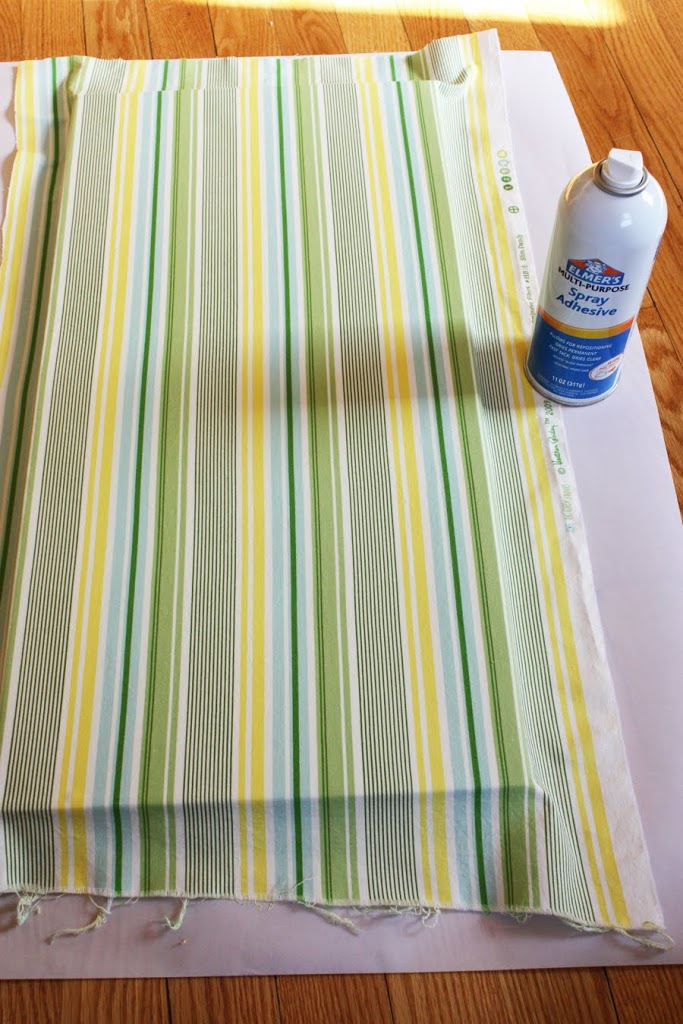
Lay the fabric squarely on top and smooth and wrap around sides. Staple the fabric into place on the wood frame of the canvas.

Make the mail slots:
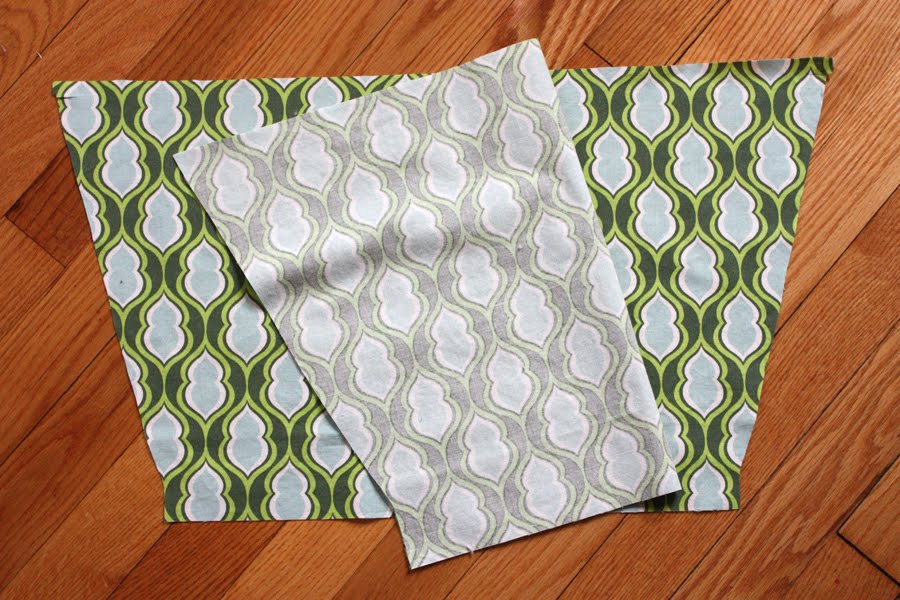
For both mail slots: Use your pattern piece and cut out two pieces of exterior and two pieces of lining, putting the pattern piece on the fold as indicated on the template. Cut out the double-sided fusible interfacing into three pieces for each mail slot. Use the dotted lines on the template as a guide.
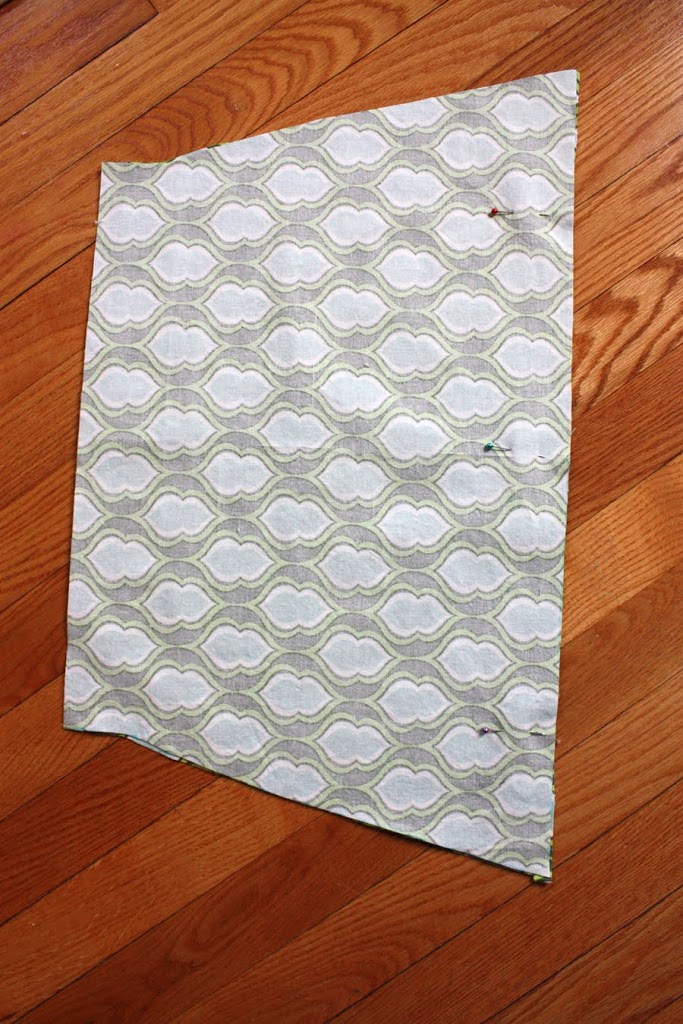
Sew the exterior and lining piece RIGHT sides together using a 1/2″ seam allowance at the top of what will be the mail slot.

Repeat for other mail slot pieces. Flip and press both so WRONG sides are together.

Sandwich the interfacing in between the two layers (exterior and lining pieces) and fuse into place according to manufacturer’s instructions. Repeat for other mail slot.
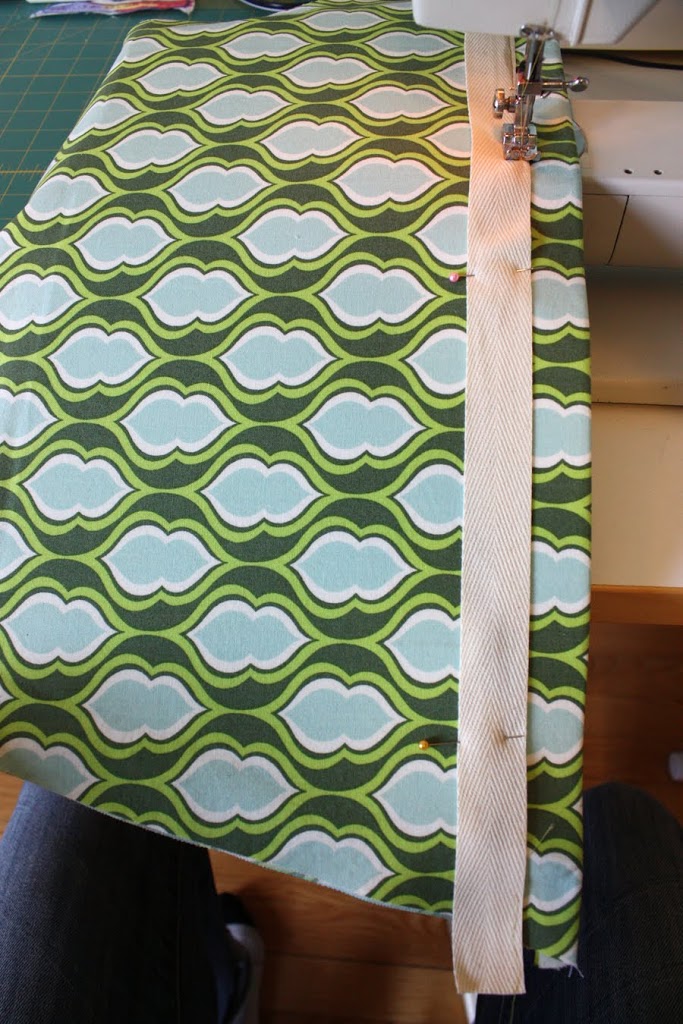
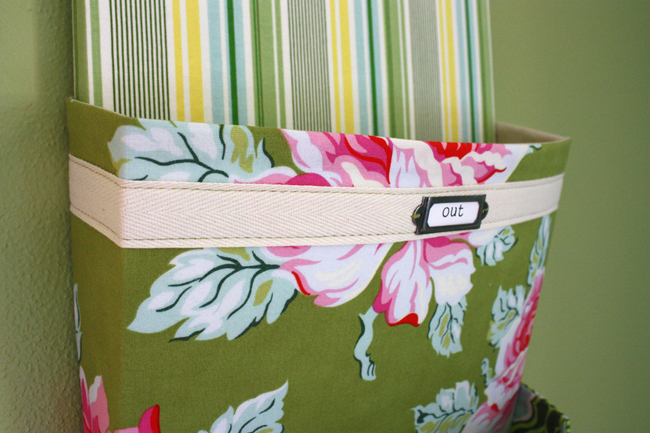
Align the twill tape about an inch below the top of each mail slot. Sew into place using a straight stitch on either side of the tape.
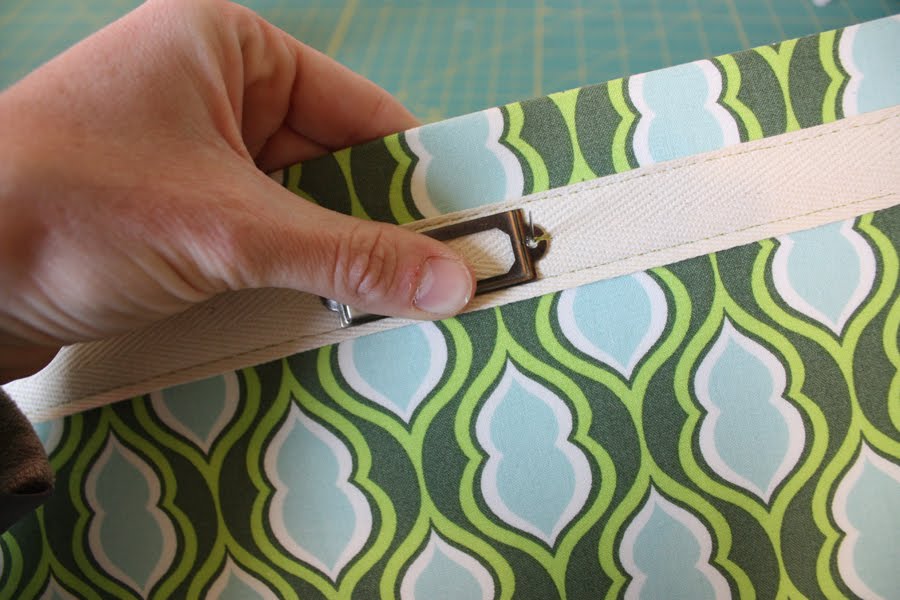
Sew on each metal label holder by hand, centered on the mail slot. Attach finished mail slots to canvas:

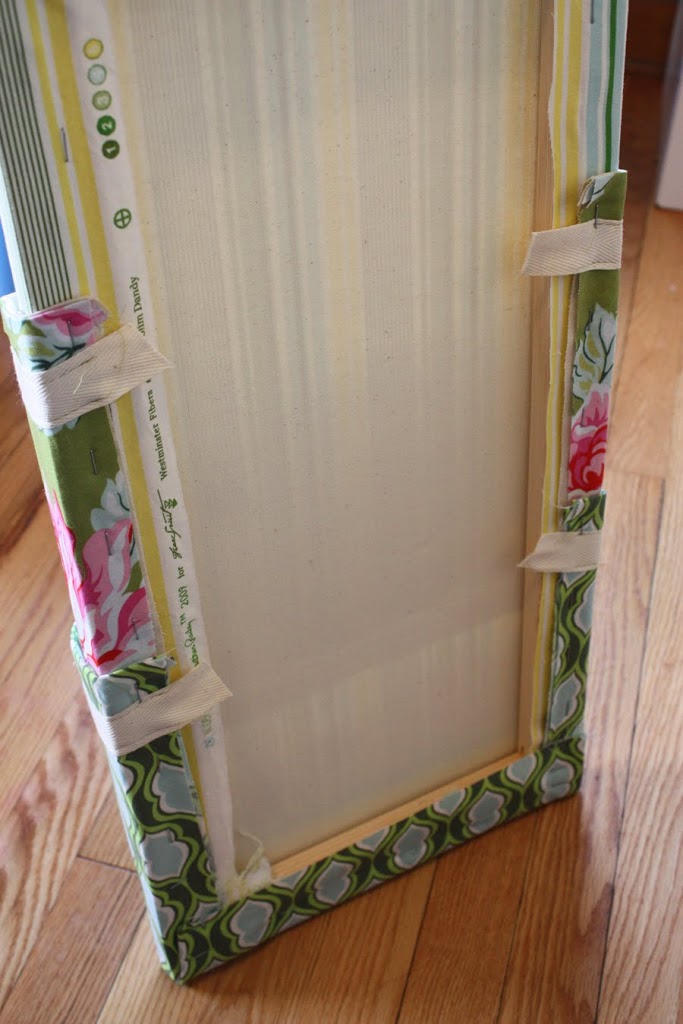
Align the edge of the upper mail slot so that the mail slot angles out. Hot glue along the sides and bottom of the canvas and press in place, Repeat for other edge. Wrap fabric around back of canvas, use additional hot glue if needed and staple into place.
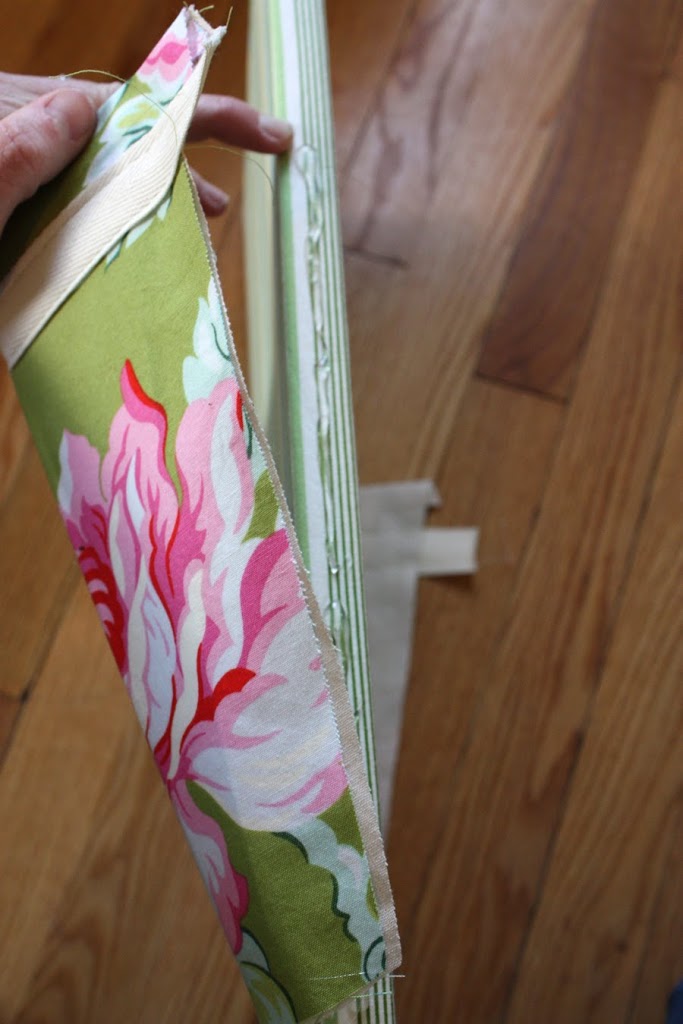
Take your other sewn mail slot and align the bottom of the slot with the bottom of the canvas. Feeling for where the interfacing stops and align that part at the edge of the canvas.
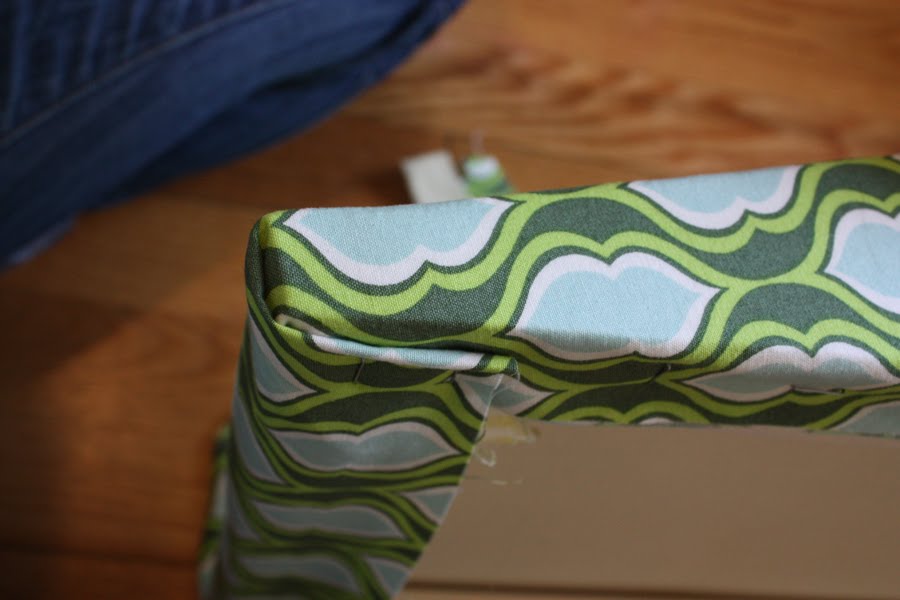
Use additional hot glue along the bottom and sides of the canvas and wrap corners neatly and staple at back.
Thanks for stopping in for Spice up your Kitchen, come back tomorrow to check out our first guest blogger.
What a fabulous idea – I may have to attempt this as I currently stuff my post away in the cupboard to keep the place tidy but often don’t go back and deal with it! Thanks for the clear and concise tutorial.
Kandi x
I love this! i was actually going to work on a mail organizer for my kitchen this week too. We tend to pile everything on the microwave and it just all falls behind and gets lost. I was thinking of fashioning something for there but this may work!
Great tutorial. will have to give it a try.
Stuff builds up so fast on the counter… its known in our house as the “crap bar” with accompaning “crap drawer” underneath.
Great project Anna! I think I might make one for my home office. Love the fabrics you used – great combination!
this is so cool…it looks like something i could definitely make myself….but maybe i would need two…one for my husband and i and another for the kids…there are always papers and stuff on my counter.
I had to pop in and tell you how FAB this is!! Fantastic job and tut. Thank you for sharing. I was thinking maybe I could make something similar to hold scrapbook papers.
Yay Anna! Congrats on over a thousand followers! I’m really excited to see all that you’re going to do this week. My kitchen could use a little “spice”. I love the mail organizer.
FABulous! I really neeeed something like this!!
Perfect!! that is really, really nice!
Loverly and functional.
Great idea!
wow!!
great tutorial :))
thank you_!!!!
I love the mail organizer! Thanks for making the tutorial so easy to follow.
I am so in love with this – and I SO DESPERATELY need it! Thanks so much for another amazing tutorial! I posted a link: http://ificould-ificould.blogspot.com/2010/05/mail-organizer.html
Thanks again!
Missy
Oh wow. That is just too awesome. LOVE, love it. I’ll take one just like that, please 😉
you have GOt to be kidding me! this is adorable and exactly what i need. when life calms down and i get back into town next week, this is number 1 on my list. 🙂 thanks for the tutorial!!!
Your mail organizer looks AWESOME! I definitely need one of these! I especially like the label holders. They add a nice touch!
I am making one of these for my living room entryway. I usually just let everything pile up on my dinning table until I get frustrated and bring it into the office, this will keep everything looking tidy, thanks!
great idea!!
Just a quick note to let you know that a link to this post will be placed on CraftCrave today [17 May 02:00pm GMT]. Thanks, Maria
This is SO darling and clever. Thanks for the tutorial. I love when people share their best ideas! I putting your button on my blog right now!
Megan
Lovely!
Thank you for the tutorial!
That is just something that I had in mind.
Yes! I am totally playing along with this one! Who couldn’t use a little more organization!
What a great idea. . . I love reading about all the things you create. . . And your blog, its so simple but jet so. . . sophisticated
Wow! I HAVE to give this a try… my paper pile is currently about two feet high, something needs to be done!
Love it! Now that blank spot on the kitchen wall is just *begging* for a mail organizer…
very cool Anna!!!
Wonderful! This is just what I need!!!
Thank you, thank you, thank you!
adorable and useful-my favorite combo!
Wow, this is brilliant! Thank you for sharing!
Very clever again! I love it. 🙂 Thanks for sharing! More ideas.
This is totally amazing, Ana!!! This is like so professional looking and doesn’t look like hand-made at all! So clever! I need one mail organizer just like this! A great way to start off Spice up your kitchen!
LOVE it! Maybe something this pretty will be a motivator to be better organized with such mundane tasks!
I just love, love this!! The Nicey Jane mixed with the twill tape – totally my style – awesome job!!
Lindsay
Genius. I love how you made this almost entirely from fabric. Very pretty too!
oh I love this! My house is being sorely neglected in the sewing department lately.. I can’t wait to see what else you are “cooking” up for the kitchen series!
this mail organizer is perfection! from the fabric to the stitching to the idea itself to the little in, out, and mail labels! i LOVE IT!!!! i totally want to make one for my kitchen too, i have the perfect blank wall for one! ohhh squee, i am sooo excited!!!
It is very clever and thank you for sharing the tute! 🙂
That’s ace, I will definitely be making this one. I have a pile of mail!!!
cute project! Love this!
This is soo AWESOME and totally usable. I wish I had the creativity and scense of “free to be me”, to be able to pull together so many patterned fabrics and make it look simply GORGEOUS.
Thanks for the tute
Hmm, it’s almost like you’ve seen my kitchen I know that I need one of these! I think I’m going to add this to my “in the near near future” (as opposed to “in the near future” list. So great, what a fun week!
Love this tutorial. It’s a great idea!!! Thanks for sharing.
LOVE it! So adorable!
Anna you are talented on a whole nother level! Beautiful color choices, the fabrics you pulled together for this really pop. I will totally fess up to the paper mess on the counters 🙁 !
Anna,
very fun idea! Never would have thought of that and what a cool mix of fabrics!
How lovely is that. Thanks for sharing you are so generous.
What a great idea! I may have to make one for my kids too 🙂
This is AWESOME! I know it won’t get done this weekend (must catch up on shop sales), but it is definitely going in my to-do pile! Thank you so much for sharing the tutorial!!! I can’t wait to do it for my house (where you’ll find letters scattered on the counters).
What a fabulous tutorial!!! Well done! Thanks for sharing … I’ve posted a link.
This is a really great idea. I can’t seem to get the pattern though. It just gives me bloomberg’s site.
Hi! This is really cute! – I just sent it to my daughter and I know she’s going to want me to make one for her. I too can’t seem to get the pattern – could you send this to me or post it on here and I’ll check back? Thanks!
orr20004@msn.com
the pattern is there to download, you just have to look for the mailorganizerpattern.pdf link. I have to have the file at that site (unfortunately with lots of ads) because blogger doesn’t host pdf files.
Maravilloso blog!!!
Seguiré tus trabajos con mucho gusto.
El ordenador en muy útil.
Un saludo
I adore this project — kudos for coming up with it! You inspired me to attempt my own no-sew version! http://www.modern-simplicity.com/2010/06/diy-no-sew-fabric-mail-organizer.html
Thanks!!!
Wow, this is awesome. I have been searching for the perfect way to organize my mail. This is by far my favorite! Thanks for sharing!
rubies-pearls.blogspot.com
i shared this on my blog 🙂
a-ruffle-in-time.com
Anna, I would like to include this tutorial in a blog I am doing about my favorite tutorials on my to-do list. I would include a picture and a link back to your site. Would that be okay? If you would like to check out my blog first, you can find me at:
http://ocd-obsessivecraftingdisorder.blogspot.com/
Thanks!
Thank you so much for a stylish and functional tutorial! How very generous of you to share your pattern! I am excited to make up one (or more) of these organizers!
I loved this and finally got around to making one of my own. Thank-you so much for sharing! I posted a link on my blog cleanandscentsible.blogspot.com I hope that is okay.
Jenn, I know it’s been two years since you made your mail organizer, but I wanted to ask you a few questions; I am at a stand still and CANNOT figure out one step. After interfacing is in place do you leave the lower edges of the two fabrics open or do you sew them and then flip it inside out through the side slots? It’s hard to see what she has done and I don’t understand that part of the tutorial.
Thank you so much. Tammie Renz trenz1216@gmail.com
I found a link to your tutorial on Pickup Some Creativity (after blog stalking awhile ;-).
I plan on turning in to my new assignment holder in my classroom.
thanks so much for sharing!!
-dani
I love this and am going to make one this week. I need it SO badly. My computer is buried on my computer desk under a pile of mail.
I’m a little confused about the construction of the pockets. Do I use 2 pieces of exterior and 2 pieces of lining for each pocket?
Oi Ana.Belíssimo porta cartas.
Parabéns pela brilhante idéia.
Feliz dia da mulher,acompanhado de um bom feriadão.
Bjtos.Nile.
this is perfect i love it!!!! exactly what i need for my messy mail! Thank You!
I just shared this on my Sweet Floweret facebook page. I saw it last year and even bought the canvas to make it. SInce it reappeared on Tip Junkie, I’m excited to give it a shot again! Thanks.
I love this idea so much that I’ll be sharing it in my Saturday Seven lineup tomorrow morning!
http://www.lefttowrite.net/2011/05/project-hope.html
Hi! Loved the tutorial! I took the pattern down by 75% and used these smaller canvases found at Walmart (package of 2 was $5.00)!
mi piace questa idea ,io sonno nuova tra voi
lili
Great tutorial. And I love the fabrics you chose.
Great idea, love this! Plus I have all of this stuff on hand, even better! 🙂 Heather
Thanks for the tutorial!
I am you newest GFC follower.
Patricia aka Mamaw
http://itsabouttimemamaw.blogspot.com/
Hey there! Saw this only a few days ago and decided I HAD to try it! Here’s my blog if you want to take a look at how it turned out. Thanks for your posts!
http://momuporgohome.blogspot.com/2011/08/oil-cloth-re-purposed-again.html
Wow. this is awesome. I’ve been looking long and hard for something to capture all the stuff that lands on our counters, but can’t be thrown away just yet. I’ve been wanting an in-box for my husband, kids and myself. This looks perfect, and can be made to match my decor. Nice job!
I really need one of these and this is one of the best tutorials on how to do it that I’ve seen!
Can’t wait to make this for my sewing room and office! Getting excited just thinking about what fabric to use!
Ciao Anna!
Bellissima idea e mille grazie per aver condiviso il tutorial: è fantastico!
Giuliana
Hi Anna,
Can I link up to this on my blog in a few weeks sharing this great tutorial! Thanks for the consideration!
Great idea! I am making this today and noticed that your measurement is wrong for how much cotton twill tape you will need. 1 1/2 yards is only long enough for two lines, and you have three on your mail slot. Better to change that to 2. Guess I’ll be running out to the store for more!
Amanda,
This is Tammie Renz, and I am also making this mail organizer. However, I don’t see where she uses the muslin in her tutorial, and how do we finish the raw edges at the top of the two mail slots? I had to actually go to Hancock’s so one of the ladies could help me figure out this pattern. I sew a lot, but this one has been a bit confusing.
I have two orders, yet I don’t have them finished because I’m stuck on the two issues. It looks like we don’t really need the muslin, and i suppose I could turn the raw edges in a bit and sew them, but the sewing line would show.
I am at a loss. Will you please email me at trenz1216@gmail.com. Thank you so, so much.
the muslin is the lining of the mail slots. You’ll need it otherwise the interfacing will be exposed.
Anna,
What confused me is that you show one pocket to have the same design fabrics sewn together (I don’t see muslin), but the top one does show muslin. I think this is why another gal asked what we were to do with muslin.
I don’t know if the innerfacing I got is exactly like yours, but it IS very thick, but I can’t get it to fuse to the fabric. I told the sales associate at Walmart what I needed, and it looks like yours.
Will it be a problem if I use light weight innerfacing over the heavier to hold it in place?
Thanks!
Hi Tammie,
I updated the materials list to call for 1/2 yard of lining fabric, that will be used for both mail slots. You might be able to make a different interfacing work. I also updated the list that calls for the specific type of interfacing: Peltex 72F, it fusible on both sides and has a plastic film covering the one side (which you would remove before fusing in place).
Anna, thanks for responding. I do have one more question. How far do you measure down from the top of the board where you attach the 1st mail slot? I divided 24 by 3, but the bottom pocket was too short. It looks like the striped fabric is longer than the pockets. Am I correct? I know what I’m doing now, so i’m starting over with the pockets – just need to know how far down to secure 1st pocket.
Thanks! Is there a way we can post our boards once we’re finished? I would love to see what the other ladies made?
I just thought about one more question I have. In the pic where you are gluing on the flowery pocket it looks like your lining is sewn together – I know the pellon wouldn’t go down that far. So, is it sewn/glued or it’s an illusion?
Thanks!
I’ll have to measure it once I get home, I think I just held up both pockets and tried to align them so the raw edges of the first pocket wouldn’t show. Then glued/stapled everything down.
The flickr group is here: http://www.flickr.com/groups/noodleheadtutorials/
And for the flower pocket, the lining is not sewn together (except at the top of the pocket), just glued and stapled around the backside of the canvas.
hey Amanda, hope you have fun finishing it up! will update that measurement. 🙂
Lovely, useful and looks easy to make! I love the fabrics you chose, they look terrific together!
Great tutorial! I used it for a mail organizer; however, instead of the canvas I used a bulletin board. Now the top portion can be used to post reminders, etc with push pins. The bulletin board was wider, so I had to modify the pattern slightly, but it turned out great! Thanks!
So pretty.Really great tute.
I am going to make some small ones too – 11×14 or so. I have some cute pink fabric with black high heel shoes and black purses of all designs, then black and white zebra print and pink on pink zebra print. I figure a teenage/young adult might like one in the bathroom/bedroom to put whatever they please in them. I’m also going to make some small ones for bedrooms to be hung low to the kiddos can put their books/toys away.
The possibilites are endless. They would be cute in bathrooms with rolled up towels and washcloths for guests. In nurseries with diapers/wipes/baby lotion etc.
I took the pic of your project to my doctors office and got 2 orders! Yikes! I hope mine turn out as well as yours.
This comment has been removed by the author.
Hi! I hope you don’t mind, but I put a link to your organizer on my new blog http://iwillusethat.blogspot.co.uk/
Let me know if you do mind. I love the organizer 🙂
Your blog are impressive to each other.I read your blog its very good and friendly, Help ful for all.
http://globaltapesandtwills.com/product.html
Twill Tapes Manufacturers
I LOVE THIS!!! This is brilliant. I am going to have to make one too for my mail. I will likely make another for my home office inbox.
Thanks for your post.
This looks so lovely. Thanks for sharing.
I loved It ☺♥ looks so useful and cute
Just LOVE this organizer, one problem I have is that I can’t download the pattern. HELP!
Gracias, gran proyecto
Agradecida por compartir tan buen proyecto
I love the tutorial and am attempting to make mine now. Can you provide the measurements for the Peltex. I can not get the pattern to print to scale. I used the measurements for the pocket fabric but not sure how much to reduce for the Peltex.
Hey Audrey! Sorry about that. The pattern doesn’t print to scale, so just the measurements are listed on the illustration. The dashed line represents where/how big to cut the interfacing. Hope that helps a bit!
Love the project! Here’s a suggestion that would surely help in my case – add a matching fabric rubbish bin that will sit nearby – because most of what piles up in my house belongs in one anyway. Thanks.
Every time I see something from Noodlehead I am happy. Thank you for being so generous with your time and talent.
very good I am going to use some old scrabble tiles for the in and out slots and adding a extra spot for recurring bills got to think up a cute short name for these thanks
This is a great idea for organising your mail! It’s very clever to use a canvas, so it’s very sturdy. Thank you so much for sharing this wonderful tutorial!
I put a link on my blog to this post, you can see it here.
Love this, BUT, don’t know how to print it!