

- 1/2 yard focus fabric
- 1 yard lightweight fusible interfacing
- scraps for windows/wheels
- 1/2 yard twill tape
- 7/16″ grommets (two)
- poly fiber fill
- heat n bond
- thread, etc.
- car template pattern piece (I set it up to print on an 11×17 paper, but you can select ’tile all pages’ if you’re printing on a regular home printer – just butt pieces together, tape, and cut out shape. The dotted lines are your cutting lines for the main car shape, but if that gets cut off in your printer’s margins just make a line 1/4″ around the solid car shape to give you room for a seam allowance.)
Cut and prepare fabrics:
Cut two car shapes from your main fabric. Cut one long strip of fabric 2 1/4″ wide by 50″ (piece together if necessary, or why not try and do some patchwork with your scraps?!).
Fuse interfacing to the two car shaped pieces and the long strip.
Decorate pillow front:

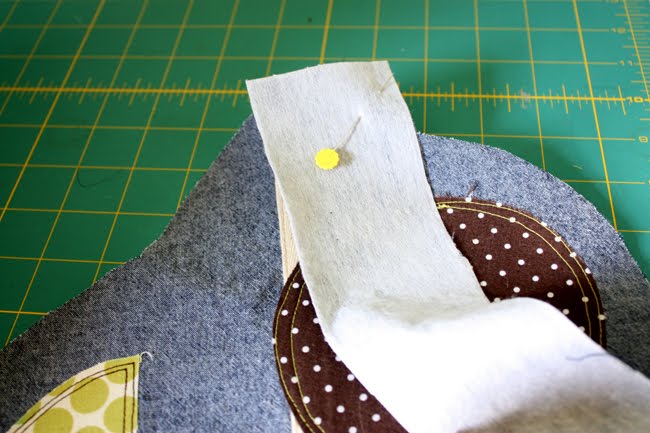
Take one of the car shapes. Pin on the twill tape and sew in place, stitching on either side of the tape. Apply heat n bond to the scraps for the windows/wheels and cut to shape using the pattern pieces as your guide.
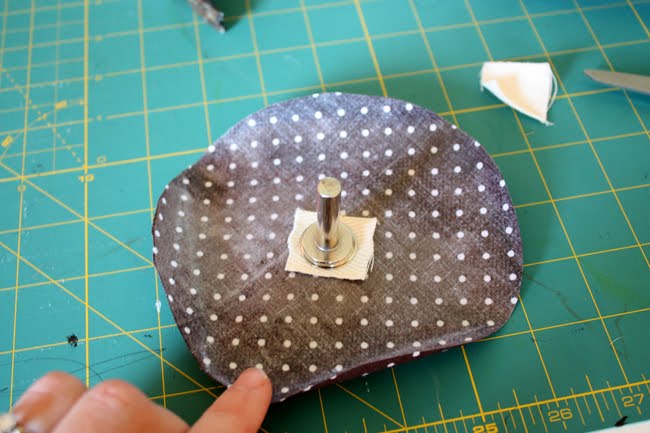
Install the grommets in the center of each wheel piece. I used a piece of larger twill tape as reinforcement, but you could also use a layer of interfacing or batting to keep it stable. There are instructions on each grommet kit, so definitely check those out. What I do is trace the inner circle of the grommet (with a water soluble pen) and cut a hole in the fabric as well as your twill tape bits or whatever reinforcement material you’re using. Put the piece of the grommet that has the stem on it through the hole on the RIGHT side of the fabric. Slip the remaining ‘ring’ piece of the grommet over the stem of the other grommet piece and hammer into place using the tool kit that comes with the grommets.
Fuse the windows/wheels into place using manufacturer’s instructions while using the pattern as a positioning guide. Sew two lines of stitching around each piece in a contrasting color. Here it might also be fun to add in the child’s name just above the twill tape for that extra personal touch.
Sew the pillow together:
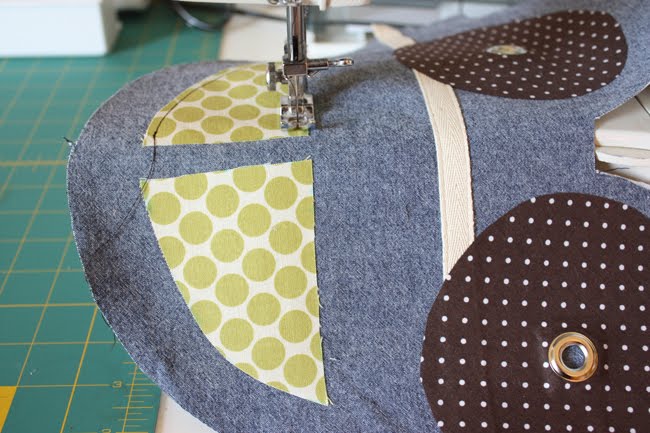
Take the one car shape piece and long strip piece and put them RIGHT sides together at the front of the car (I just found it easier to keep track of what I was doing if I put it at the front). Starting about a 1/4″ in from the edge, stitch all along the perimeter of the car using a 1/4″ seam allowance.
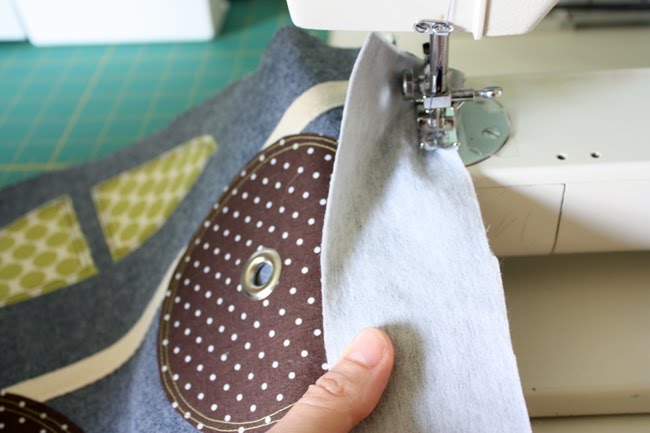
Being sure to stop and lift the presser foot with the needle down and pivot the material so that they align. Take your time here, just go slow and make sure the raw edges align. Now you should have this:

Repeat for other side of car, leaving a small opening in the front of the car for stuffing.

It is a small hole, but I find the less time and effort I have to put into hand sewing an opening closed – the better.

Finish!
Turn right side out. Stuff the pillow. Tuck the unfinished ends of fabric into the pillow and hand stitch the opening shut. And tada, a fun car pillow for your favorite car enthusiast!
SO cute!! This would look darling in my boys’ room!
This is precious! Thanks for sharing! You have a very lucky nephew 🙂
This is really cute! I have a son that adores cars!
I’ve just gotta say that I love the picture of the pillow on the street…too funny!
This is too cute! I just stumbled across your blog…I love it! Thanks for sharing all these wonderful ideas.
How Sweet. Great tutorial.
Anna, this totally ROCKS! My boys would go crazy for one of these… have to add it to the list. Thanks for sharing another wonderful tutorial.
oh my gosh this is so cute!! i’m nagging my mother to make this for me now 😀
just love the picture of the car (pillow) on the road! so very cute~
SO cute! And the pics of it are adorable!
Just a quick note to let you know that a link to this post will be placed on CraftCrave today [28 Jun 12:00pm GMT]. Thanks, Maria
Adorable!
Totally awesome!
clever idea!
Very cute. I love how you took a picture of it “driving” down the street. 🙂
So cute Anna! You are just full of great ideas.
I love seeing great boy projects. One of my best friends is having a boy in October so I may need to give this a try!
omg!!! i love it!!!! so fabulous!
Really cute car!! Love it 🙂
Super cool! Will have to try it for sure!
You totally make the cutest things!! It’s hard to find fun things to make for boys but you have done a whole boat load full!! er car full 🙂
that is so cute!!
Thanks so much for sharing this tutorial !!!
This pillow will complete the new big boy room!
Love it! thank you for sharing the pattern!
This is so cute – thanks for the tutorial – Might have to make one with a zip in the back and it can double as a pj bag.
I can’t tell you how excited I was to see this! I just redecorated my boys room with cars EVERYWHERE. I wanted a cute car pillow and here it is!!! What a lucky soon to be nephew you have, his aunt makes him wonderful things!
hermoso tutorial y divino tu blog tre felicito un beso y hasta pronto
Super cute. Thank you for this tutorial.
Simple and yet very beautiful! Also very funny. I really love your style.
Oh man, my eldest son is going to LOSE IT over this one! Thanks Anna!
I love this pillow! I will be featuring it on crazydomestic.com on tuesday, aug 24th! Thanks for sharing!
So cute! I’m visiting from BoyOhBoyOhBoy. Love this tut, I think it may be next on my craft list! Hope you’ll come over and visit soon at SuperStinkyBoys!
I can only get 1/2 of the pillow to print–the front half… I want the larger size, but it doesn’t seem to be working. Is there any way you could e-mail it to me in 2 files??
kama_blogs (at) live(dot)com
Okay, got it figured out and now I have it in 3 sizes. 🙂
Lovely!!!
I will so much start gattering fabric around to make it for my boy!
Thank you very much for sharing such nice project!
This is a cool car pillow, you should make a truck pillow next 🙂
I love this! Found you via Grosgrain’s blog 🙂 This is exactly what I was looking for as a present for a colleague with a new baby 🙂 Thanx for sharing!
That is so cute! My little boy would surely love to have one like this. he loves cars! 🙂 Thanks for the tute!
Adin B
Adorei!
Está muito fofo, como todo o seu blog.
Obrigada por compartilhar.
This is just too cute! I’m not much of a sewer but I might just have to try this out. I’ve got to grandsons who would really like this!
maravilhosa almofada…irei fazer uma igual para o quarto de meu filhote, um abraço!
Awesome! So cute!
I’ll be featuring it on my blog tomorrow!
seemesew.blogspot.com
Ps. I won your runaround bag on Made a while ago and LOVE it!!!! Its my favorite bag now!
Amei, todo o blog, tem ideias maravilhosas. Você tem uma criatividade incrível. Parabéns. Vou compartilhar no meu blog aqui no Brasil esse carrinho e seu blog.
Um abraço
rositabyrose.blogspot.com
I Love the car. Thanks for the idea. I wanted something to make for little boys who are very sick or have cancer. I will me making them and bringing them to the hospital for those sick little boys. I made dolls for the little girls. Thanks again!