
{If you’re stopping over from Kojo Designs, welcome!}
Here’s a fun tote bag project I thunk up (yes, thunk) the other day. Of course there are tons of ways to make a tote bag, but I thought this one was fun and gives you a lot of options no less!

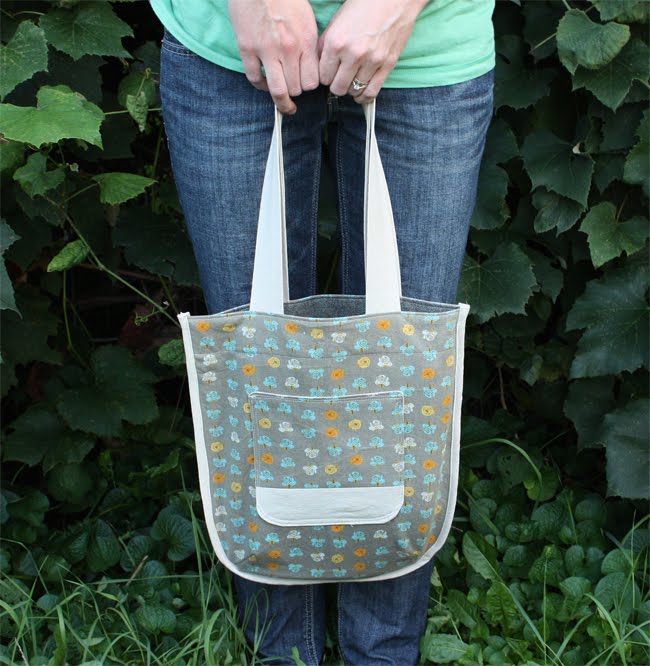
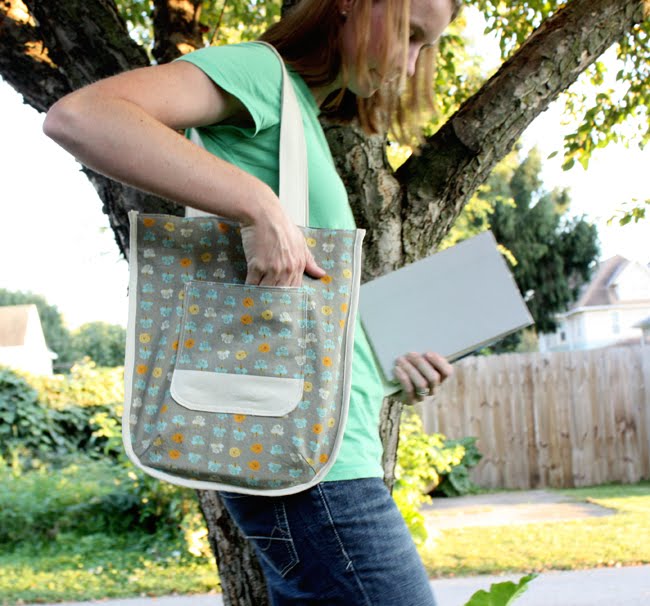
| The Library Tote Tutorial |
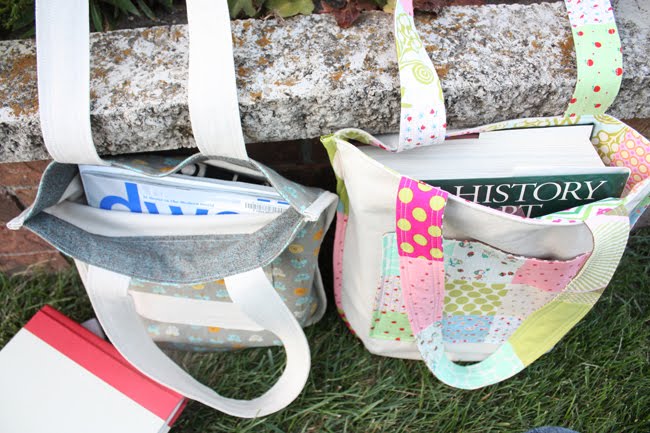
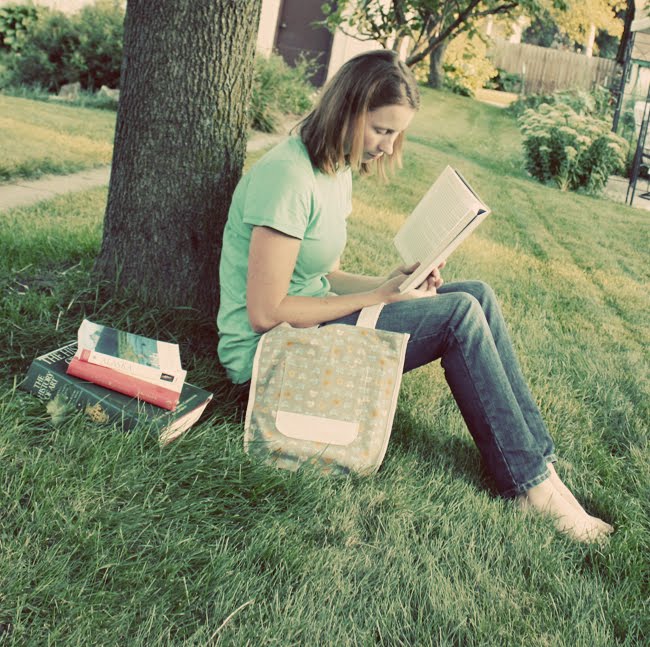
Whether you like things scrappy or streamlined, this bag is ready to go when you are. Take it to the library or to the park, it’s big enough for all the essentials.
Ready to make one (or a few?!)
Materials:

1/2 yard exterior fabric
1/2 yard lining (if you choose to use any)
1/2 yard for straps, or cotton webbing or a handle type you prefer
bias tape – handmade or store bought
thread, sewing machine
water soluble pen
pattern pieces [click to download]
{1/2″ seam allowances throughout, unless indicated differently}
Cut and prepare pieces:
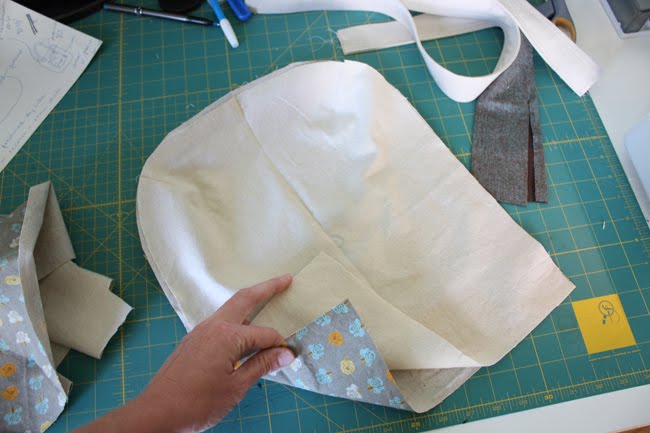
Cut two pieces from the main pattern piece out of the exterior fabric. Also cute two pieces of the lining fabric if you’re using a lining. You don’t have to use a lining the way the bag is constructed, but if you want to use a lighter weight fabric on the exterior, you’ll probably want to use a lining.
Cut two pocket pieces. One of which will be the lining of the pocket.
Cut strap pieces: cut two pieces 6″ tall by 24-27″ long, depending on how long you want your handles to be.
Cut reinforcement pieces: these are on the inside of the bag, they can add a decorative or fun touch if you’d like, cut two pieces 3″ tall by 13″ wide. Iron one long edge of each piece WRONG sides facing by 1/2″
Make Straps:
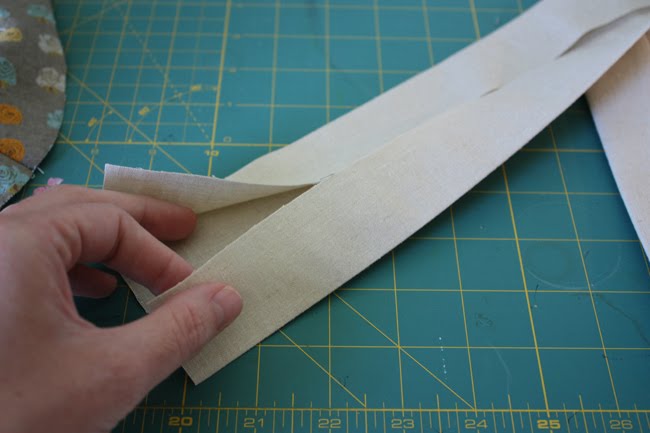
Take the long strap pieces, fold in half the long ways, and press. Open up, fold raw edges to the center crease and press.
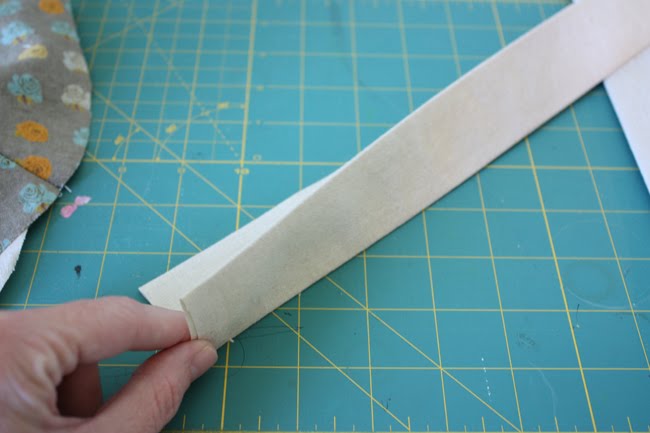
Fold in half again and press.
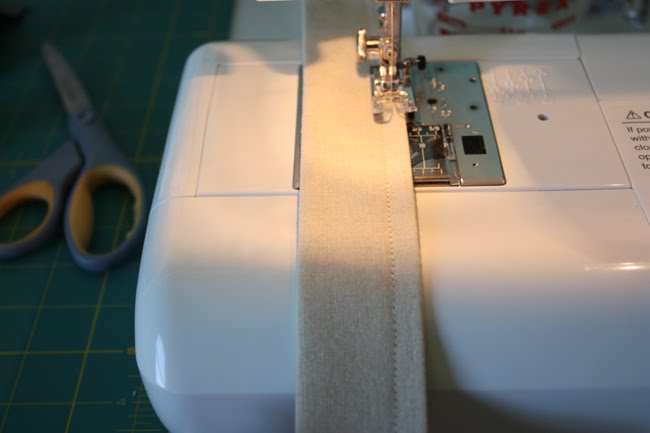
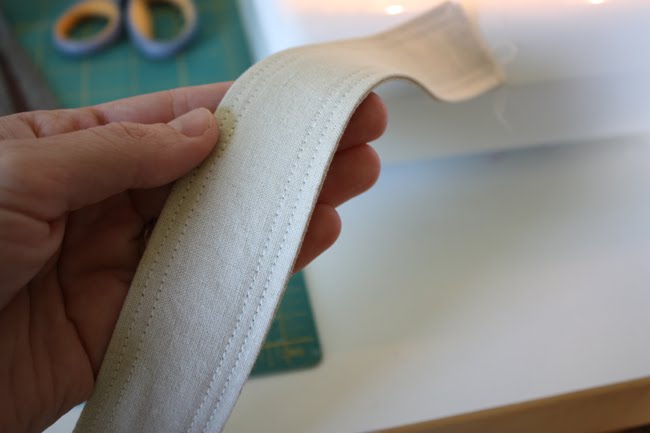
Sew down the length of the strap with the first row of stitching at 3/8″ and the second line of stitching at about 1/8″ on each side of the strap. Repeat for other strap. Set aside.
Make pocket:
Make these as patchworky as you’d like. (And, sorry, I didn’t take pictures of making the pocket, let me know if you need help on this.) Place pocket pieces RIGHT sides together, sew using a 1/2″ seam allowance all the way around the edge of the pocket, leaving a 2″ opening on the bottom side of the pocket piece. Clip corners and turn right side out through the hole you left at the bottom. Press. Topstitch on the TOP edge of the pocket only. I did two rows of stitching about 1/8″ and 1/4″ from the top. Set aside.
Assemble bag exteriors:
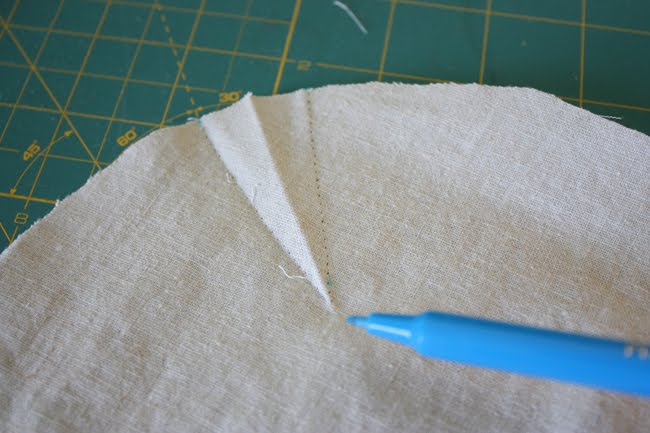
Take your exterior pieces (making sure you’ve marked the corner darts – those little pizza shaped pieces – on each piece with a water soluble pen) and sew the darts in the corner of each side of the exterior pieces.
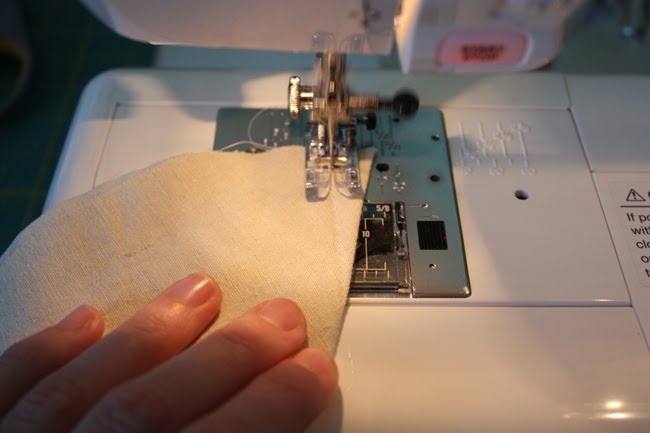
Align the two edge dots with fabric RIGHT sides together and stitch along the line to the upper dot of the ‘wedge’. Repeat this for both corners for all main bag pieces.
If you’re using a lining, take the exterior pieces and place them WRONG sides together with the lining pieces and pin together. If you’re NOT using a lining read on…
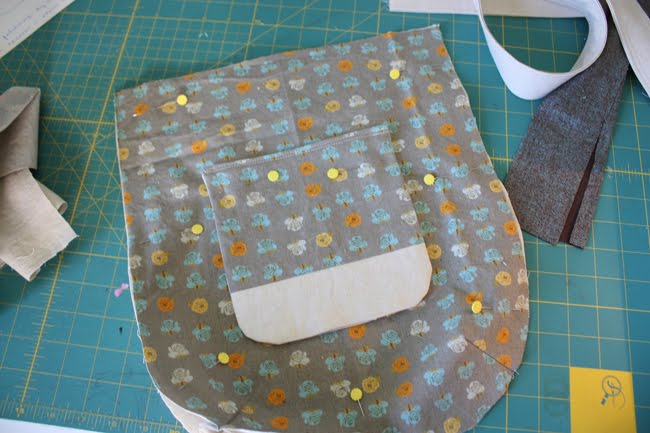
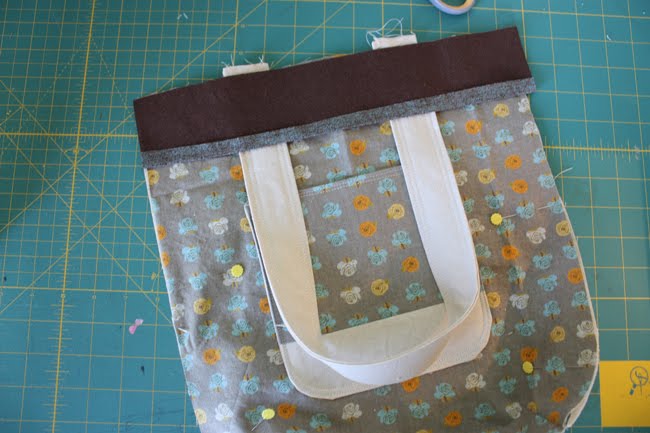
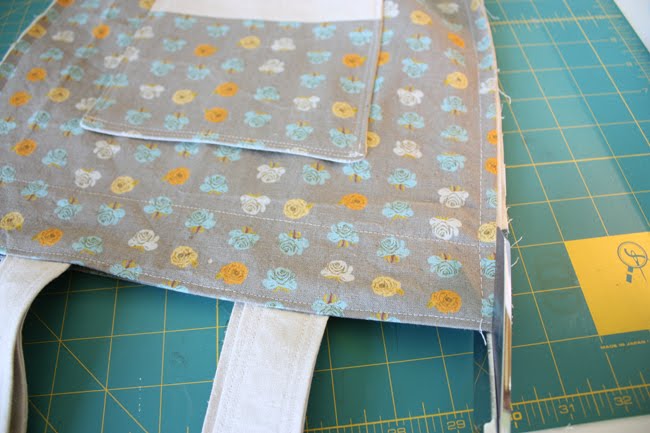
Pin the pocket to the front of one exterior piece, making sure it’s centered.
Sew pocket onto front of one exterior piece. I used two rows of stitching along the pocket sides and bottom.
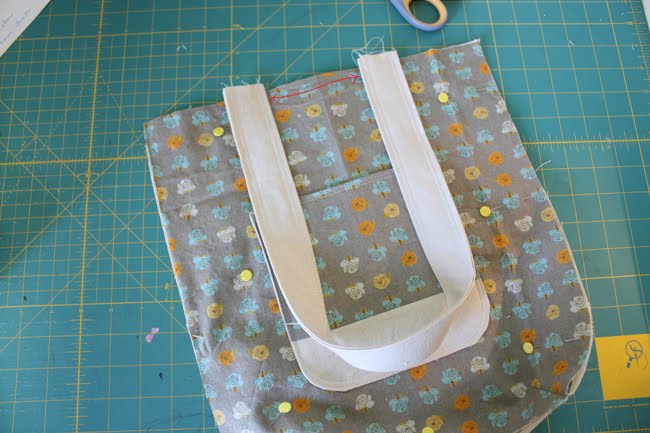
Align strap pieces with the raw edges of the top of the bag, spacing them equally from both sides, leaving about 3.5″ between the straps (see the tiny little red arrow line above). Be sure not to twist the strap at this point!
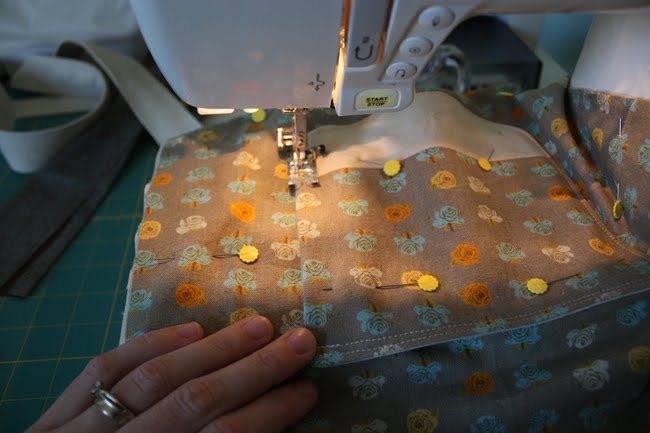
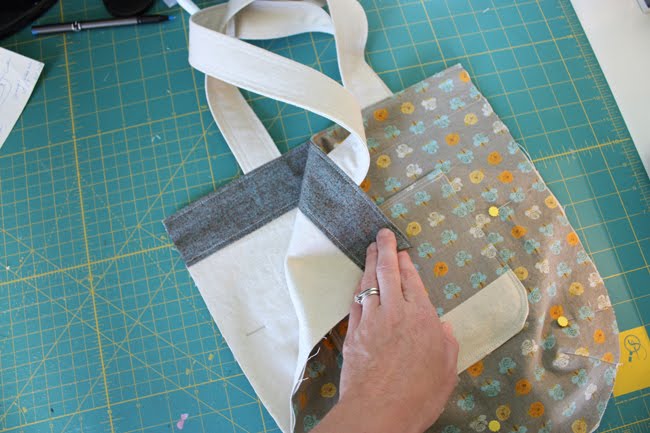
Next, align the reinforcement piece with the unfolded edge at the top of the bag.
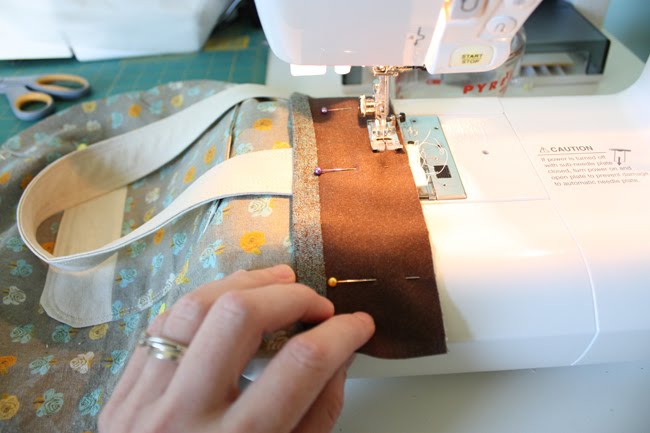
Pin and sew using a 1/2″ seam allowance.
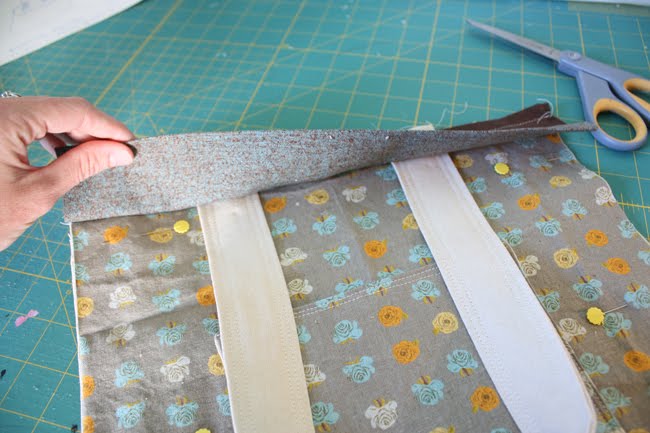
Flip and press so that the WRONG sides are facing.
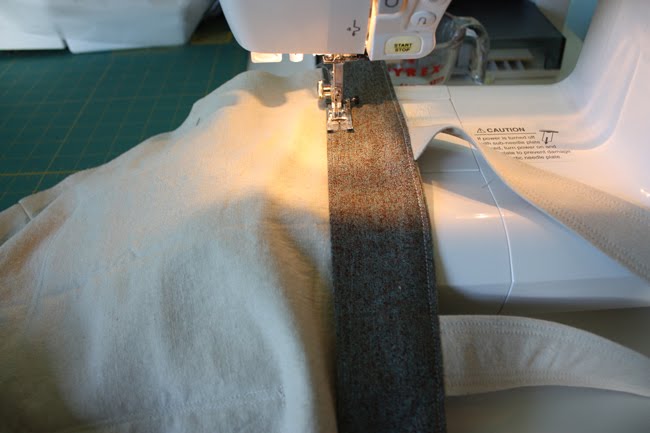
Topstitch at the top of the bag and again at the bottom of the reinforcement strip. Repeat for other side of bag.
Finishing the bag:
Take both assembled exterior pieces and place them WRONG sides facing (or lining RIGHT sides facing if you chose to do a lining).
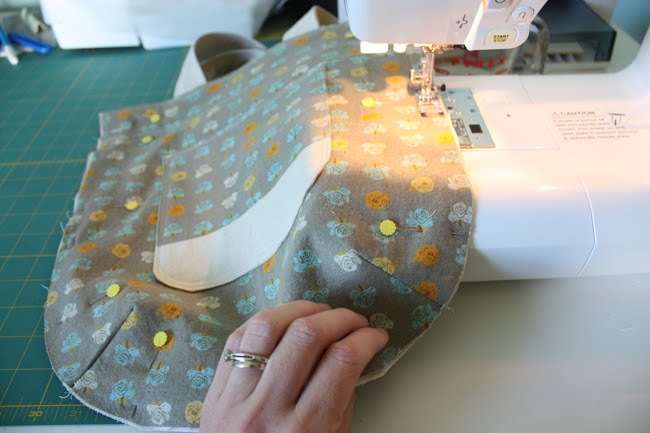
Baste along both sides and bottom of bag using a 1/2″ seam allowance.
Trim seam allowances to about 1/4″ from the basting line of stitches.
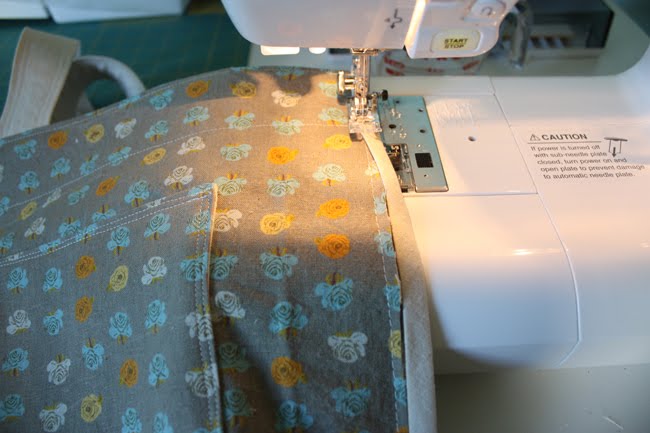
Next, take your bias tape and sandwich it along the sides and bottom of the tote and sew into place. Be sure to tuck in the raw edges of the tape by folding them under. Sewing on the bias tape can be a bit tedious, especially with thinner bias tapes (I made my bias tape strip 1.75″ wide), but just take your time and go slow, this is the part that will really show the quality of your work!
That’s it! Fill it with books, sling it on your shoulder and you’re off to the library!
{Just wanted to add that for the patchwork/scrap type bag, I made my own bias tape with scraps as well as some of the strap piece, the pocket, and the reinforcement pieces. The pocket was made using nine 3.5″ squares and sewn using a 1/2″ seam allowance.}
I love it!!! I am so gonna make of these!!! Thanks for the tutorial!!!
This is really cute Anna! Great job and great tutorial!! I’m sooo gonna do one of these too!!:)
Great bag. I’ve been meaning to make a dedicated library bag for ages. Now I have no excuse. x.
These are great! I love the binding you added around the edges. Great tut. ♥
çok güzel
Great post! I think my youngest needs one of these for the library.
this is amazing. you are so talented.
Great job…looks very professional!
love this bag! I’ve made a bunch of bags lately just simple bags lined with a pocket inside. This bag is so cute! love the bias tape and the shape! thanks for sharing and the tutorial!
That’s funny, I just posted my own Bias Tote bag tutorial today on my blog. If you want to check it out, it is at:
http://ocd-obsessivecraftingdisorder.blogspot.com/2010/08/bag-lady-week-bias-tote-bag-tutorial.html
Great minds think alike 🙂
Okay Anna, I just love all your stuff! You always seem to pick the perfect fabric for every project, I just love it!
Great project and tutorial- practical too, love it!
I really like this, especially the patchwork bag. The straps are nice and wide. This is a really good size. It’s big without being too big.
That is a perfect bag Anna! I think the size would be perfect for so many things, and of course it looks so great too. I love the bias tape finish!
This would be fabulous for my last year of college! Thanks for the great idea!
We are a family that loves the library so I LOVE this tute! I’ll be featuring as well!
Thanks so much!
This is great Anna! I love the fabric you chose.
you are so giving with your creativity!
this is great.
one more project in to my queque!
This is great! Thanks so much for sharing your patterns and your talents!
That is super cute. I love the look of the binding around the sides and bottom. That would make a cute bag for the girls to carry their Bibles in to church. Style is important even on Sunday, you know.
Your tutorials are always so great. Thanks for sharing your skills. I’m excited to try this one out. I especially like the shape and pocket on it.
Great shape, adorable & durable bag. My only problem? We need a whole set since we borrow so many books at a time!! Off to find some cute coordinating fabrics for a new set of library totes.
Thank you!!
So, so fabulous!! Fantastic design, shape, and detailing! :o)
Love it!
Thanks for the great tutorial! I owe a few tote bags as gifts, and this is an awesome take on the traditional tote.
Thank you for the tutorial! I love to make bags!
It’s beautiful Anna!! I love the bias tape around the edges, such a great idea!
Melissa
Another great tutorial, thanks Anna!
Great bag, I’ll be having a go at that!
score! you’ve done it again Anna!!
awesome!
Such a cute bag! I think the bound edge is the perfect touch!
What a wonderful tutorial. I especially love the patchworky tote. Thanks for sharing this great project.
Did you see my Facebook post today or something??? I was asking who had a good tote/purse pattern!
You made that seem so easy.
I think I am going to try it!
Thanks for great tutorial.
Jacqueline
This is awesome! my sister in law loves books and I’ve been wanting to make her a tote. I love the cute details on yours. Thanks for posting the tutorial!
Hey Anna – I love this! I love the fun rounded corners on the bottom and fun binding on the patchwork-y (can that be a word?) one.
Another great tutorial!!! I love your blog!;)
I love it! Absolutely darling. Could I share your tutorial on my blog?
What a lovely bag! You are so talented, Anna, and thanks for sharing 🙂
You did it again, Anna. I love the bag. Thinking Christmas gifts…And the pictures with this one are great.
I’ve got a fabric in mind to make one of these fab totes. . . now if I can just find what I’ve got in mind. You are so clever!!!
these are so cute! i love them! we go to the library all the time so i am definitely going to have to make some for me and my kiddos! thanks!
very very cute! You have such a great way of taking a simple concept and reinventing it/making it way cooler than it ever was. I love the styling you did on the pocket and the trim around the bag. Almost looks like reversed piping…or something like that 🙂
cool cool cool!
This is awesome! And I really need SEVERAL of these. So, I have now bookmarked them and am very grateful for your tutorial!
So cute! I love all the fabric! I so need to learn how to sew!!
These will be great as we start our adventure in homeschooling 🙂
Really nice book bag, I like the rounded corners. And nice and easy, that is what we are all looking for! Thanks
Great looking bag. I never thought to add the reinforcement edge. I love it. Fantastic tutorial and fantastic blog. I just clicked over from Ucreate and I am so glad I have a fresh new blog to peruse.
this is just awesome i’m making it for college which i start tomorrow so i better go sew it up now. thank you so much for sharing this tutorial
Amanda
http://patriciaraedesigns.blogspot.com/
Great tutorial! And I love the bag. Now, I just need to find the time to make one of these. Thanks!
Love the reinforcement pieces on the inside and the clever way they’re added! Great way to jazz up the lining without using up your favorite fabrics…
I just love your projects and tutorials! I just can’t get enough of them! I’ll have more time to sew when the girls go off to school next week….I’m so excited!
I may have missed it in the tutorial, but what type of material did you use for the reinforcement pieces? Thanks a bunch!
Dana
dlbeisel@gmail.com
I am a bag junkie, and this is such a cute bag!!! Thanks for the tutorial!!!!
OMG! Love it! You read my mind, I was thinking of finding one of these the other day to make and voila! There was your lovely tute! now to find the time to sew in my crazy day…haha. Thanks for your comment too hun, luv ya 🙂
oh my gosh Anna! This bag is a.mazingly cute!! Perfect fabric choices for it too!
This is really great and I love your clear, step-by-step photos.
This is such a great tote. Love the extra detailing, really kicks it up a notch :). LOVE that rose print fabric! What line is that from?? Wonderful tutorial. Thanks for sharing!
love this tutorial! thanks! i made one and posted about it here-
http://vievesscrapbooking.blogspot.com/2010/09/alright-so-another-slipcover-that-i.html
thanks for sharing!!
Love the tutorial!!! Thanks for the inspiration. I made a simpler version of the tote bag as I’m a novice sewer.
I adore this idea! I need a library tote pronto! I featured this idea today on a roundup of fun ideas:
http://oopsey-daisy.blogspot.com/2010/09/wednesdays-wowzers-here-comes-fall.html
Have a great day!
~Alison
!!
You are my god!
Lovely tutorial. The bag it’s simple, nice, and cute. I’ll make it and use it for my painting accesories 😀
great tutorial!
I have included it in my Christmas Gifts To Sew round up
http://jojoebi.blogspot.com/2010/10/lots-of-gifts-to-sew.html
thanks
jo
I just made my first!!! So cute and easy and FUN. I had to get creative with the pattern pieces because my printer would NOT print tile – grrr – but it still turned out great! One christmas present down! Yeah!!
These are great.
Bookmarked this page.
Thanks.
Marie
Thanks so much for this tut!! Im in school and want a cute bag to tote my books in and this will be perfect!! 🙂
I LOVE this bag. I posted a tutorial for a kids’ bag and referenced your tutorial as one of my favorites. Wanted to let you know!
Kate
http://betweenthetoys.blogspot.com/2011/04/preschooler-library-tote-tutorial.html
Oh what a great tutorial! You make my day. Thanks for sharing ^_^
Hey! My 13 year old daughter loves this tote soooo much, I just made he three in different styles! Thank you so much for sharing your creativity =) x
Just discovered this tutorial today and it is perfect timing…I need to make a bag for a birthday present …by tomorrow. Thanks
Hi Anna, These are just beautiful!
I have included them in a list of great tutorials to make for little boys and girls for Christmas.
If you would like to have a look you can see it here…
http://allysonadeney.wordpress.com/2011/11/28/handmade-gift-ideas-with-tutorials-kids-little-boys-little-girls/
Thanks for taking the time to put this together for us.
Ally on harrysdesk
Thank you very much for this fantastic tutorial. You are a very good teacher.
I have made this bag!!!! I love, thank you!!!!!! You can see it in my bolg: http://cosiendoaoscuras.blogspot.com.es/
I made this for my son as a trick or treat bag. Instead of a pocket I put his initial on the front. He loves it and tries to use it all the time, not just for Halloween 🙂
Love the colors, but sigh! The Pieces link is not working ….https://docs.google.com/viewer?a=v&pid=explorer&chrome=true&srcid=0B17DuQHbJMKsMzFjZTZiMmItZDAzYS00ODk1LThhYzMtYTkzYjk4NjRlNjFh&hl=en&authkey=CJrShNwE
Sus manos son maravillosas, hace cosas como estos bolsos hermosos! gracias por compartir! 😉
Love this tote! We just started taking my two year old to the library and she would love this! One question; I am a little confused about the lining. Why Do you have to put the pieces right sides together? Would you just assemble as if there was no lining since the edges have bias tape and the bag doesn’t need to be turned inside out?
I think if I’m reading your question correctly, yes, if you’re using a lining you’ll just be laying them together right sides facing (after they’re already attached to the exterior pieces). So correct, just like you would if there was no lining since you’ll be finishing the raw edge with bias tape.
the pieces aren’t working for me.. can’t wait to make, but please fix!!
The google doc has full access, I can open in Safari and Chrome. Not sure why you can’t open it, sorry!
Thanks so much for this tutorial! I love it and have used it a ton – it is especially good for teacher gifts. I blogged about one I have made here: http://tdcell.com/threadridinghood/wordpress/?p=459. I appreciate your time spent to write. I have spent a lot of time making so many of your tutorials and patterns!
This is amazing, I found it on a search for library bags to make for my teen girls.
I think I will try finishing one without bias tape for my girl who likes less ‘fancy’ things and with bias tape for my other girl. Wish me luck! 🙂
I love this bag, I made one a few years ago for my sister and now she wants 2 more for her boys to put their art supplies in ….. so now I’m making a couple more and this time I’m using ripstop for the lining so it’s water resistant haha..
Wow, amazing Bag 🙂