
Love projects like this one, part sewing, part painting. I think that’s why I dove head first into sewing. For the past however many years of being homeowners, we’ve been remodeling, now onto our second – and probably final – home. I am a huge fan of This Old House, have painted nearly every surface in our house (sometimes twice), am pretty confident using power tools, and I think I’m not too shabby with the wet saw.
We’ve spent long hours fixing up the house we live in, but now there’s only one or two smaller-ish projects left. So I find myself looking at older houses in town when I drive by thinking how cool it would be to fix that one up, oh wait, that one, no that one! I’ll probably never get to fix up another house, but that’s where you luck out, it’ll make me dive farther into the sewing realm…
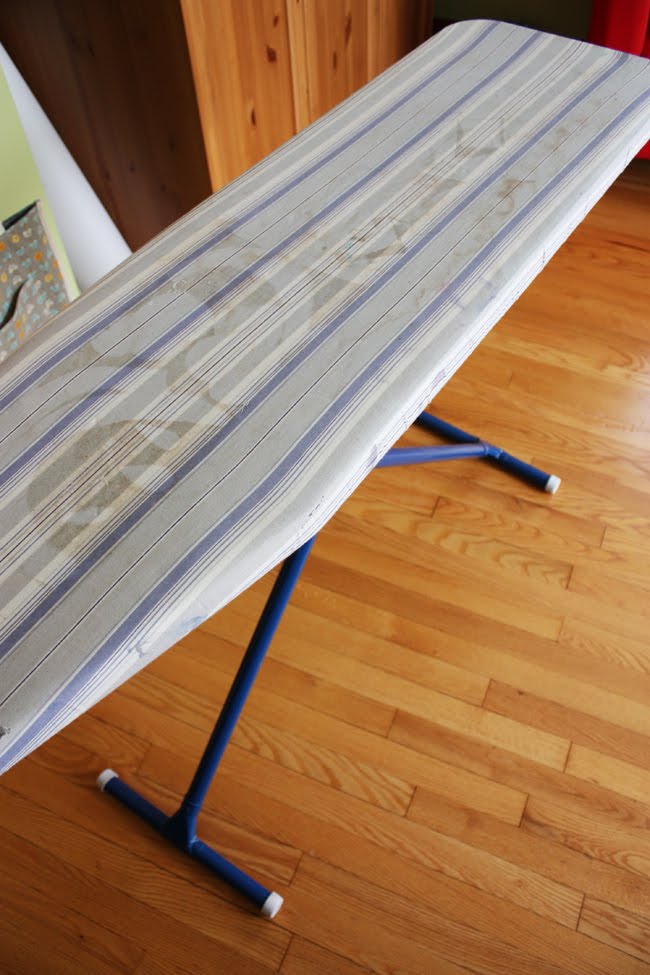
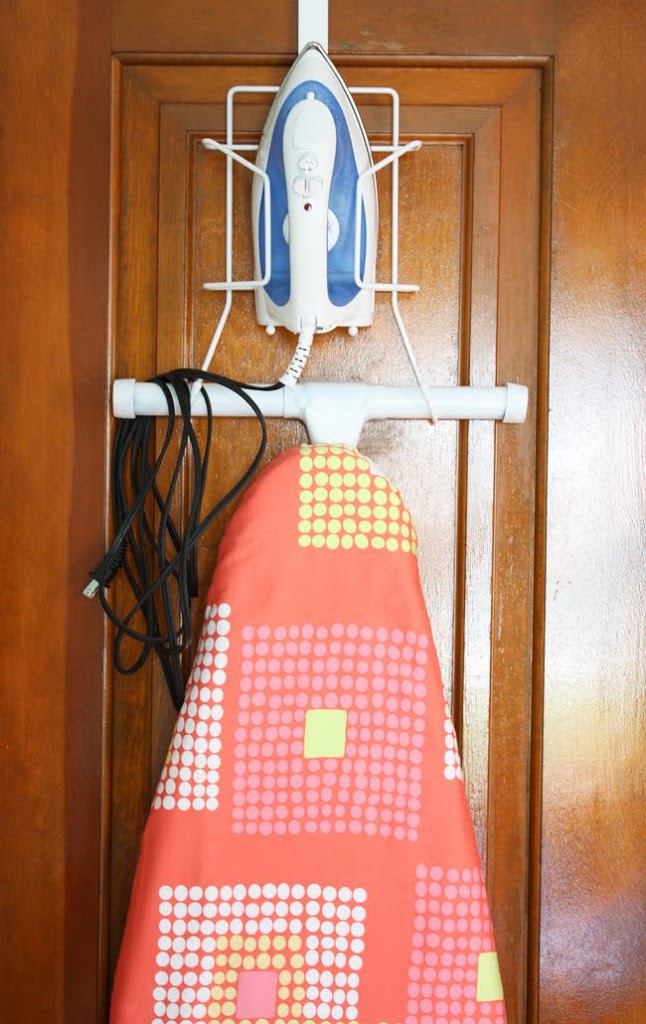
And so you might not have noticed, but I’ve never shown my ironing board in my tutorials. There’s a reason for that:
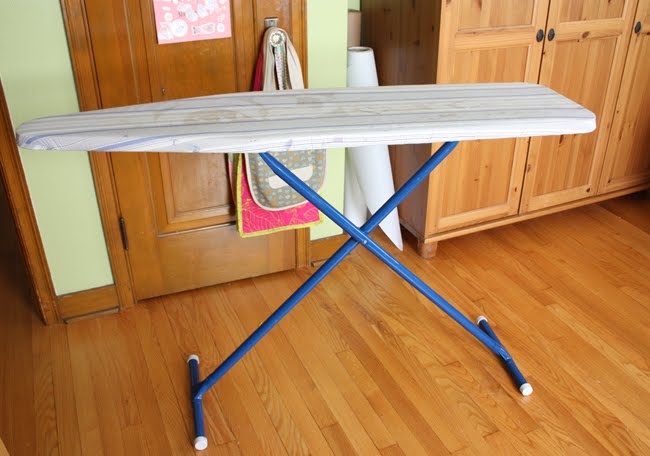
So I had this fabric, no idea of what I was originally going to use it for, and some bias tape, and a can of spray paint.
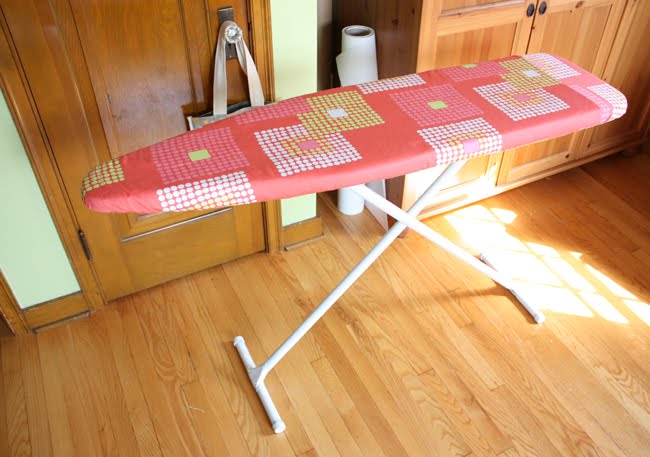
One ugly ironing board, turned slightly more pleasing to the eye.
If you think it’s time for an ironing board overhaul check out these tutorials:
Ironing Board Cover Tutorial @ Comfortstitching
Ironing Board Makeover Tutorial @ Make Something
Super Easy Ironing Board Cover Tutorial @ U -Handbag
How to make an Ironing Board Cover @ The Purl Bee
Jazzy Ironing Board Cover @ Sew4Home
What a difference! If my ironing board looked that good I’d never put it away.
The poor sad ironing board … often neglected. Yours turned out great! I’ve wash my cover but never made it a new “dress”, and painted legs too – how clever!
Love what you did with this ironing board – mine is even worse looking. Please, could you tell me what paint you used? Did you spray it? Mine has some small rust spots so I assume I will need a special paint but I am clueless.
I am impressed with your power tool capabilities, I don’t even know what a wet saw is!!!?
Love the makeover and thanks for the linky too :))
oh I love it Anna! my mom’s ironing board is pretty sad looking…maybe I’ll make her one for her birthday that’s in November! I also love the painted legs. and the hook! 😀
this is something that I too need to do, but for some reason I’m too scared to try! will have to push aside my fear and just give it a go! love how yours turned out.
Makes me think about my shirt sleeve ironing board (that my grandfather made of wood) which is in desperate need of a new cover. It’s on the list, but too many other things to do first. Tomorrow, right?? Ha, Ha. 😀
Very pretty! I had great intentions of making a new cover for my ironing board, too. Never seemed to get the job done, so I put one on my Christmas list last year… worked like a charm! LOL
My question is… where did you get that nifty hanger thing? That may have to go on my next Christmas list! 😉
my ironing board could really use a makeover. Thanks for sharing. Would love to have you come join my linky party!
Joy
mommaskindacrafty.blogspot.com
My ironing board cover looks much worse than yours! I’ve had making a new cover on my “list” for a long time! Your ironing board makeover turned out great!
sigh…my ironing board is so jealous now.
Great makeover! My ironing board is NASTY! The perils of fusible interfacing and hard water. . .
It looks great! I splurged on a new oversized board (almost twice as wide! makes ironing yardage so fast) and the cover is still nice and clean … but pictures like this certainly tempt me to try something new.
I’m inspired Anna!
awesome makeover! That’s funny-I wrote up a tutorial the other week for a cover-just haven’t posted it yet! 😀
I really need to do this. Mine is as stained as yours was AND I have cut it several times!!! It is all chopped up in the middle. I am sure it’s a no no to cut on your ironing board.
Looks better than new, Anna. This is upcycling at it’s best. The cover is terrific. x
Yeah, ours stays out most of the time and takes up most of the tiny hallway going back to our bedroom, We don’t even have a door to put it behind. Yours looks so much better! I’m sure it loves you for that.
You are just sooo talented!! Yours is adorable and looks brand new and yes, mine could use the same. Thanks for posting!
love it! i, too, need to get busy on this project. our board is out half the time and looks pretty sad. you are an inspiration!
Awesome cover! I love it!
Oh, I’m impressed! Like a brand new ironing board.
I would check the links, thanks!
I was seriously wondering what the spray paint was for until I realized you painted the legs….obviously not enough coffee today.
Looks great Anna! I should make a new cover for my ironing board, mine is quite gross 😉
Pleeeeeeeeeeze….a tutorial
kathy
http://quiltsbagsgardens.blogspot.com/
Nice job! Looks like you changed it!
Thank you so much for posting this, both of my ironing boards definitely need a facelift and this is good inspiration.
This is great! Thank you for posting. I was just thinking the other day that I wanted to see if I would be able to make a new cover. Ours is outrageous!
I so badly need to do this to my iron but have been too lazy to. It looks so pretty! You know you are seriously dangerous to my “must make” list. It’s bursting at the seams and you keep adding more….:P
oops meant ironing board…that’s what happens when you type while breastfeeding.
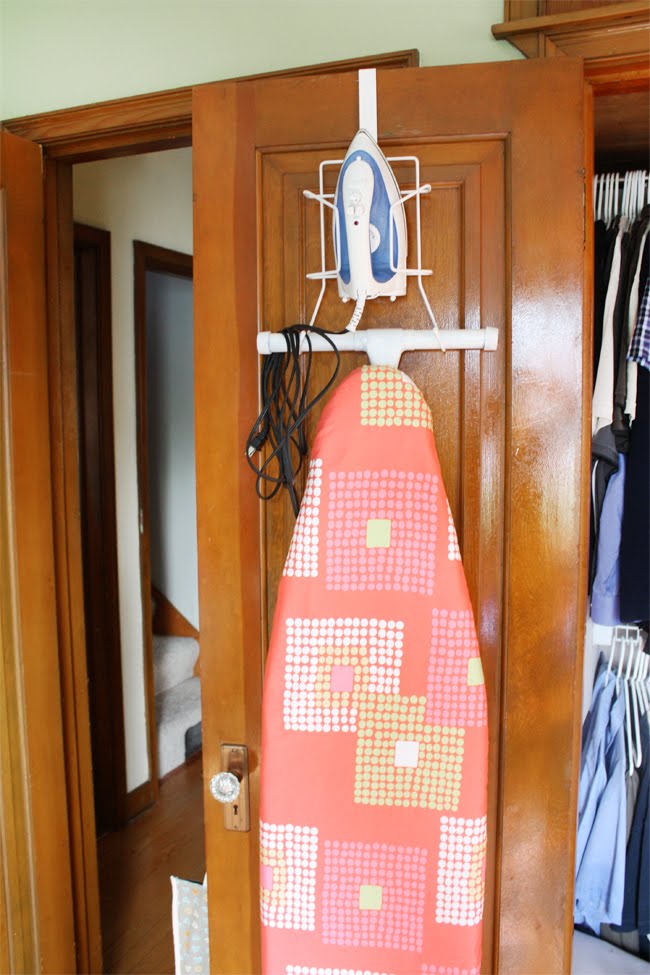
Where did you get the hook? I would LOVE to have one for my sewing room.
hey flaun~
The hook came from Home Depot. Hope that helps!
anna
HA! Anna, I have that exact ‘before’ cover on my ironing board right now and I dare say I think yours was in BETTER shape than mine :). I’ve been wanting to re-do mine for sometime, but it’s just one of those ‘it can wait’ projects :). But now thinking of spray painting the legs a fun color … like aqua …. hmmm, this project may have just been bumped up on the list :).
Happy Day!
SERIOUSLY! This is on my own project list. Thank you so much for listing the links for tutorials and ideas…I was feeling a little overwhelmed. So excited.