
I first want to say thank you to Dana and Rae for hosting such an awesome event. If you haven’t been indulging in all the fun already, go check out both of their blogs for lots of great inspiration. There has already been so many great ideas!
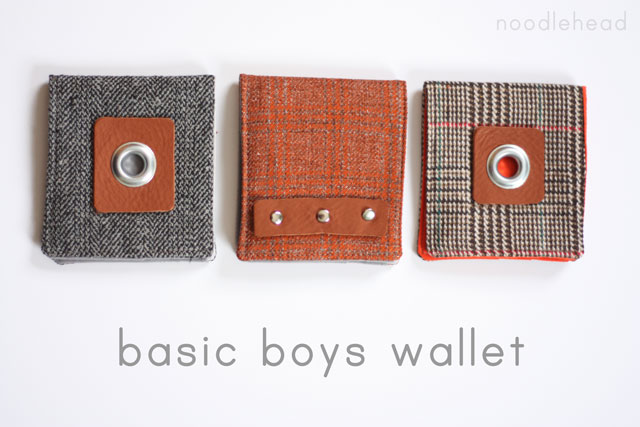
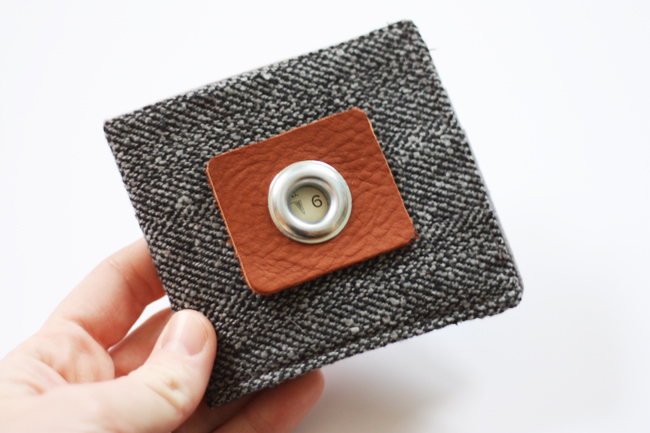
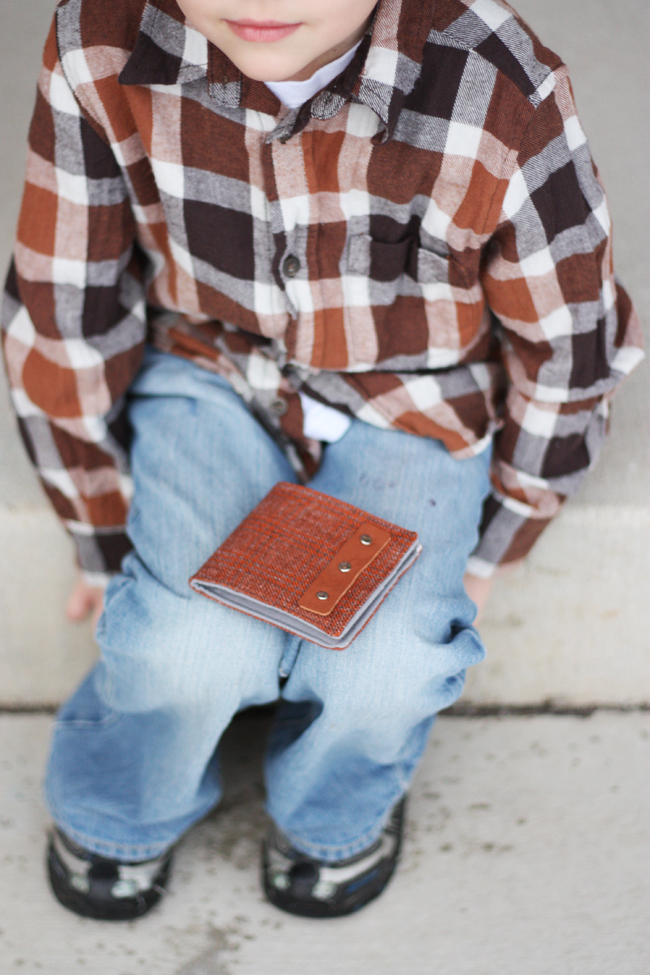
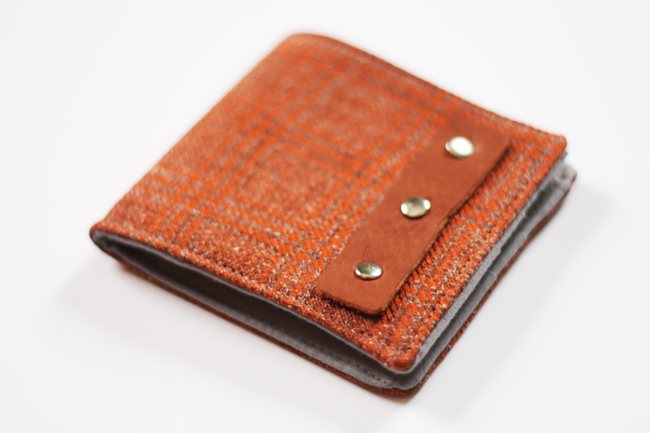
Today I’m sharing a basic boys wallet tutorial because…
every boy
needs a place
to keep his stuff!
So I know, you’re probably thinking, ‘What? She has two girls, how’d she get in the mix?!’ Well, I pretty much slipped Dana a twenty and told her I just had to join in on the fun. But really, I think there’s a part of me that really clicks with all things boy. So here I am, onward with the tutorial…
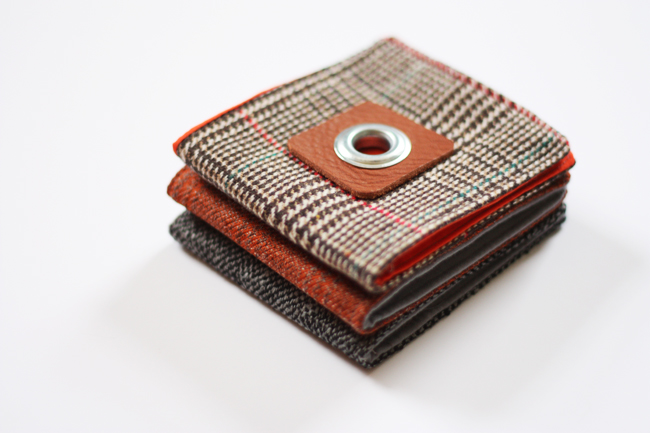
It’s a great time of year to make these wallets. All the fall suiting fabrics are on sale this time of year, and you’ll only need a 1/4 yard of your main fabric (and have plenty leftover to make more).
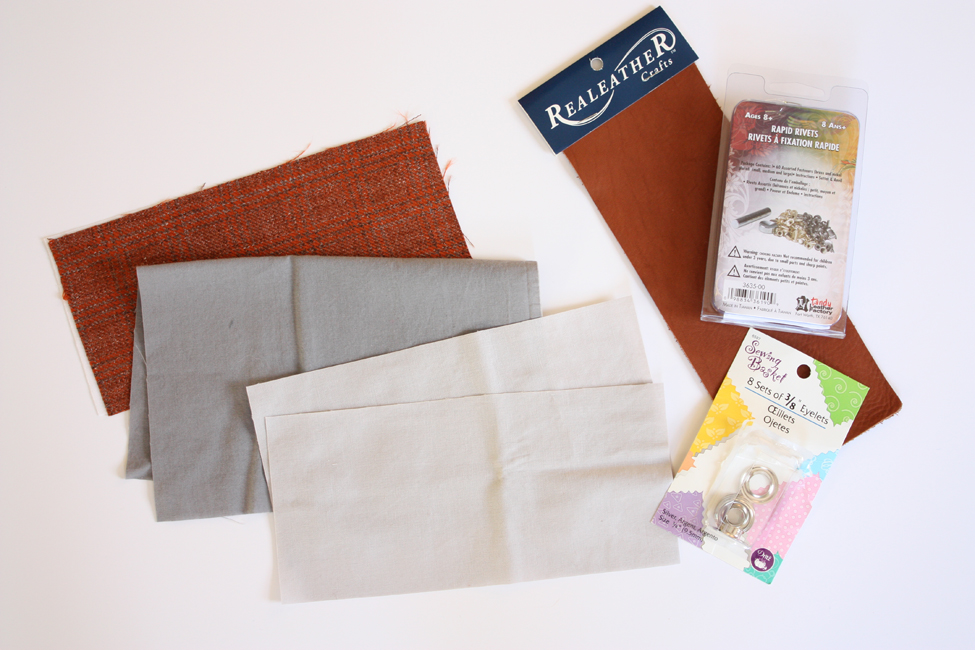
Materials:
{1/4″ seam allowance throughout unless otherwise noted}
Cutting the pieces:
From the exterior fabric:
– cut one piece 8.5″ wide by 4″ tall
From lining fabric:
– cut 1 piece 8.5″ wide by 4″ tall (this is the wallet lining piece)
– cut 1 piece 8.5″ wide by 3.75″ (this is the card holder lining piece)
– cut 1 piece 8.5″ wide by 9.75″ tall (this is for the card holder slots)
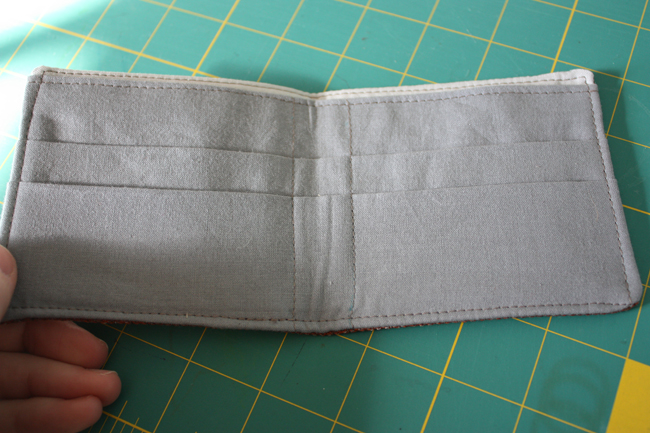
Assembling lining:
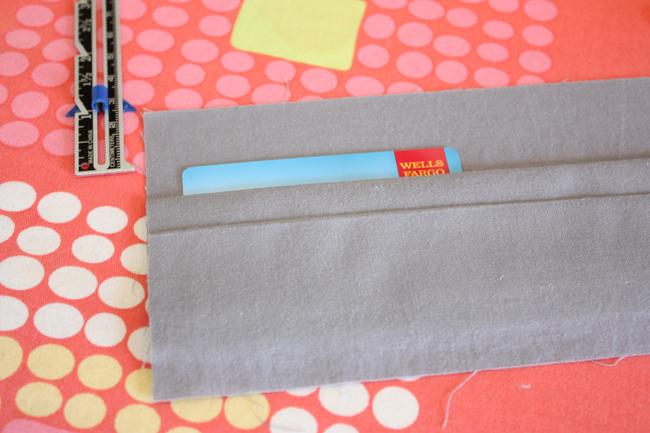
To create the card holder pockets, take the 9.75″ tall lining piece:
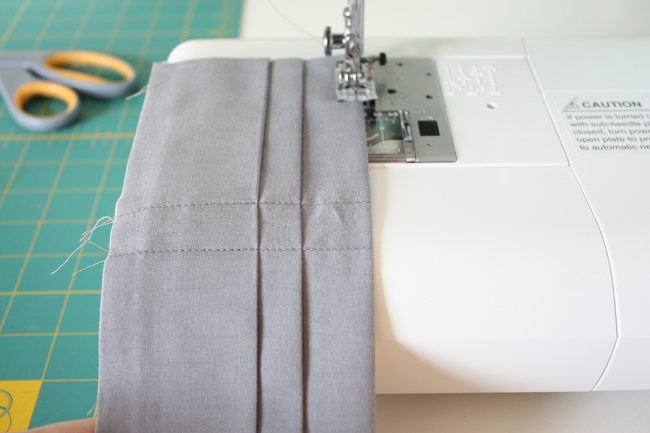
Fold it like an accordion (as you can see in the side view of the above picture). Measuring starting from the top, fold the fabric up at the 2.25″ mark, fold fabric down 1.5″ (from the previous fold), up 2″(from the previous fold), down 1.5″ (from the previous fold). The finished piece will measure 3.75″ tall by 8.5″ wide. Press.
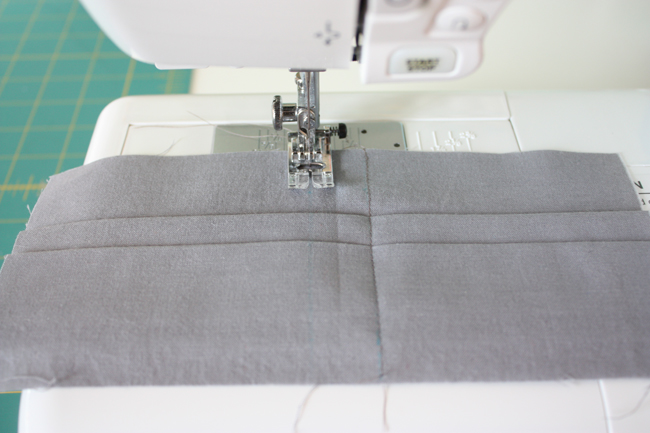
Next, sew 2 rows of stitching down either side of the middle of the card holder fabric spaced approximately 3/4″ apart.
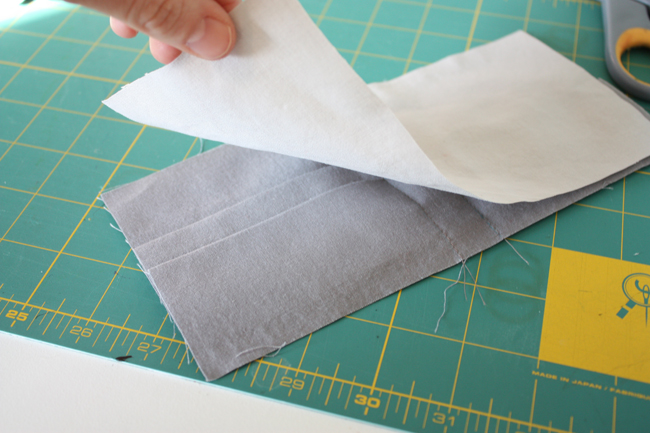
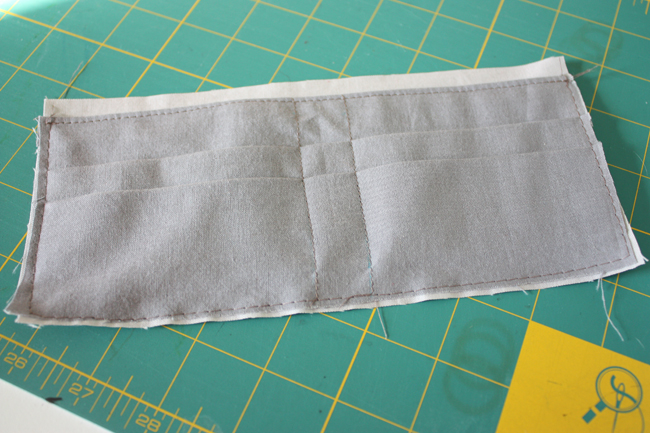
Align top edges of one 8.5″ by 3.75″ piece with top edge of card holder piece, right sides facing. Sew.
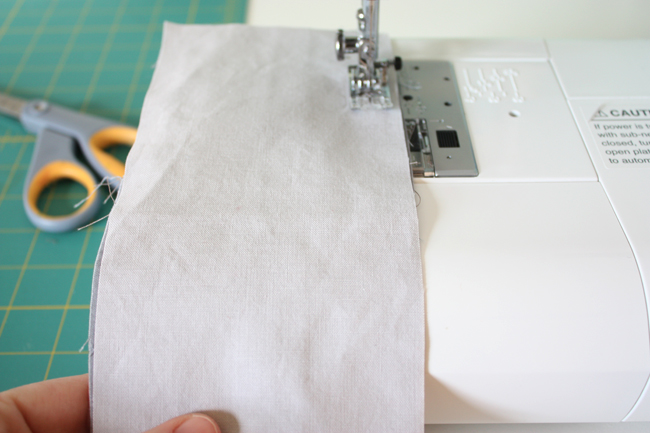
Position fabrics WRONG sides facing, press.
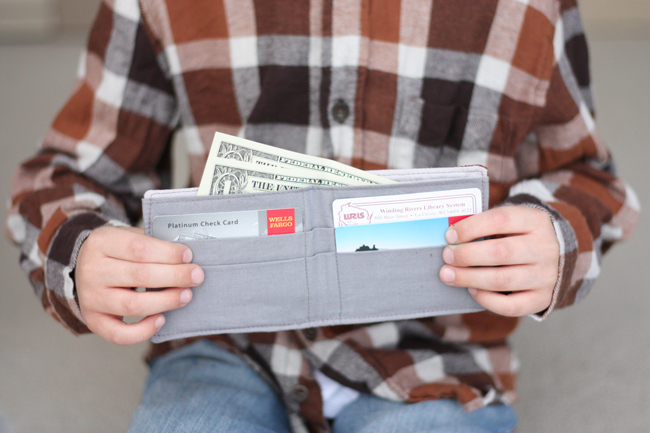
Topstitch along top edge. You should now have four card slots.
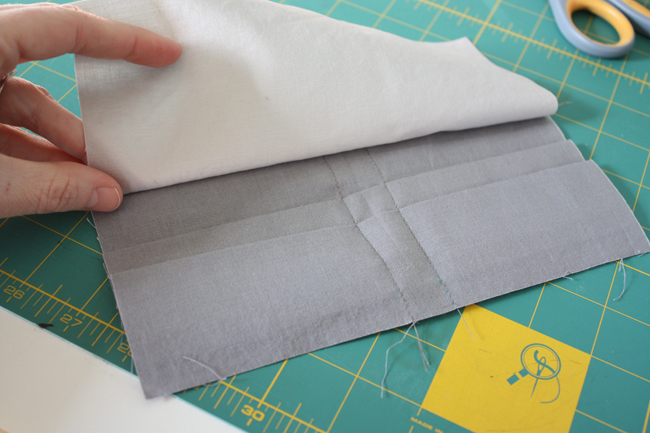
Baste this assembled piece to the RIGHT side of the wallet lining piece (4″ tall piece) with the card slots facing you, aligning raw edges at bottom.
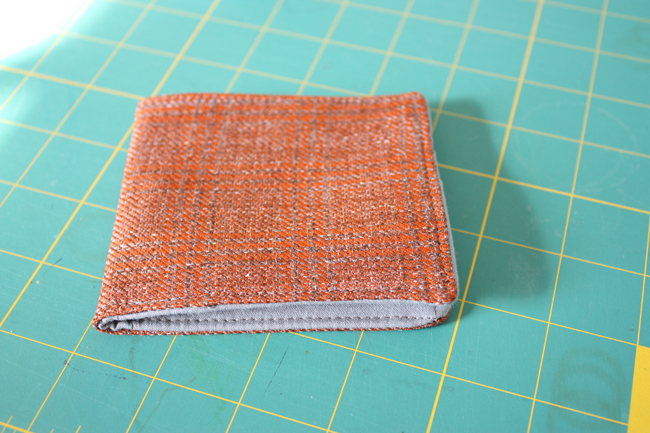
Assembling wallet:
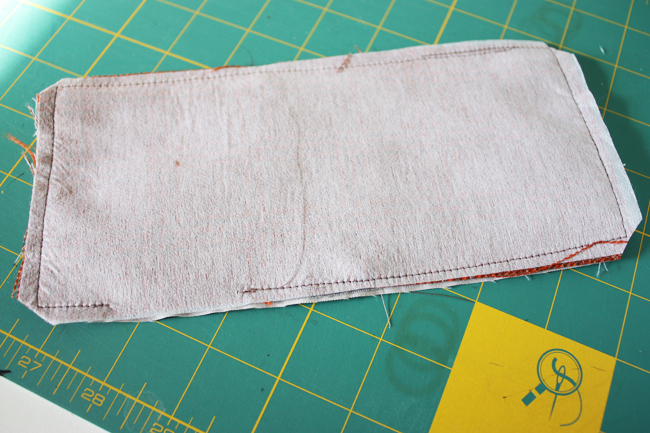
Fuse interfacing to WRONG side of exterior fabric.
Place lining assembly and exterior piece RIGHT sides facing.
Sew around all edges using 1/4″ seam allowance leaving a 3″ opening for turning. Clip corners. Press.
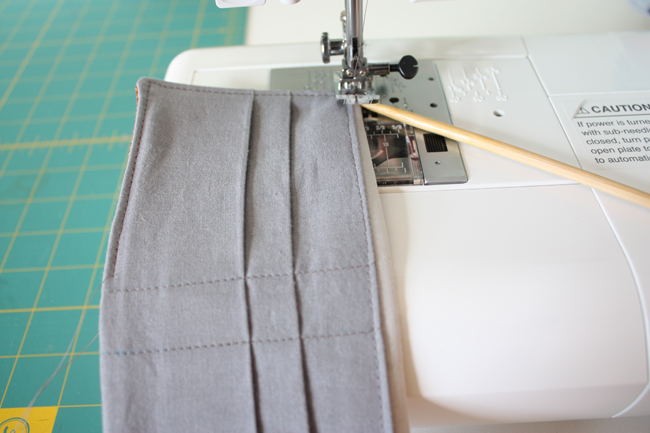
Topstitch around entire wallet, I use a chopstick to get really close around the corners, it helps grab onto the feed dogs of your sewing machine. You’ll be sewing close to the top of the pocket, but be sure not to catch the pocket (with wallet slots) when topstitching. Press.
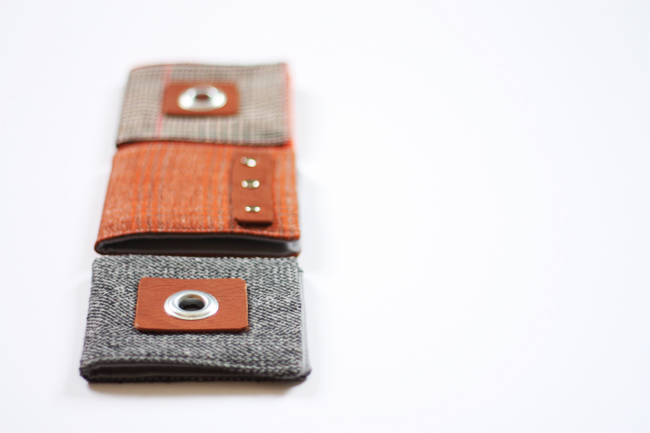
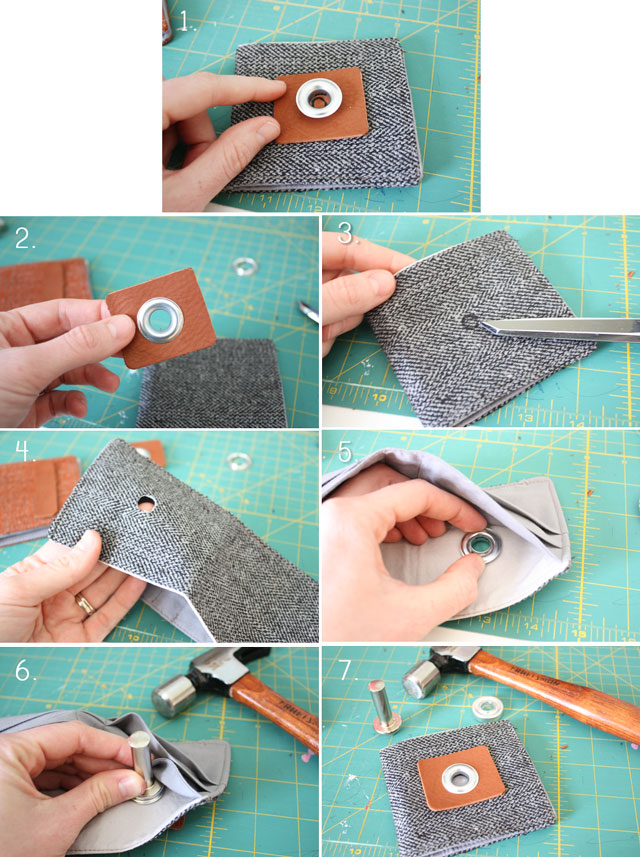
Add any embellishment, grommets, leather, rivets. Follow my pictorial grommet directions:
That’s it. It’s a pretty basic wallet, so mix up your fabrics, try something new, and get creative! Enjoy.


Love love love it! These are so adorable, Anna!
This is fabulous! It’s even easier than I thought! You are always brilliant. Thanks Anna for sharing.
Thanks! I have actually been meaning to make myself a little wallet just for holding the cards I have from all the local craft shops I frequent. My “real” wallet is looking less like a fold and more like a roll! I think I am going to adapt your design to be a little more girl and less boy, but that accordion fold technique is something I was struggling to come up with on my own.
So absolutely cute!! I can’t wait to make one for my lil boy.
Wonderful! Can’t wait to make these for my boys!
Love the grommet piece of the design. I can’t wait to make one for my son and maybe a girled up version for my daughter.
This is awesome! How many times has my son emptied my wallet or my husbands? I think I’ll make him his own complete with old cards that he can empty and lose as much as he wants. Then maybe he’ll leave ours alone (or not)
ABSOLUTELY IN LOVE with the way these turned out. Fabulous!!! Every child, buy & Man would want one!!!
That looks much easier than I would have imagined. Nice job!
LOVE it! Thanks for sharing!
My 8-year son has been asking me to make him a wallet for over a month…this is perfect (and I already have some that orange suiting!) Thanks!!
These really are cool! Love the fabrics you chose and the neat embellishments.
Perfectly done as always!
Love it!
menina vocÊ é incrivel..
Ficou linda e super pratica..
Muito facil de fazer e entender..
Beijos…
Love the leather and grommet details! And it’s the first project in the series that you could actually do for older boys. I’ve got a 15 and a 12 year old and I think they’d go for this! Thank you so much!
Wonderful!
Thanks for sharing!!
Ione
ionedartes.blogspot.com
So cool! My husband is going to want one too!
Anna, those are SO cool! Love the hardware. My son is sitting next me and is insisting that I get started making one right NOW! Thanks for sharing.
Oh. I LOVE this! I will have to move it to the top of my list for my 5 year old that is all things money right now.
These are just about the cutest things ever!
I really love these!
Super cool! I’ll have to wait untill my son gets interested in paper money, right now it’s all about the coins ha ha!
Thanks for sharing.
This is exactly what I needed! My son has been keeping his money in a tupperware container :). It’s pretty hard to find cool wallets for boys in stores so this is a perfect solution – thank you so much for sharing!
SO fabulous!
I LOVE the way you did the card pockets!! I’ve made a couple of wallets in the past & your way is much easier (and less bulky!) than any other method I’ve seen ~ pure genius!! thanks for sharing!!
Another fabulous tutorial, Anna. I think I need to make some for my boys!
YES!!!! i was just about to search for a pattern for a wallet!! i cant wait to make this! i love your tutorials and patterns, they are so clear and easy to follow. thank you so much!!!
I think I make one for my husband! Love it!
Oh my goodness I good totally do that. Thank you for your wonderful tutorial. I am so excited, my boys have been bugging me for a while for wallet. Thank you
So super-ly cute, and your embelishments make it!
Love it, Anna! I am going to make one for my teenage brother!
Nice! I love that wallet – might make one for myself first! Who’d you borrow the boy from :)?
These wallets are REALLY cute. They look so classy & sophisticated. Thanks for the tutorial (I too have 2 girls (and 3 nieces), but am always on the hunt for good boy projects for gifts!)
How fantastic is this! You amaze me once again!
Well done Anna! The wallets are super stylish and the pictures are great and the tutorial is so easy to follow. You rock! A wallet is something I never thought to sew. Great idea!
Cheri
Anna! I love this tutorial. I just bought a huge ugly leather jacket from the thrift store yesterday and I am hoping it will make a cute boys wallet…among other things.
Thanks for the great tutorial!
Really cool, Anna. Any boy would love this. Especially love the grommet.
Just a quick note to let you know that a link to this post will be placed on CraftCrave today [05 Mar 12:00am GMT]. Thanks, Maria
Dude, I may need to make one of these for myself…until my son is old enough at least!
I love these!! They are so cute!! 🙂
Sheridan
http://www.theverycraftyowl.blogspot.com
I love love LOVE these wallets!! The suiting, the grommets, the everything! I linked to your tutorial on Craft Gossip Sewing:
http://sewing.craftgossip.com/tutorial-basic-boys-wallet/2011/03/04/
–Anne
Oh my!! Cool wallet! Hello from Russia!!
AWEEEEEEEEEEEESOME TUTORIAL!!
Anna, These are AWESOME!!! I must make some. I know a couple of OLDER boys who would like these too!!!
I bow down to your awesomeness Anna!
Is it wrong to want one of these for myself? Maybe even my 33 year old “boy” would want one, and my husband, too. Neat!
Leslie S. in MN
esclante at comcast dot net
super cute! I’ll def have to try my hand at this. Thanks for the step-by-step! .)
Christy
super duper cool anna!
toni x
yay! I was waiting for you to do something for the boy- awesome wallets… LOVE them! -Erin
You know, my nieces are sooooo easy to make gifts for but I never know what to do for the nephews. Really, how many knitted watch caps can they wear at once? These wallets are very cute and your tutorial is great! Thanks for sharing.
these are darling and will make GREAT birthday gifts for all my daughter’s friends that are boys that are turning 5!
Superly cute, love the details.
How brilliant! Super manly, too. Gotta make me a couple of these. *Bookmark!*
I just saw this linked up on homepodge. You’re so talented! Would you mind making me a herringbone wallet with rivets? 😉
What a great idea!!
My daughter would love one…to hold her AARP card (she’s 10!!!!). For some reason that’s her most prized possession in her wallet!
Coooooooool wallet!
I wish we had a currency without coins in Europe …
I don’t have any boys… but I love your tutorials!
I’m always so impressed with the precision in your sewing. I am a total slob in comparison. Awesome tutorial! I love the grommets
This is great Anna! I’m so afraid of grommets and rivets though… Yikes!
love this tutorial! thank you!
anna! you’ve got to stop inspiring me! I can’t get it all accomplished 🙂
This is so stinking cute! I love the fabrics you chose, and the grommets, and — well, all of it! :o)
This is so great. You are one smart cookie. My grandson loved the bike basket and I know he will love this wallet as well.! Thank you so much for the tutorial!
That is SUPER stylish! I can’t wait until my husband needs a new wallet. I’ll be making him this one! Thanks so much, I’ll be spreading the word about your fabulous tutorial.
I don’t think it is easy until reading your tutorial. So cute! I think I’ll make it for my sons.Thanks
I staed up late last night making one of these – thanks for the great tutorial Anna. It was easy to follow and turned out so cute. You rock!
nannergirl
LURVE IT 🙂
Yesyesyes! Very nice!!
Love the wallet tutorial well done!
Your blog so good love it!
super cute! is my 2 1/2 year old son too young for these?!?! 🙂
i might just have to try some out!
Awesome, I have so many upholstery samples that would be perfect for these!
Got a link for this from Stacysews. Saw how cute it is and then realized – of course, Noodlehead. I made your gathered clutch for my sister as a birthday gift and it turned out darling. Can’t wait to make it.
I’ve been looking for a good wallet pattern for a long time, and toting a falling apart shamble all along the quest! Finally, I found your post, thanks to Man Made DIY, and I whipped up two in less than an hour this morning.
I’m so grateful.
Thank you, thank you, thank you!
Finally! An actually easy pattern/tutorial. When I’m done with it, this will not scream boy… but it will show off the tom-boy I really am. I can’t wait to get started on this.
Very cool 🙂
Thanks for this tutorial – it looks great! In fact, all your projects are great!
Hi and many thanks for the tutorial. I’ve just made a more girly version, but the boy version is so cool, too.
Just wanted to let you know that we like your tutorial so much we posted a link to your blog from our Butterick Patterns Facebook page.
http://www.facebook.com/butterickpatterns
Thank you for putting up this tutorial as my ds was feeling left out with my sewing projects, I am going to make him one today
Oh, I love it! Thank you! I made a couple and have more to go. I added some decorative stitching to the card holders on one, and, since I couldn’t find leather at my local fabric stores, went to goodwill and bought a couple leather belts to cut up. They were so thick and hard to work with I would have been better off cutting up an old purse. Next time!
I love this! Thank you! Made a couple and have more to go (posted photos to flickr). I’m going to stuff one with a gift certificate for a boy that is difficult to shop for. I added some decorative stitching to the card holder and used a cut-up belt from Goodwill for the leather accent since my local fabric stores didn’t have real leather. Next time I’ll cut up an old purse, the belts were so thick and hard to work with!
That is great! I am featuring it on my blog on the 4th!
seemesew.blogspot.com
Anna, this is a wonderful and thorough tutorial. I included a link in my latest blog post:
http://trashn2tees.blogspot.com/2011/12/hod-rod-birthday-party-handmade-ideas.html
Wishing you and your family a very happy holiday season too!
-Jenelle
http://trashn2tees.blogspot.com
Great tutorial! You’ve been featured on the Quality Sewing Tutorials blog.
We hand select only the best free tutorials and patterns for home sewers.
Grab a brag button!
i love this one too. thank you very much for sharing this wonderful tutorial. just what i am looking for; for my 3 sons and for my husband.
Es super chula!!! espero hacer algo parecido… muchas gracias
Ah! también espero seguir tus novedades
karumina
oh this would make my nephews feel so grown up! 🙂 i think i’ll do it for their birthdays 🙂
I’ve been making your Open Wide Pouches all morning. This wallet pattern will be so perfect for the little guy in our lives. He’s six and has been asking for a wallet. THANK YOU for this wonderful tutorial! -Marci @ Stone Cottage Adventures
I’ve been searching for an easy pattern to make my grandson a personalized wallet with his initials. Your pattern is perfect! Thank you so much!!!
This is a super great TUTE! Thanks
These are so stylish. Thanks for the tutorial. I featured it here:
http://sewprettysewfree.blogspot.com/2013/02/wallets-sewing-tutorial.html
I would think it would be easier to add decorations to what will be the outside fabric BEFORE it is stitched together.
Have to try this…My son need it one. Thank you for the tutorial.
This is an excellent tutorial and you get a cool wallet at a fraction of a price of what you would pay for.
Thank you for posting this! I always make them out of duct tape and it’s so tedious! Sewing is way cooler!! Can’t wait to make one for my son!
Thank you so much for this great tutorial!
I´m searching for a wallet having also something to put the coins in. In my idea then it could be difficult sewing it on the left side before slipping the right inside out. Do you have any ideas?
(I hope my english is understandable, haven´t ever talked about sewing in english before…).
Svenja
Where does the fusible interfacing come in? Also what type of fabric are you using for the liner? is the white fabric light weight and the grey fabric heavier? I love these wallets, i am making them for my boys and nephews for Christmas! I hope mine turn out good, have you ever thought about a doing a video tutorial? ( I follow them so much better, haha)
My son would love this! I’m pinning it to my Gifts for Preschoolers (DIY Style!) board–thanks for sharing the directions!!
Hi! Your site requests we use this for personal use only. I’m looking for permission to use this with the boys (and perhaps girls with different fabric choices) in our 4-H club. I think it would be a great way to advance their sewing skills…lots of topstitching practice!
oh yes, please do make these with your 4-H club! The terms are more for those who would want to make and then sell the finished items, that’s why it’s listed for personal use/charity/gift giving only.
thank you…. bless you all, those who sincerely share this kind of tutorial, it really awesome. hope i can make it someday. ^^
This is such a great tutorial, I would love to put it on my blog along with the two wallets I am making for my brother-in-law’s this Christmas. I wanted to get your permission to put it on my blog with a link back to your tutorial. Would that be okay? Just let me know and Thank You for the awesome post!!
so cute. I made one and added a link to your blog here http://handmadegiftsarebest.blogspot.com/b/post-preview?token=8sPq0UIBAAA.IC1_KqS5LowASGKECnKQIg.m__oofuoOagBeMZDgXpHFg&postId=6403775389940550924&type=POST
Impossível não querer fazer igual!!!!
Fantastic tute thanks!
Thank you so much for sharing this pattern. I just made one for my husband and even though I am a novice at sewing it took me just over an hour 🙂 Janet
I love these!! They are so cute!! 🙂
leather wallets for men
Is there a way to download this other than as an html? My granddaughter would enjoy making this, but does not have access to a computer at home. I do not know how to get a pdf for this pattern.
Hi Cynthia! Sure, just highlight and copy/paste the text/pics into a word doc. 🙂
I can’t believe how quick this project was!!!! I forgot to get a 5 year old boy a gift for his birthday today, so I googled homemade gift ideas and voila! I have a lovely gift! I added Velcro and a little flap so his money doesn’t fall out (I’m going to stuff it with some $1 bills 🙂 )
I’ve made this wallet half dozen times or so, and I find I need to make one of the lining pieces 4 inches, otherwise it just doesn’t work the way I follow the assembly instructions.
If left at the 3.75 inches, then it just doesn’t match up on the seam edges when doing the final assembly of the external to the portion with the card slots.
I don’t know if I am missing something or if the pattern is in error. I get that the interior portion is shorter, but if I want the exterior to be able to extend slightly as shown in the final top stitching segment, the pocket lining piece needs to match the measurements of the exterior.
Ah, sorry! I had updated the tutorial for the cut instructions and ended up messing it up. Should be corrected now. So sorry!
Thank you so much for updating this. It is a great pattern, one I’ve used several times now for grandchildren and nieces and nephews.
I don’t know why I am finding the accordion folding so difficult. Too late at night? When you say fold down after 1.5″, do you mean from he first fold line?
Hi Lise,
🙂 Yep, sometimes that can get the best of me, too. I’m happy to help though. Yes, the measurements are from the previous fold line. Does that help? I’ll go back to edit it for clarity. 🙂
Thanks for the clarification. I also had a few trial and errors with it when I made the first couple of wallets, but the new directions will make it so much easier for sewists to figure out the folding.
Thank you! My son is so excited to have a “man” wallet!
Hi Anna,
I like the style of your wallet/card holder, however I am having difficulty in the the accordian fold. I spent many hours trying to get it to workout to 3.75″ and still with no like. Is there a mistake in the measurements? I am going to try a peice 8.5″x 12″ and cut off the access. I’m always coming up sure. I am going by the instructions and measurements. Am I doing something wrong?
Here is what I do
Place your fabric face up. fold the TOP down 2.5 inches.
then measuring from the fold you just made, measure down 1.5 inches and make another fold.
Having the fabric facing up again measure from the second fold, measure down 2 inches and fold upward to the top of fabric.
Then measure up 1.5 inches from 3rd fold and fold down at that point.
It works for me, but I do understand how the instructions can be confusing. If you look closely at the photo of the folded fabric, you can see the directions of the folds and see how the fabric span between each fold varies. Looking at the photo from left to right, you see fold 1 at the 2.5 inch mark and it folds up toward the top of the fabric. Fold 2 is done 1.5 inches from fold 1 and is closer to the top of the fabric edge. fold 3 is 2 inches away from from fold 2 and is closer to the bottom edge of the fabric. Fold 4 is 1.5 inches from fold 3 and is closer to the top edge of the fabric.
I hope this helps. Try practicing with a piece of paper.
Those are awesome!!!!! It’s so nice to have something to make for my grand boys. And your instructions are perfect. Ty for sharing
Thank you! 🙂