
I knew almost right away when Katy first contacted me about Once Upon a Thread which book I would pick. The Tale of Peter Rabbit by Beatrix Potter. It’s been a favorite of mine and my family’s for a long time. It has such beautiful illustrations and of course a little lesson to be learned. (oh and I should add that there’s a cute Peter Rabbit website with fun activities and games for the kids, check it out!)
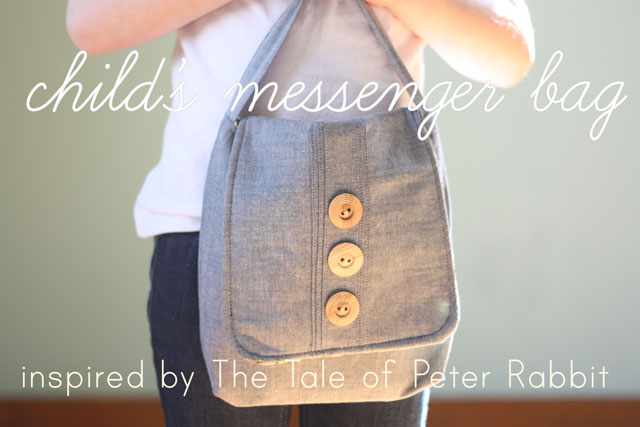

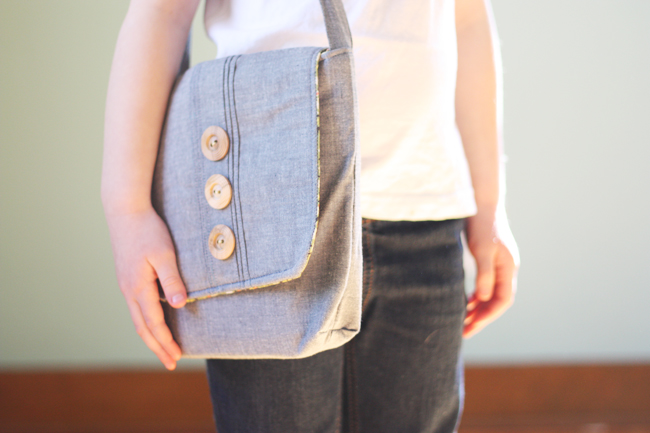
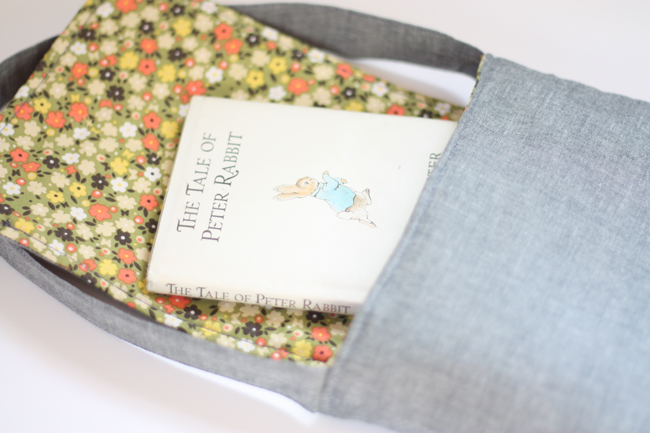
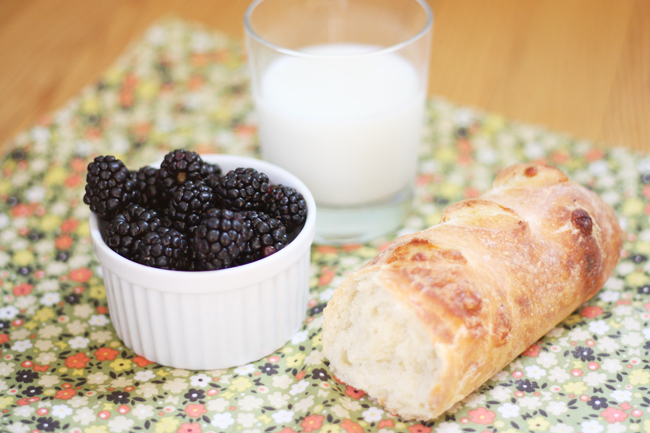
I decided a child sized messenger bag would be just the right fit in peter rabbit’s world. Of course a messenger bag is nothing terribly new, but it was fun to put a peter rabbit classic spin on it. I chose chambray, some pintucks, a tiny calico print, and some wooden buttons to give a hint toward peter’s jacket that got caught in the gooseberry net.

Materials:
- 1/2 yard exterior fabric
- 1/2 yard lining fabric
- fusible fleece or other interfacing of your choice, such as canvas
- 3 buttons
{1/2″ Seam allowance used throughout)
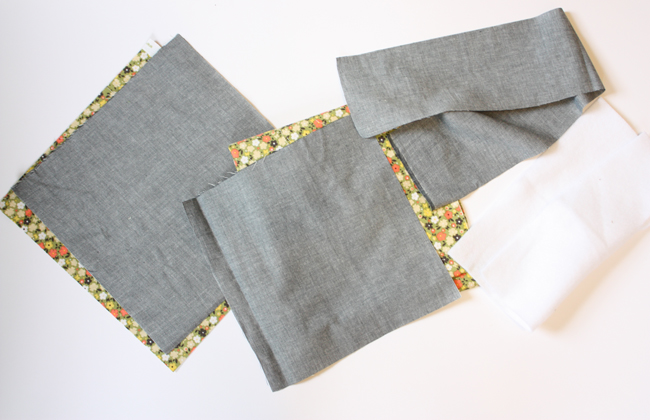
Cutting the pieces:
cut 2 exterior body pieces 10″ x 10″, also 2 pieces fusible fleece
cut 2 lining body pieces 10″ x 10″
cut one handle piece 4″ wide x 21″ long, also lightweight fusible interfacing
cut 1 exterior flap piece 9″ wide by 8.5″ tall
cut 1 lining flap piece 7.5″ wide by 8.5″ tall, also fusible fleece
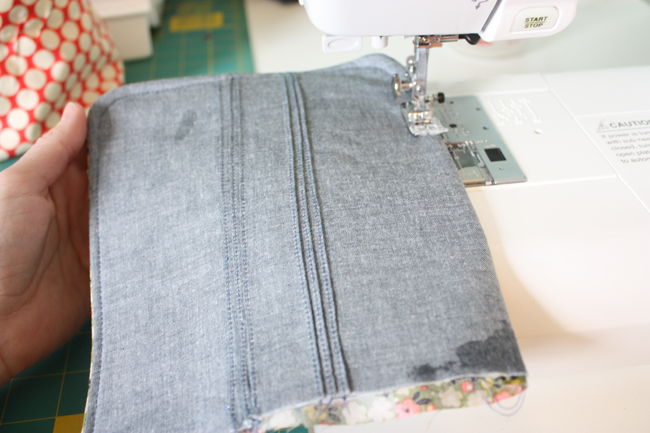
Making the front flap:
To make the pintucks, I used my edgestitching foot on my machine, but you could also use a regular foot.
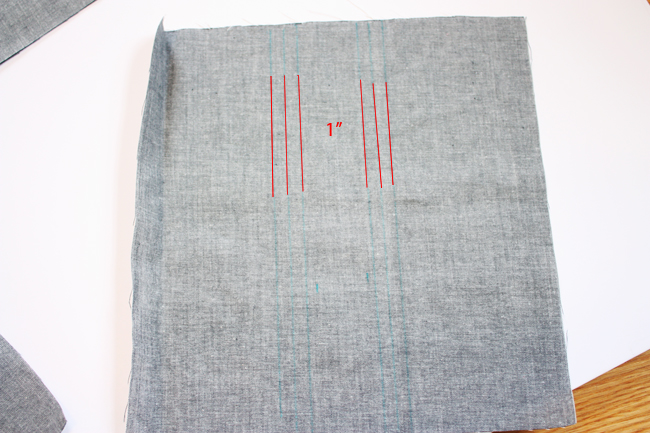
Mark lines on the front flap piece. Leave a gap 1″ wide down the center and mark two lines on either side of the gap. Mark two more lines on either side about 3/8″ apart.
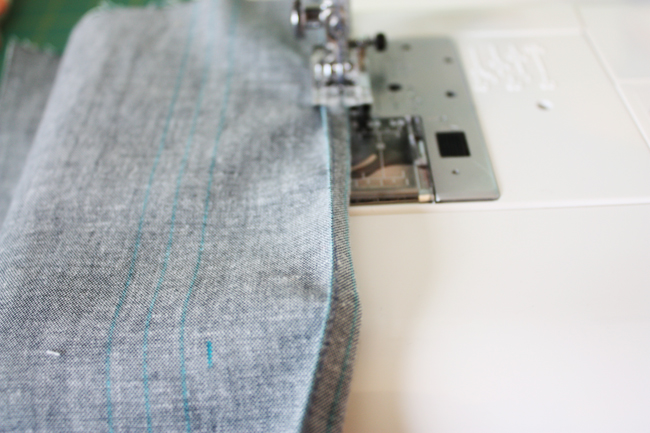
Next you’ll be folding the fabric WRONG sides facing on those lines and stitching close to the edge.

Press pintucks outwards towards edges.
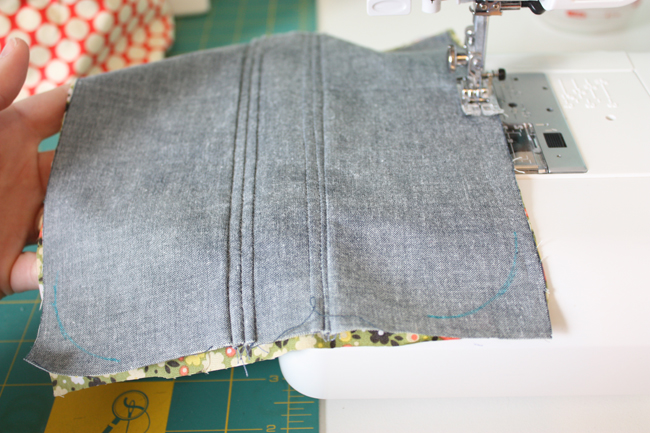
Place the flap exterior piece RIGHT sides facing with the flap lining piece. Use a water soluble pen to make rounded corners on either side, you can use a cup or a camera lens, whatever is round and nearby. Pin and sew. Clip corners.
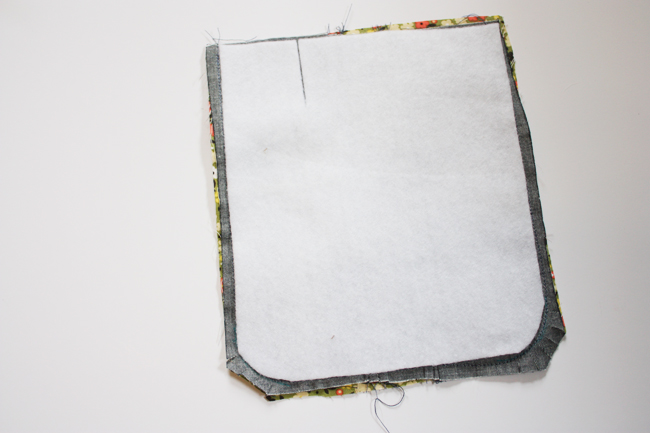
Fuse on fleece, cutting the fleece to fit within the seam allowances.
Turn right side out and topstitch along both side and bottom edges. Set aside.
Sew the handle:
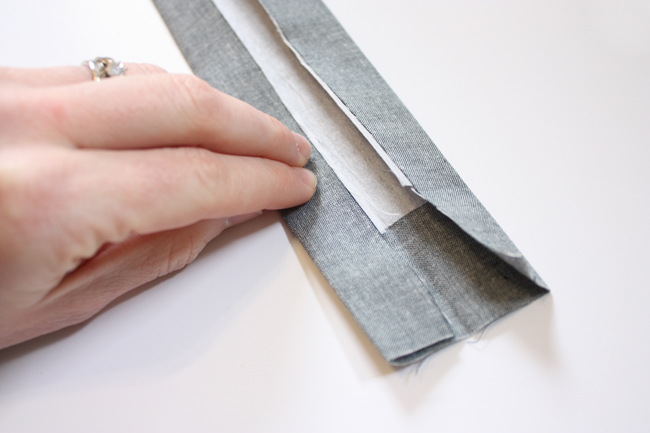
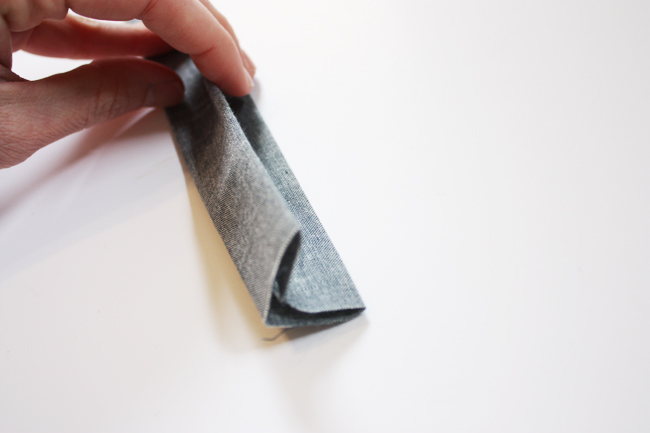
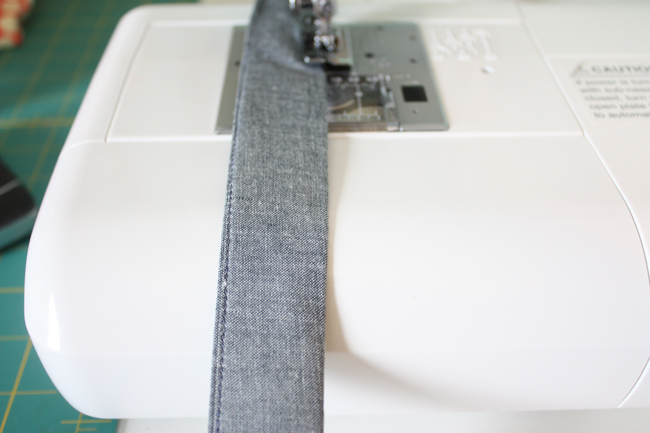
Fuse on the interfacing to the WRONG side of the fabric. Take the handle piece and fold it as you would making bias tape: folding lengthwise in half, opening up and tucking raw edges to that fold line, and then pressing it in half again. Topstitch along both long edges of handle.
Making the body of the bag:
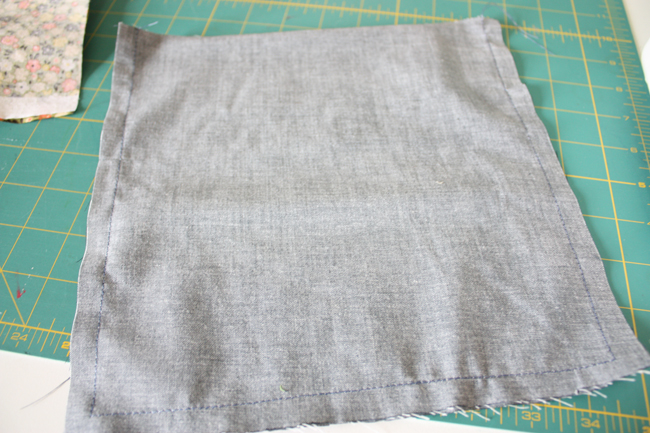
Take your exterior bag pieces, RIGHT sides together. Sew together along both sides and bottom. Here’s where you can stop and fuse on your fleece to the WRONG sides of each of the exterior pieces.

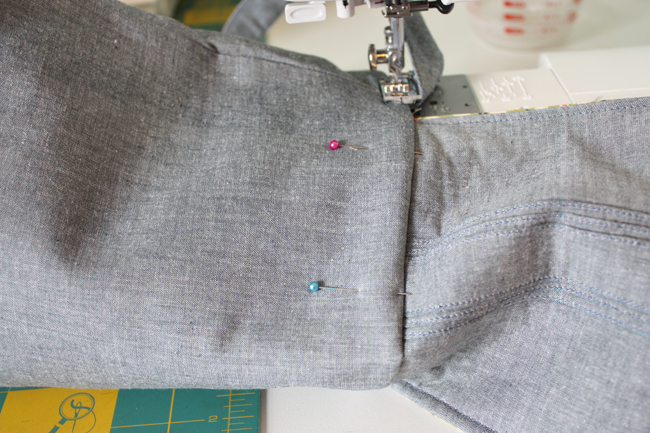
Next pinch the side seam to line up with the bottom seam on each corner. Sew across this triangle 1″ from the tip. Clip corners, repeat for other corner.
Sew the lining:
Take the lining pieces, RIGHT sides together. Sew together along both sides and bottom, but this time leaving a 3″ opening along the bottom edge for turning. Next pinch the side seam to line up with the bottom seam on each corner. Sew across this triangle 1″ from the tip. Clip corners, repeat for other corner.
Finishing the bag:

Pin the handle on each side seam of the bag exterior piece, making sure to not twist the strap, align raw edges. Pin front flap in place placing the flap exterior facing the body exterior, aligning raw edges. Next slip the lining over the exterior/flap/handle aligning raw edges. Readjust pins and pin in place all around top. Sew. Pull bag right side out through opening in lining. Sew the lining shut by tucking in the raw edges, pinning, and sewing shut using a small seam allowance. Push the lining into the bag, press.
Topstitch along the entire opening of the bag, it helps here to use a longer stitch length to get nice even stitches. Sew on the buttons and you’re done!
Oh Anna!!! You never disappoint! A beautiful bag and one of our favorite stories too! 🙂
What a lovely, tasteful children’s bag. Thanks for the tutorial–I have several nieces and nephews that could use something like this!
Forget the kid – I want to make this for me!
So cute. Can’t wait to try and make this for my daughter.
It’s adorable — I love the pintuck and button details!
great!!!
Really sweet bag. Can’t wait to make one (or two) for my wee ones.
Anna, I just love your blog. Thanks for sharing with us all the lovely patterns. You have helped me to enjoy sewing again. You are such a sweet, talented person. Checking out Noodlehead each morning has become a habit for me. I think this little pintucked bag is especially charming. I am anxious to try making one of my own. Thank you!
Oh, I LOVE it. I love the big buttons and everything–so cute! The pintucks are my favorite part!
Sweet! Those pintucks are really a nice touch!
This is really neat! The pintucks and wooden buttons just pull it all together. That snack looks pretty yummy too 🙂
ADORABLE bag! I love Peter Rabbit 🙂
The bag is great! I am most thankful that I now know a method of doing pin tucks! Thanks!
Absolutely darling and I’m LOVING the buttons and pin tuck pleats!!
The pin tucks were an inspired feature! They really make the bag. And your model is not to shabby either!
What a perfect little bag! Love the tuck and button details and it’s unisex, a great project.
Adorable. I want to make one for me! It’s about that time again when I’m tired of all of my purses and I’m ready to make a new one. This is perfect. I believe this will be going on my to-do list.
Definitely going on my to do list for my little niece and nephew ( of course will do something boyish for the nephew ) – plenty thank yous for the tutorialxx
I love this… every thing about it from the fabric, to the little buttons and pintucks- perfection! I am filing this at thecraftersfilebox.com to save for later. Thanks for sharing!
What a lovely bag. Thanks for sharing the tutorial!
Love, love, love!!
Your bag is so adorable! I think I may have to make one for a little girls birthday that’s coming up. It would be the perfect gift along with some new books. Thank you so much for the pattern and instructions!
So beautiful. Classic lines and detail are a true fit in the tiny world of Beatrix Potter. Clean, charming, and classic are the words that come to mind.
SO beautiful. I always love your projects and fabric choices. Definitely goes to my to-do list.
Just Another Day in Paradise
This is so simply perfect – and I love Peter Rabbit as well! Thank you for the tutorial!
I love the pintucks and the wooden buttons. Perfect choices. Great photos as always, Anna.
Perfect!!! I have been looking for a demin child’s bag and this is perfect. I plan on making several of these. Thank you so much of sharing the tutorial.
I love it! Thank you for sharing!
So classy! How the heck do you manage to dream up so much amazing stuff???
Awww. That’s one of my favorites, too. Although, The Velveteen Rabbit is up there, too. Oooh. Velveteeeeen.
Just lovely!
Those pintucks are perfect! so sweet.
I love the pintucks and the buttons- great detail. I’ll have an adult one, please 😉
Anna! This is gorgeous, you’re a machine. I have no idea how you constantly churn our so many tutorials! Beautiful. I’ll definitely be trying this one.
Love the pintucks and your fabric choices. I need to reread Peter Rabbit!!
What a sweet little bag! Thank-you so much for sharing this tutorial – I can’t wait to try it! 🙂
So darling! Love the pictures. You are so generous!
Just a quick note to let you know that a link to this post will be placed on CraftCrave today [16 Mar 01:00am GMT]. Thanks, Maria
There might be a sweeter bag around, but I haven’t seen it!! x
this bag is gorgeous in its simplicity!
We are big fans of Peter Rabbit as well, but maybe for a slightly different reason. Our last name is Abbott…My Mother-in-law tried to name my husband Peter as a baby…he ended up Greg instead thanks to his Dad. Lol
Gorgeous little bag. Did you have to use a special foot for the pintucks?
My 2-year-old just pulled Peter Rabbit off the shelf last night for the very first time. It was so fun to watch her discover this wonderful story! She loved Peter’s little jacket and shoes. I love this bag, inspired from his jacket (and I love the blackberries, bread, and milk!). I think I may make one with brass buttons to reference the book even more closely. 😀
Beautiful bag Anna, thanks I can’t wait to make one for my girl. I love your tutorials.
How beautiful!
Oh I LOVE Beatrix Potter books… Great tutorial as usual 🙂
Oh Anna, this is adorable and such a great tutorial.
Love this messenger bag! The pintucks and big buttons in the middle are so perfect together! I just wish I had a girl to make this for!
Really, such a lovely bag Anna.
Just got done making this Anna! Used purple corduroy for the outside and cute pink and purple ballerina fabric for the inside. My daughter loves it and immediately began sticking her things in it! Thank you for the great tutorial!
Could you be anymore amazing? Really girl. Great pictures as well.
There’s something about a messenger bag that just makes me want to go to the library. It’s darling and what a great tutorial!
This is so cute!! I love everything about it. The chambray, the small floral, the buttons, the pintucks, the rounded bottom, the inspiration…all so so good!
Hello,
i am from Germany and i have found your tutorial for the childs messenger bag. Im loving it!
Thank you for the tutorial and for your other interested things and inspiration.
Thank you so much for this post! I’m new to sewing and used your tutorial for my first bag ever. The results are great; my 3 year old has filled the bag with books and won’t give it back!
Will you do me a favor and write a note in the tutorial in that first paragraph of “Finishing the Bag”? I couldn’t figure out if the lining should be right side out or not when I sewed it all together. I guessed wrong, but my fabric was cute on both sides, so I’m not going to redo it. But when I come back to make another, I’ll need to know which way it goes. Thanks!
hey tifani,
glad you liked the bag! I edited that part, thanks for letting me know. 🙂
Thanks, Anna. 🙂 Here is a link to my bag: http://msmathmom.blogspot.com/2011/05/our-first-bag.html
Hi Anna
I love your cute bag and it totally inspired me to make one as a pressie for my niece.
Do you have a Flikr group for pics? Sorry if I am being ditsy and missing it.
There are pics on my blog post for today http://lizofdandeliondaydreams.blogspot.co.uk/2012/04/messenger-bag.html
Kind regards
Liz
xxxx
Awesome Liz! and here’s the flickr group: http://www.flickr.com/groups/noodleheadtutorials/
Hey I am from Germany (thats why my english isn’t so good).
I really really like your blog and this bag is so cute, i love it.
It’s now a birthday present for my sister. Thank you for the Tutorial:)
Hi!
I really like your tutorial, I’ve already made one bag for myself (even though I did a few things wrong.. :D)
I hope You don’t mind I posted a link to your tutorial on my new blog: http://crafty-lapinka.blogspot.cz/2013/04/crafting-inspiration-i.html.
Have a nice day. :o))
Lapinka
I made this bag today for my niece. It’s a fun project even for a new sewer like me. I am super thankful for this free tutorial! I know my niece will love her new bag.
There is a detail to the sewing that was not in the tutorial that would have been helpful for a novice sewer like me. I will mention it to help out anyone who makes this and is also new to sewing. When you get to the step of sewing the lining to the exterior piece, make sure that the exterior piece is right side out. It is shown right side out in the photo but is not specified exactly. Once you pin the straps and the flap piece to the exterior piece, you pin the lining to it all. The lining has to be wrong side out for this step. There is not a photo for it and so I was really clueless since I’m new to sewing. You will stuff the exterior piece (with pinned on straps and flap piece) into the lining piece. I made a cute pocket for the inner lining and the first time I pinned and sewed the bag together I did it with the lining facing right side out and when I turned the bag my pocket was hidden on the inside. It really was not that big of a deal to rip the seam and re-pin and re-sew. But, if I can save someone from having to make that mistake, that would be nice.
Thanks again for this really great tutorial! I am looking forward to making more of these and hopefully will get better at sewing! I had a lot of firsts with this bag. Pintucks, attaching straps, and fusible fleece facing were all things I’ve never done.
I’m really loving this pattern…I am a ambitious newbie to sewing and am giving this a try. I do have a few basic questions:
1) I’ve never done rounded corners before…usually if I can find a video to follow I’m ok. Is what is shown in this youtube video the correct method for this bag? http://www.youtube.com/watch?v=bggJt8r7L8w
2) I know the seam allowance is 1/2″ throughout…it looks smaller on the handle though. Is that just me?
Again, loving your work. Sorry for the dumb questions, I really am a complete newbie having only sewn a couple of pillowcases and I am teaching myself.
This is my second time making this bag and both times I did not have enough fabric for the exterior flap after I cut the 2 body pieces and 1 handle. I have enough on the other fat quarter to do the 2 body pieces and one flap. I thought maybe I had turned the fabric the wrong way but to get the handle piece I have to cut it one way. Am I missing something?
I’ll double check, definitely possible there’s a mistake. I’ll update the post and leave a message here if/when I find the error. 🙂
Thanks!
Yep, mistake! Sorry, I’ve updated it to list 1/2 yard cuts. Again, apologies!
Thanks so much! This is such a cute bag!