
Hi everybody! Hope you had a lovely weekend. Several months ago Shannon from Luvinthemommyhood and I got chatting about sewing with knits. We were both on a little kick and wanting to sew more with knits and just learn a few more tricks.
Who doesn’t love a comfy knit t-shirt or top? I think almost everything I own (besides some of the things I’ve made for myself) is made with knit fabric. It’s soft, stretchy, and downright comfy!

And be sure to stop over at Luvinthemommyhood to check out Shannon’s super cute Poppy Top!

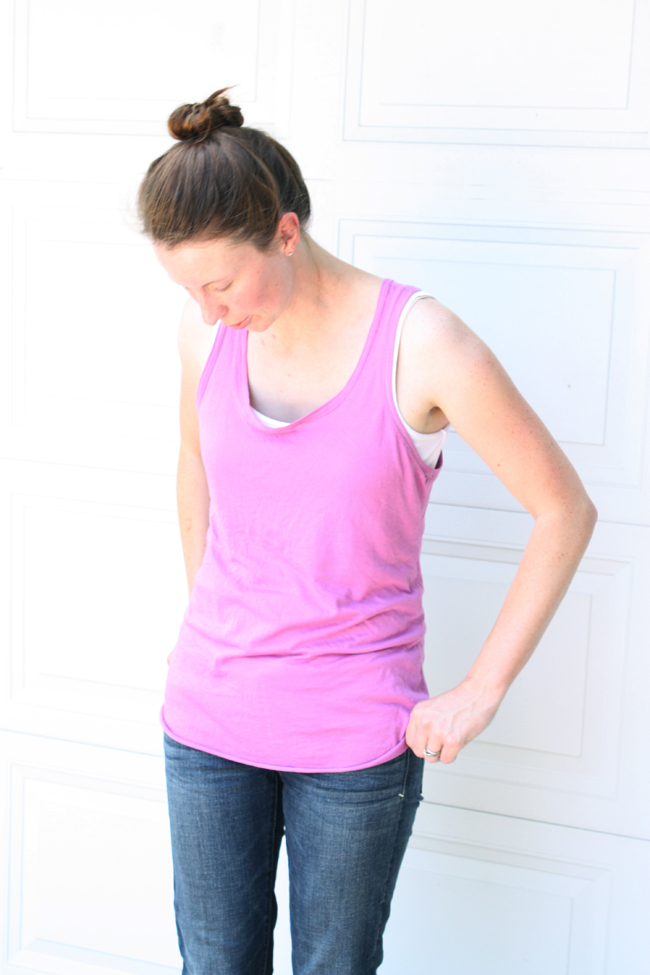
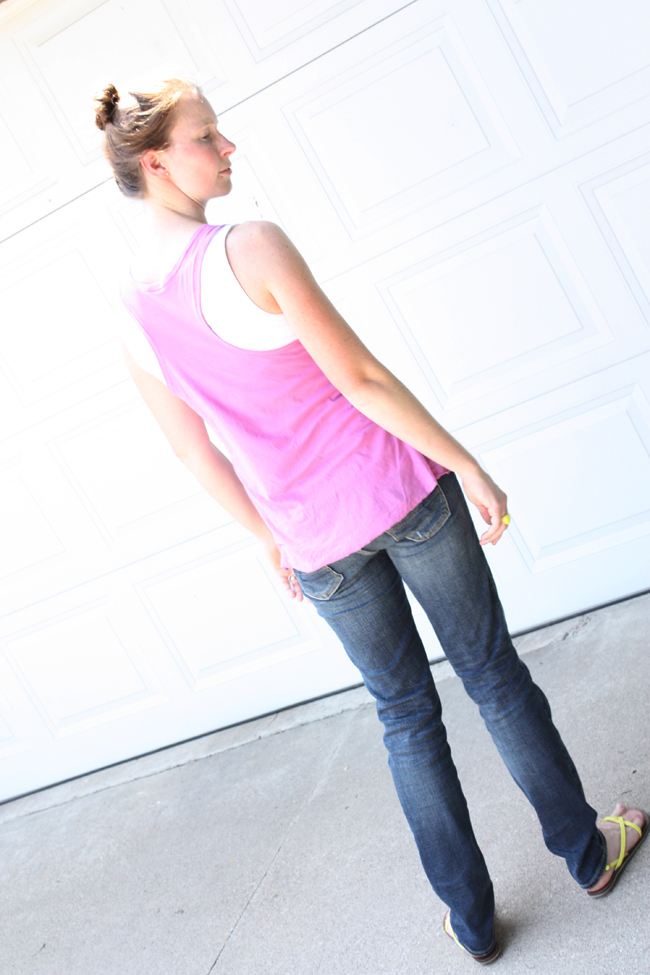
For the first week I wanted to share something nice and cool for these hot and humid summer months: a basic racerback tank. You might have remembered I made one similar using regular woven fabric cut on the bias, this is a little variation on that same idea.
Materials:
1 yard knit fabric, something with stretch to it
ball point needle
thread (polyester or polyester blend is best)
walking foot (optional)
twin needle (optional)
I love this project because I scored a nice lightweight stretchy knit for $1 a yard at my local Hancock fabrics (you’d be able to find something similar at joanns, etc). It took me about an hour to make. So it’s a one dollar, one hour project, pretty cool right?!
Making the pattern:
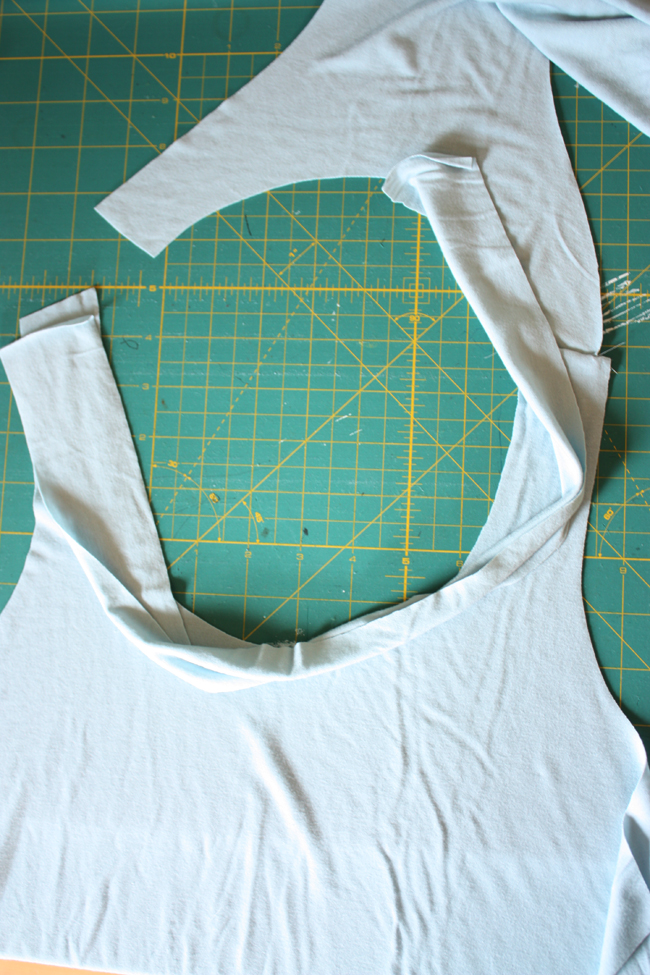
Grab a regular t-shirt that fits you well.
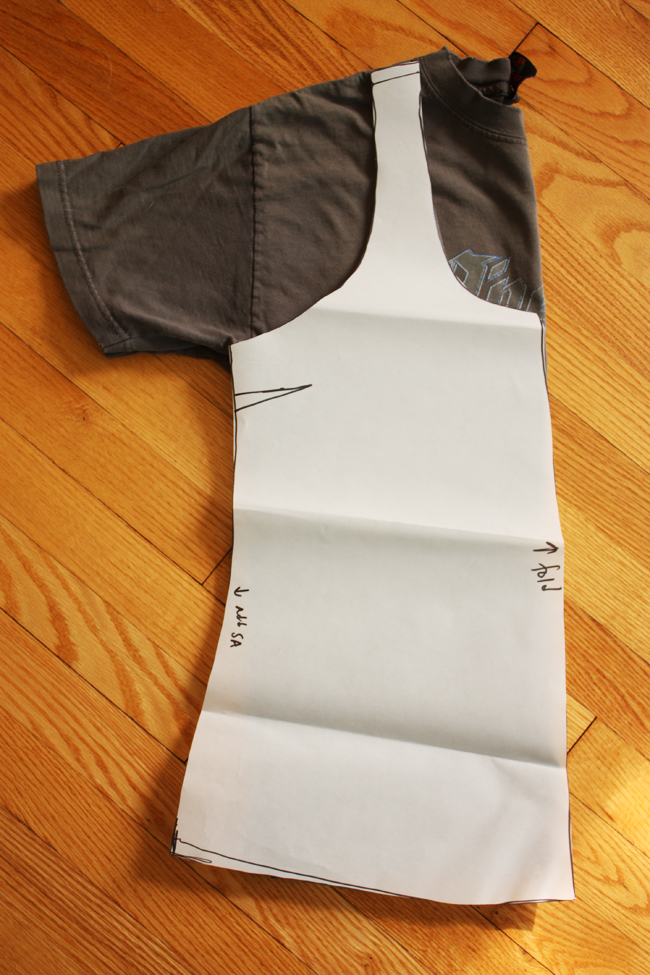
Fold it in half. You don’t really have to be too precise here, just make a similar shape as to what I show in this picture. I like layering my tanks so I wanted somewhat loose fitting and long. Like a higher neckline? You can do that! just move up the curve of the neckline. It’s amazing what you can do when you make your own clothes. Oh, and if you wanted to try this with a woven cut on the bias, you can add a little dart right under the arm on the front piece.
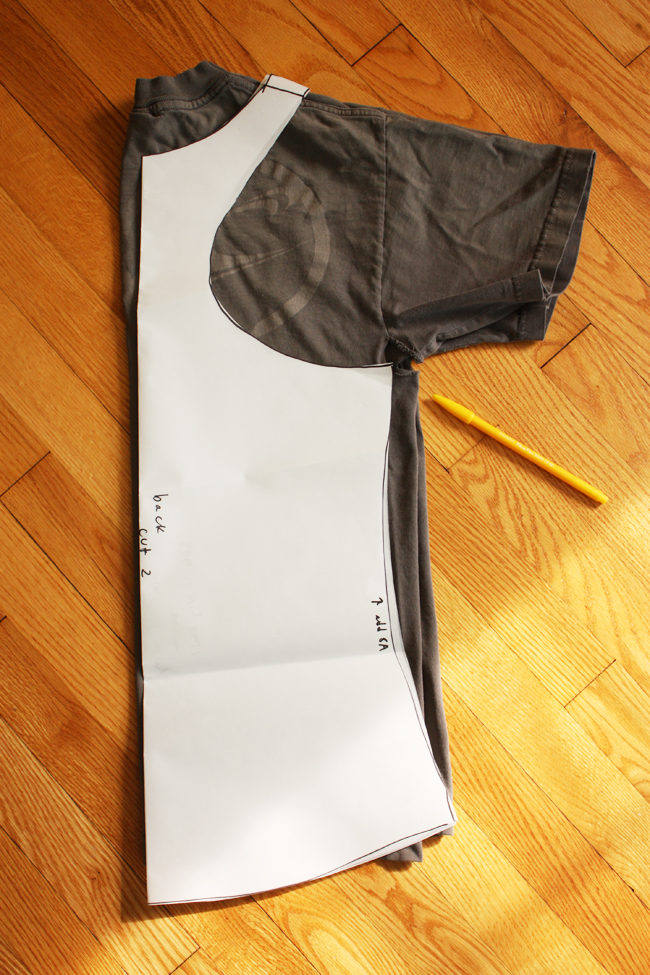
Now fold the t-shirt in half the other way, this will be the back. Again, just make the basic shape, nothing too scientific about it. Just make sure the bottom of the arm opening matches that of you existing t-shirt or slightly higher. Cut out your 2 pattern pieces being sure to mark where to place the pattern on the fold.
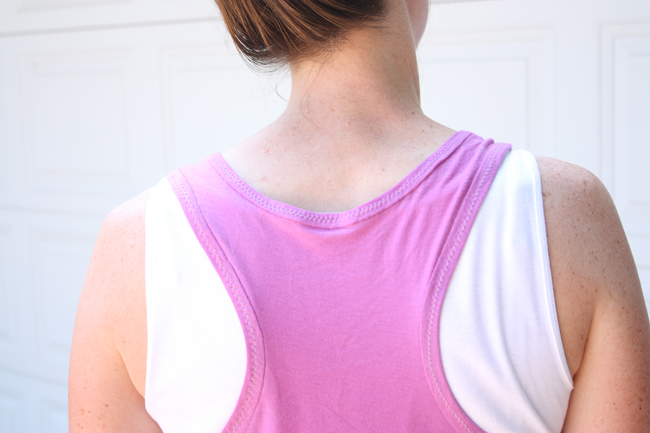
Next, cut 2″ wide strips across the grain of the fabric (side to side the stretchy way). This will be the binding for the neck and arm holes.
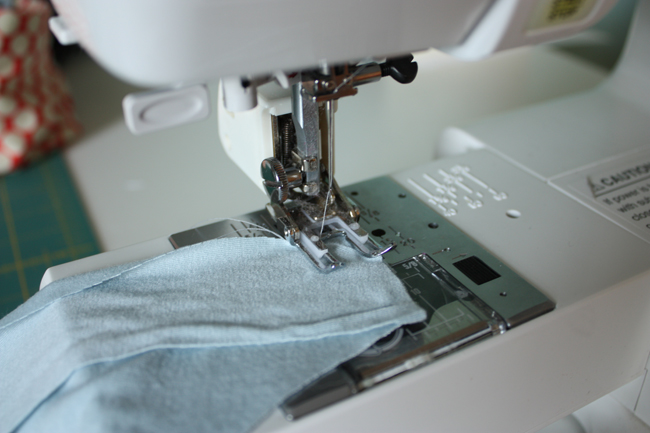
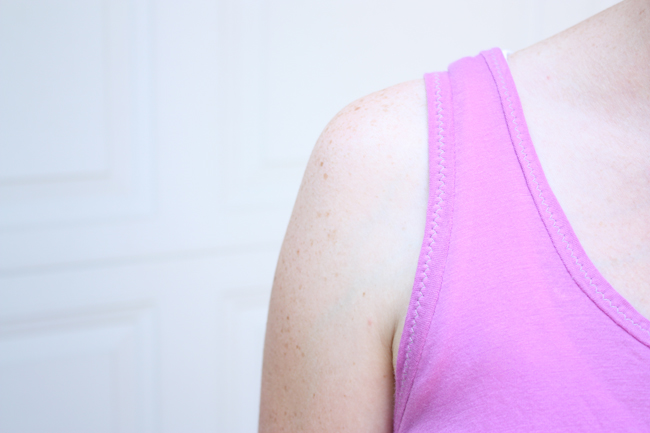
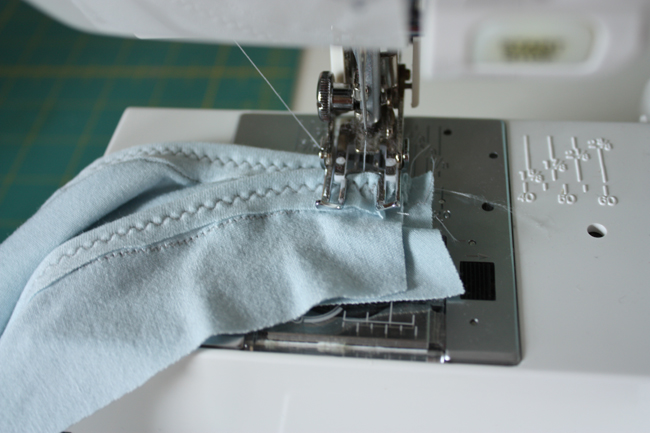
Sew one shoulder seam together. You could use a walking foot and a stitch that looks something like this might be an option on your machine:

Don’t worry if your machine just has a basic stitch, just use that and lengthen your stitch length or do a narrow and long zig zag stitch.
[I do want to stop and point out that Omi Creates does a really nice job of explaining this same binding technique that I’m using here with a baby onesie, so I’d definitely recommend at least reading through her tutorial for some great tips about sewing with knits!]
Next grab one of the 2″ binding strips and cut it to be about 75% of the total length you need to go around the neck opening and around the back part of the neck opening. You might want to stretch your binding a bit and see if it will stretch enough to fit the whole length since you’ll be stretching the binding slightly as you sew it on to the tank. Place it RIGHT sides together with the tank, aligning raw edges. I sewed it using a 3/8″ seam allowance.
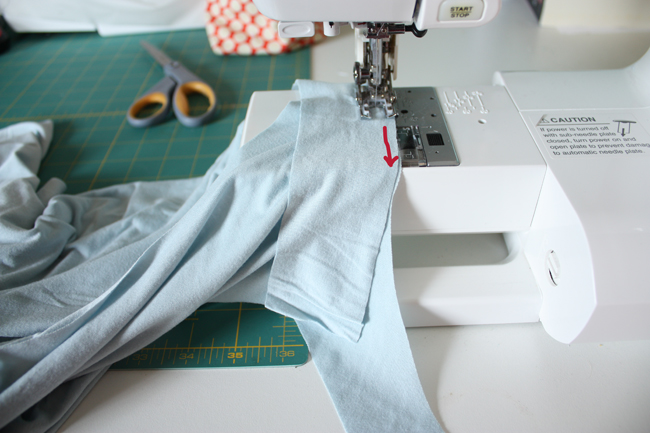
Stretch the binding strip slightly as you sew (in the direction of the red arrow, towards you), but just let the front and back of the tank pieces get pulled along by the feed dogs on your machine.

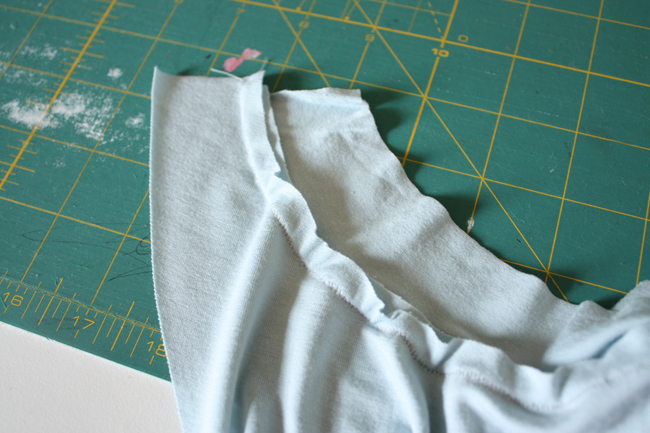
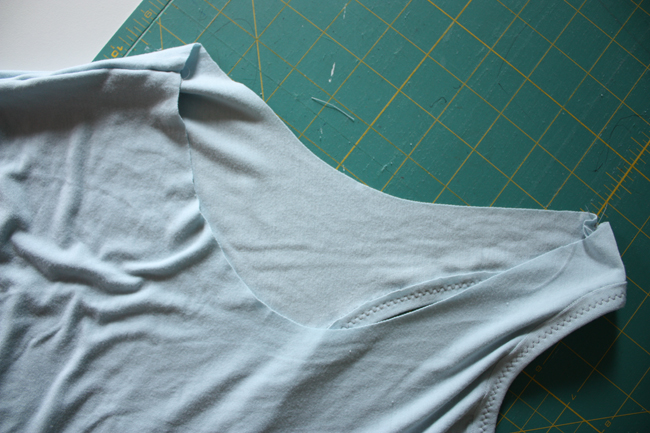
Press with seam facing upwards toward the neck opening. Next you’ll flip the binding around the the back (WRONG) side of the fabric like this:
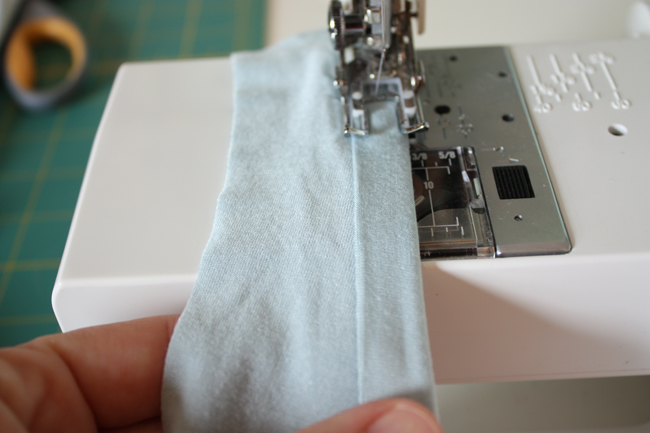
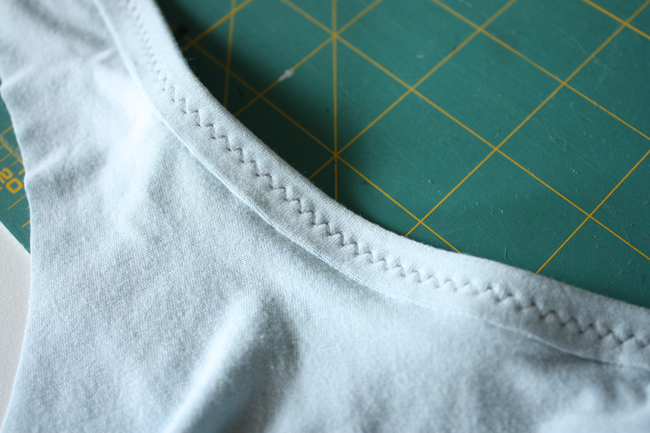
You’ll want to sew on the top side though since the stitching will be very visible.

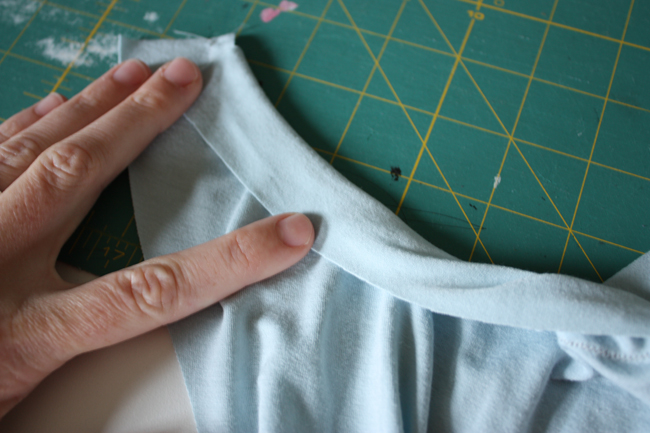
Set your machine to a medium width, medium length zig zag stitch and sew all along the binding, trying to keep the binding about the same width. You could pin it all in place, but I found that it was pretty easy just to fold it over and sew as I went. Sewing on top of the binding is where you could alternately use a twin needle instead of a zig zag stitch.
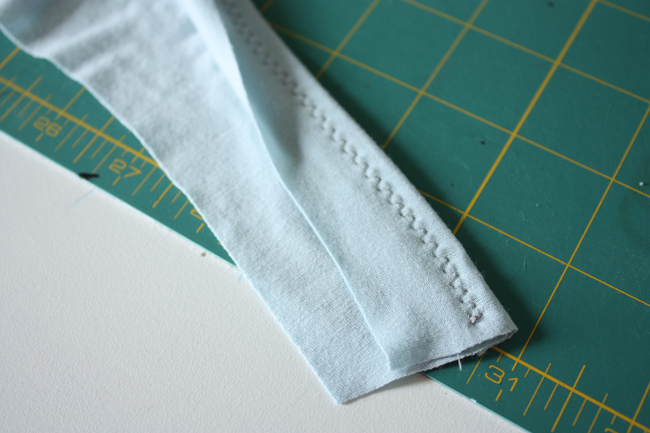
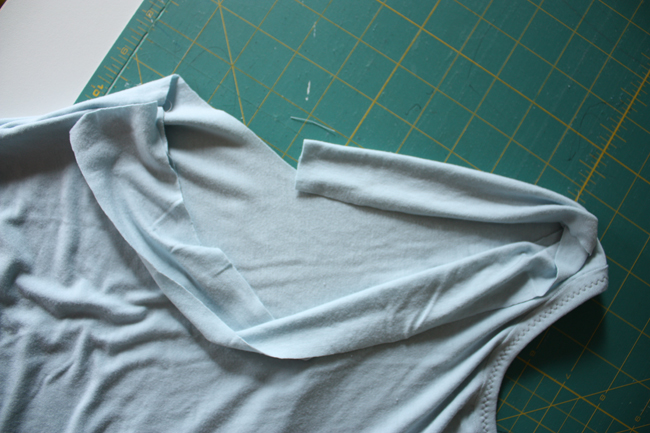
Trim excess binding from back:

Sew the remaining shoulder seam together.
Then sew both side seams (no pic of this but, just put them RIGHT sides facing and sew). Press.
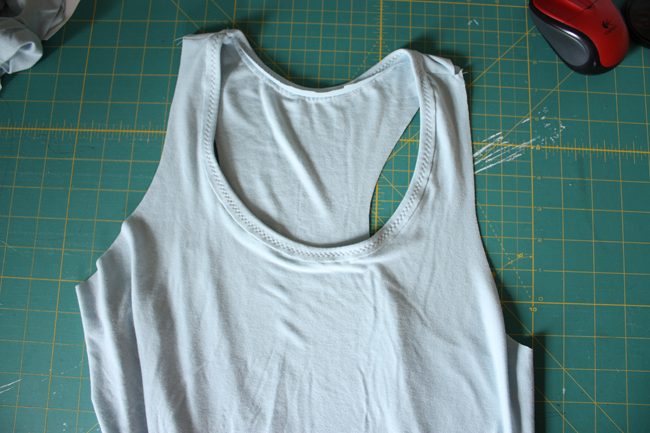
Sewing the armhole binding is similar to the neck binding.
Again, cut the binding strips to about 75% of the total length you’ll need.
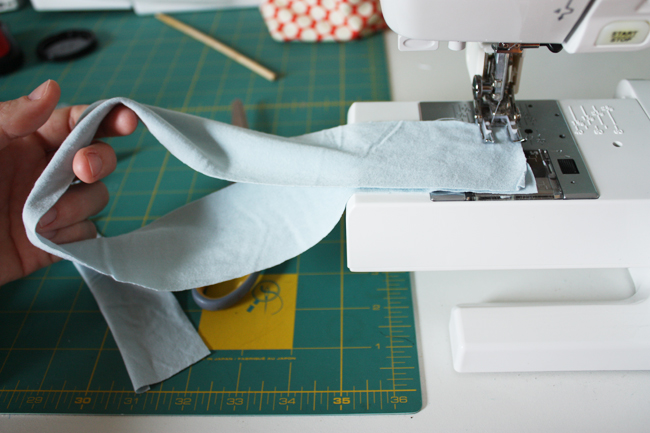
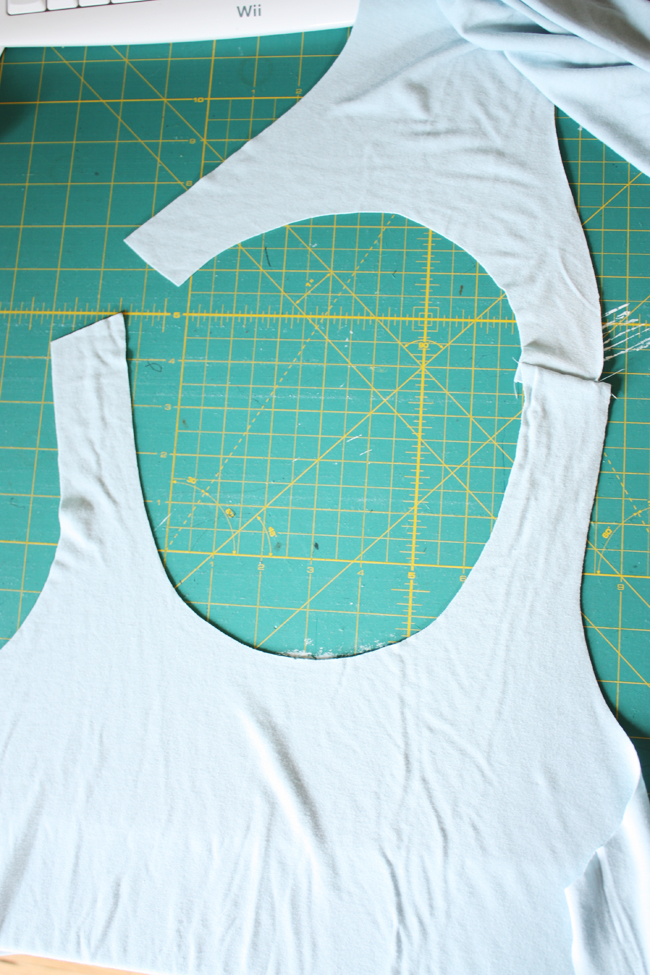
But this time, you’ll fold in in a loop and sew the seam along the short side of the binding strips, making a circle. Attach the binding the same way as the neck seam. That’s it! You could hem the bottom, but I really like the raw edge look, so I just left mine. Now put on your tank and get some relief of the heat.


The tank looks great! I’m glad you’re doing a series on knits. I usually steer clear of them even though they’re more comfy because I had a few mishaps trying to sew knit stuff in the past.
Great top! Looks like the perfect project to break out my new twin needle for the first time.
~JamieS@ Scattered Thoughts of a Crafty Mom
Anna! you are SUCH a talented woman! thanks for sharing…they look great!
Woot! Just another reason I’ve got to save up for a walking foot. 🙂
love. IT! need to try this pronto 🙂
LOVING your blog! Tons of AWESOME tutorials and inspiration!! I found you through Pinterest, someone pinned your patchwork bolster pillow tutorial. Grabbed your button for my blog: http://michele-byyourside.blogspot.com/2009/03/blogs-i-love.html
Thanks,
~Michele
What a stunning D.I.Y!
Great idea! Looking forward to the posts.
I’ll be following along – I have some knit fabric, just am too chicken to actually use it. I also have a walking foot that I haven’t successfully managed to attach to my sewing machine yet – maybe I need to dig the manual out if I can find it after 25 years!! Your racer tank looks like a great first knit project for me!
Ok, you really got me going now. I have never, ever felt like I could sew with knits without a serger! I’ll be watching for sure!
p.s. I love it that you sew on full rabbit.
Your timing is perfect! Knits are scary to me, but your post makes it look manageable. I tried to make my daughter a dress from 2 re-purposed shirts…not so good. Am I brave enough to try again?
Jamie
Awesome Anna! What a cute tank! It looks very “you” as well.
So my frustration with sewing knits is that my machine sucks the fabric in and eats it. I have a straight stitch plate, but I thought if wasn’t a good idea to sew knits with a straight stitch because of risk of stitches popping? I managed yoga skirts for the girls, but every time I’d try to hem Claire’s I would just tear it up. Any thoughts? I want to keep trying, but that fabric eating is maddening.
Yay! I could definitely use any tips you have on sewing with knits! (and I love that last pic!)
I like the binding technique. It looks very professional. I’m very excited to see what you two come up with 🙂 I love knits!
I love this top and can’t wait for the series. Thanks so much!
Great tutorial and shirt – I like the trim! I just wished I had a better sewing machine – the idea of sewing knits on my current machine makes me slightly nervous…
Oh my goodness it’s serrendipity. I have just made plans to do some serious knit sewing and I have not done much in the past. This will be so helpful, thank you so much in advance.
I have a query. Why do you put the side seams wrong sides facing to sew? Wouldn’t that make the seam on the wrong side?
Cheers,
Robyn
Nice tutorial! I also love knits.
Thanks for sharing. I love the binding technique. It has been years since I worked with knits. Might give it a try again.
I’m so excited for this series! I can’t wait to try this binding technique. Thanks for the walking foot tip too. 🙂 Your tank looks perfect!! 🙂
Awesome timing! My 3yo keeps asking me to sew her underwear; so far I have made two pairs, but I am definitely in the market for some knits pointers 🙂
When I sewed the bindings on the waist and leg holes, I left it in a long strip, then once I’d stitched the whole way around the first time, I lifted the foot, lifted the needle, and rotated the fabric to sew the binding ends together, formimg the loop. I like not guessing what length to make it.
Great tutorial, Anna!
Just a quick note to let you know that a link to this post will be placed on CraftCrave today [19 Jul 01:00am GMT]. Thanks, Maria
Thanks so much for posting this tutorial! Sewing is scary for me but I might try this one! I love how you’ve explained everything in such an easy way! Thanks again! x Lily
You’re so cute. Someday I need to replace my knit skirts that I wear to death.
I never thought of using the knit fabric for bias binding…and certainly didn’t know about cutting it at 75% of the length. So thanks for a great tip!
perfect. found my project for the day!
Anna, wonderful job with this tutorial. Makes me want to run out and buy fabric to make a couple! Keep up the great job!
What a great tank! It looks great on you, and I love your hair up high like that!
Nice tank! I like your binding method. I will definitely try that with my next shirt.
THIS. IS. AWESOME. You rock!!!
Mad Skills! I need to do this, I have always been so fearful of making clothes for myself, but this looks easy. Or maybe you just make it look easy…either way, thanks for sharing!
I agree with everyone – you.so.totally.rock!! This is beyond cool!
Sooo want to try this! You make it look so easy! You are totally awesome! 🙂
lovely binding! I’ll have to come back and study yours and the onesie tutorial more closely. Thanks for all the knits-sewing ideas!
seriously Anna?? you are the queen of taking something intimidating and making it easy. I love that about you!!
Love it!!! I linked to your tutorial on Craft Gossip Sewing:
http://sewing.craftgossip.com/tutorial-make-a-racerback-tank-from-knit-fabric/2011/07/21/
–Anne
Love the racerback t-shirt! Looks so comfy. I’m going to try it!
http://www.seaminglysmitten.blogspot.com
Jenny
I think this is a fantastic tutorial.. I have messed up a few knit projects in the past- trial and error- I wish I had this to start with!! Will definately mark this page and come back to it.
And by the way I LOVE all your bag tutorials. Thanks for sharing! =)
I love the style of this shirt, Anna. You make it look easy 🙂 The color is beautiful, too. Really excited for this series on knits.
This is adorable! Nice job and the tutorial is great.
I love this. I tried finishing the edges of a tank dress earlier this summer but I applied a strip of knit kind of like bias tape instead. It just made the neckline roll out and it drove me nuts. I will definitely do this next time instead. Thank you Anna!
I’m excited to read this series! Thanks for sharing.
I really appreciate you sharing the settings on your machine. It’s really helpful especially for a novice. Thanks so much. 🙂
Thanks so much!!! I have been working on a racerback dress project and just couldnt seem to get the binding just right, but your tips and instruction are so clear and helpful…. Thanks Again!!
I just want to say, THANK YOU. I”ve not been sewing for very long at all and a couple of months ago I cut up my favourite knit dress in the whole world (it had several holes in it, sadly- it was time) to make a pattern out of it. Everything went well until I came to sewing the binding on the neckline and armholes. Aside from an initial problem with the tension in the yarn on my machine, I couldn’t for the life of me get the binding to bite the whole way round- so there are some really awkward holes between the binding and the fabric- now I can rip it all off knowing I safely know how to fix it! Hurrah!! Cheers 🙂
great tutorial… thanks! i laughed at the turtle and the rabbit on your machine, so funny!! 🙂
It is really a great element to buy women’s tank tops and i just love the color of this tank tops and the net sleeves in the top really impresses me a lot.It’s appreciative.http://www.apparelnbags.com/womens-tanks-and-camis.htm
THANK YOU SO MUCH. GREAT TUTORIAL. THANK YOU
ชอบจังเลยค่ะ
Gppd idea on the tanks. I never wear them they always look bad on me hanging to low in the front. I can make these. Thanks for sharing.
You make it look so easy – I just fell out with my sewing machine over this – my needle unthreaded itself about 15 times, and I had to take the machine apart 5 times to get the fabric out as the needled kept getting stuck and sewing over and over and the material got sort of eaten into the machine! Neither of these things has ever happened before over and over again. I’m not sure if it’s the stretch fabric, the walking foot, or the stretch stitch but my machine was seriously unhappy. I tried changing the tension and the stitch but it kept going wrong, the top took me 4 hours in the end and is significantly shorter than planned after having to hack off the bottom after very bad hemming incident – I should have left the edge raw like you did. Am feeling a bit dejected now – maybe I should stick to making handbags…
Hang in there Anne! Sorry you’re struggling. Sometimes it’s a matter of whatever knit fabric you have or getting to know how your particular machine handles knits. I promise it’s worth sticking with!