
Hi there! Welcome to simplicity skirt 2226 sew along. Whether you’ve been sewing garments for years, or if this is your first time using a commercial pattern, we’re going to sew along together and by the end of the week we’ll have a really cute skirt that’ll fit right in to your wardrobe.
Today we’ll discuss sizing, tracing pattern pieces (optional), cutting your pattern pieces and fusing on interfacing.
Sizing:
So you’re probably looking at the back of the pattern envelope where the sizing information is, right? Scratching your head.
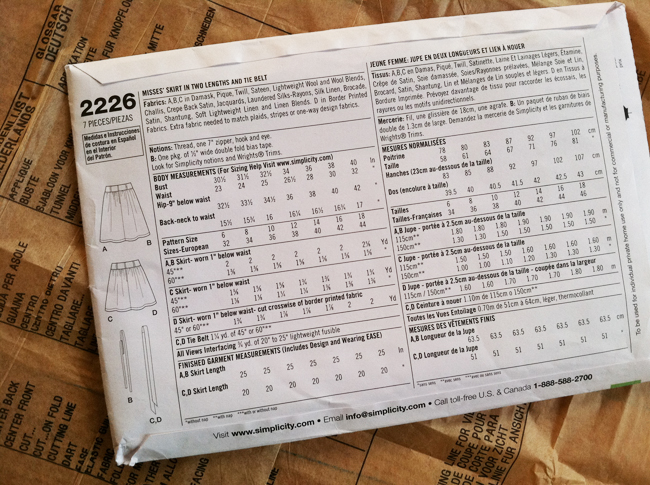
I believe with my measurements I should have made a size 14 skirt, which would have been way too big. I only really know that from experience that the wearing ease (or the amount of room built into the pattern) has typically been too much. I used a size 6, but could have definitely gone with a size 8, and I typically wear a size 4 pants/jeans. My best advice if you’re still unsure what size to use would be to use some muslin or junk fabric and cut out the waistband pieces (pieces 4 & 5) and sew them together, it should give you a pretty good idea on the sizing.
They do stress one thing in the pattern quite a bit, which is that the skirt is designed to be worn 1″ below your waist (your natural waist). So if you’re used to wearing things lower on your waist, this skirt isn’t designed to be worn that way. If you’re still determined to make a skirt that sits lower, you might want to make a size or two larger. Again, a muslin would come in handy to help figure it all out.
Tracing:
I use a large roll of tracing paper and a sharpie to trace all my patterns. I never cut the actual pattern pieces for two reasons 1.) I want to keep the pattern intact in case I ever need to make the garment in another size (really essential for kids clothes) 2.) durability, the tracing paper I use is much more durable and sturdy than the tissue pattern pieces which tend to rip and tear.
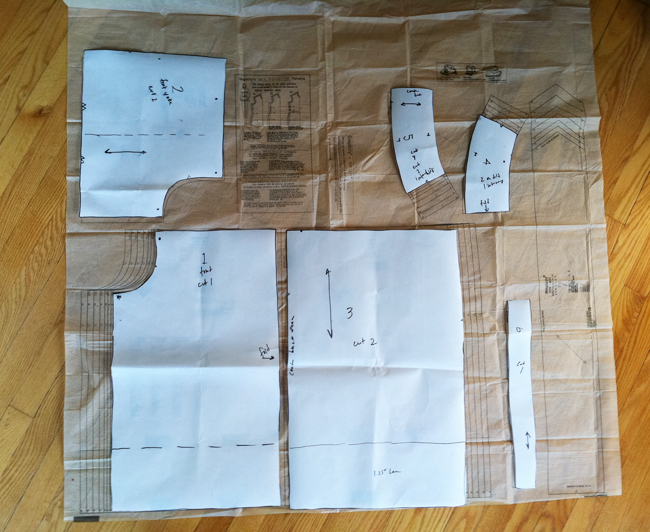
So go ahead and trace the pattern pieces. For view C (which I’ll be sewing, but I’m skipping the fabric ties/belt) you’ll need pieces 1,2,3,4,5 and 6.
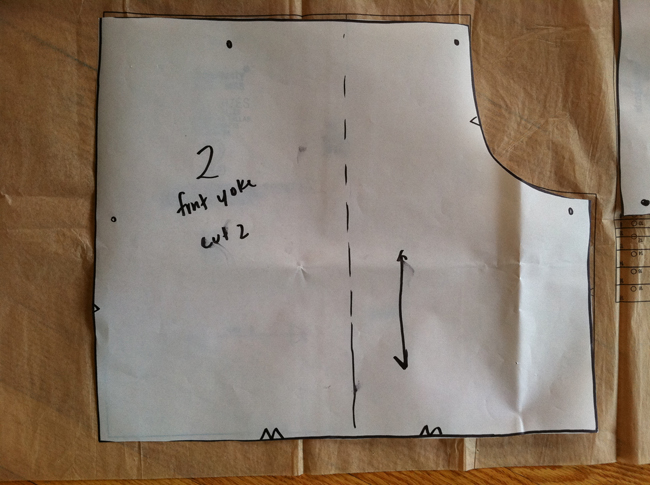
You’ll want to be sure to trace and mark all the notches and dots as well as indicated grainlines and which pieces are to be aligned on the fold. Notches are used to help align pieces when sewing, dots are typically used for placement or stitching start/stop points. The grainline shows you how to place your pattern pieces on your fabric, essential for when you’re using directional prints and ensuring your pieces will sew together well.
* Be sure to wash/dry and press your fabric before cutting.
Cutting:
Fold your fabric so that the WRONG sides are facing, aligning selvage edges.
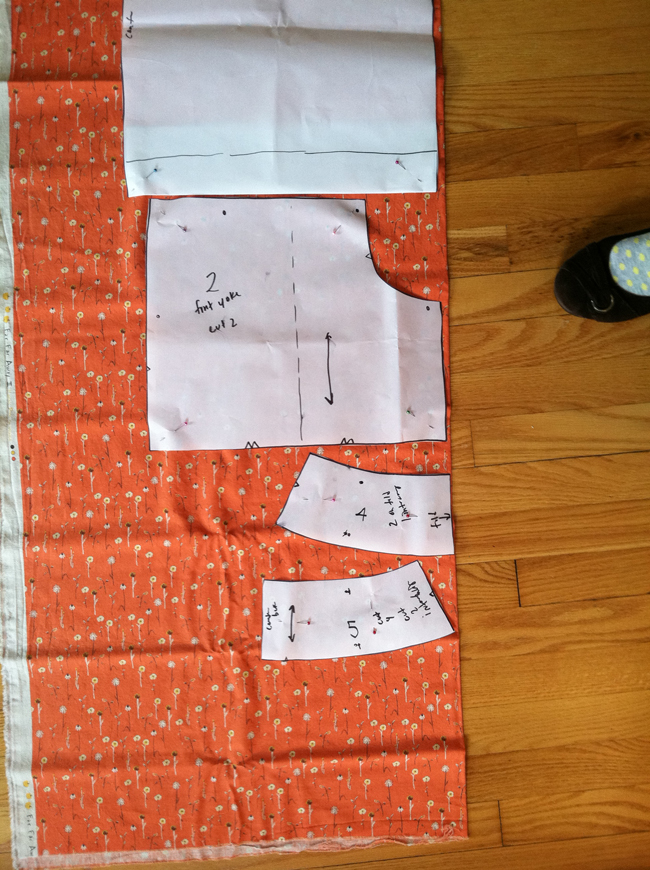
Pin your pattern pieces in place like so (there are also cutting diagrams on page 3 of the instruction pages, I did mine a little differently, but it’s up to you):

You can either use a scissors, pinking shears, or a rotary cutter (28mm) and self healing cutting mat, which really makes quick work out of the cutting process. Be sure to align pieces 1 & 4 on the fold.

To mark the notches cut outwards away from the pattern piece to note each notch. To mark any dots, use a pin and water soluble pen to poke through the pattern piece and mark on the fabric.
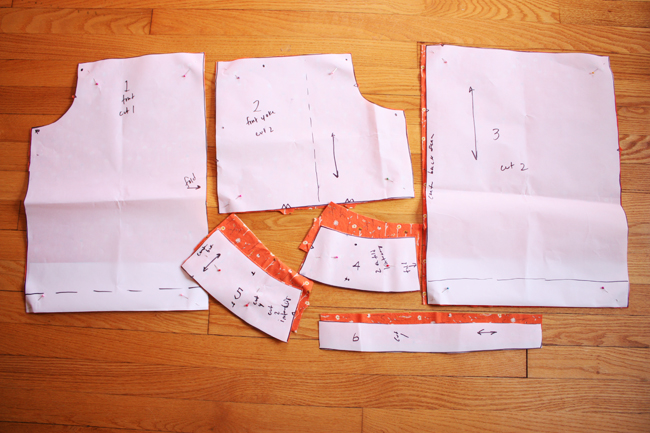
And after all the cutting, you’ll have your pieces:
Interfacing:
You’ll need to cut pieces 4 & 5 out of a lightweight fusible interfacing as well.
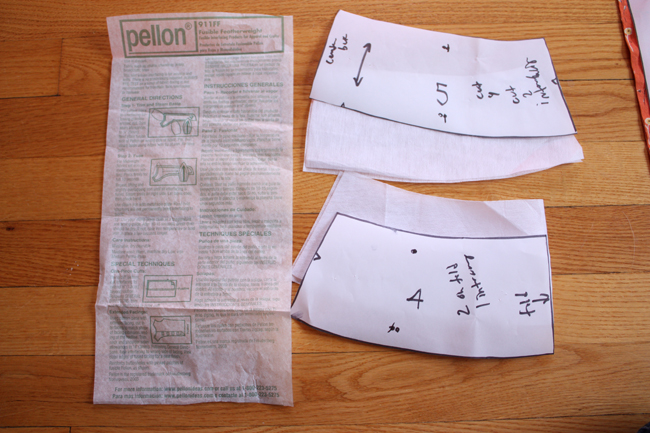
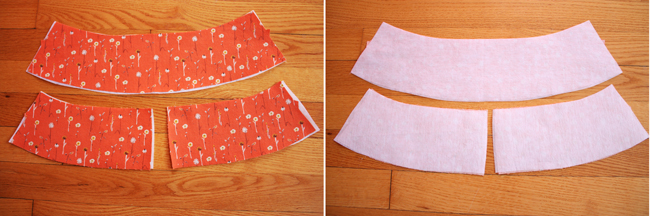
Fuse the interfacing to one set of the waistband pieces (you’ll have two sets, one for the waistband and the other is the waistband facing). Follow manufacturers instructions to fuse on the interfacing to the WRONG sides of pieces 4 & 5.
That’s all for today, take a little break, pat yourself on that back, and I’ll see you here tomorrow for Day 2!
[I’m going to run this sew along a little differently than my typical blog posts, if you have any questions or comments or suggestions/tips please leave them in the comments section and I’ll respond to them there. Usually I like to reply to comments directly by email when time allows, but this way the info will be there for anyone who joins along.]
Thanks for stopping by!
Top tip about doing a trial waistband to check sizing! Genius! The sizing with patterns is one of the things that scares me the most. I’d not managed to prewash the fabric before so that’s in the machine and then I’m going to trace the waist bits and have a play until I’m confident about sizing!
Yes! Thank you for the waistband tip, I was really concerned about finding the right size. I have had this marked on my calendar since you announced the sew along. I am so excited!
Genifer
Yay! I too thank you for the waistband sizing tip, so smart. 🙂 So excited to get started on this!
Yeah, the waistband tip may just revolutionize my life… 🙂
That’s quite a variation in sizing! Love your tip to cut out the waistband in muslin or junk fabric to figure out the size you need. 🙂
Off to get tracing paper (I wonder if parchment would do) and put the fabric in the laundry. We are so used to NOT washing fabric for crafting/bags etc, I didn’t even think of this! And thanks for the sizing tips!
I am not a skirt person so I am playing along with a shirt but still doing the same steps 🙂 thanks for “making” me stick to a plan hehe
What a great idea to use muslin to figure out your waistband size, I had already washed my fabric, so I am ready to go!
I love how you organize everything and take the mystery out of sewing. It all seems very doable. Where do you find tracing paper on a roll? Everything I find seems too opaque or quite expensive.
So glad you’re all ready to sew up a skirt, it makes me really happy! Donna, here’s a good option for tracing paper on a roll: http://www.nearseanaturals.com/item.php?id=2117 you can also find it on sites like amazon as well.
Oh fun! I wish I was joining in, but I’ll just put in my two cents instead, haha! For sizing, I always look at the finished measurements on the bottom back of the pattern cover, and add whatever ease I want to my own measurements to figure out the right size. However, often patterns (like this one) just have the finished length measurement on the back cover, but the actual pattern pieces will usually have the finished hip or waist measurements on them. That’s always been helpful to me, so maybe it will help someone else too :).
I’m so glad I read this before cutting, I’ll definately test the waist band first. I also love the tip to cut the notches out like that instead of in to the fabric or drawing them on. I usually just don’t include them which probably accounts for a lot of my failures!
Great idea with the trial waistband, how many times have I carefully measured myself, gone with that pattern size and ended up with something 2 sizes too large?
My top tips for this stage would be gently ironing the pattern pieces and fabric so everything is nice and flat and cutting little snips into the seam allowance at the point of each triangle instead of the notches outward. I used to do them that way too but since switching to snips I find the much easier and more accurate.
Exactly why I hadn’t started this pattern yet, sizing! DEF going to cut out a muslin waistband first, you’re so clever! 🙂
Thanks for doing this Anna!
My fabric’s in the dryer as we speak. Hopefully I can get it cut out tonight! 🙂
I have already cut my fabric, and realise now that I may have picked the wrong size… I wanted my skirt to sit lower on my hips, so cut the size 16 when I’m a size 4 in real life.
I have made skirts from them before and find that they are too high on my waist.
Is anyone else doing the view D like me?
Thanks Anna for organizing, and the clever tips.
I hope you have heaps of fun with the sew-along, and I can’t wait to see the finished products. I was going to take part & tried to find the pattern, but it doesn’t seem to be on sale her in Australia.
Hi Anna
I just (like an hour ago) bought the pattern and I can’t wait to start. Will search for the perfect fabric once the boys are in bed. Tks for doing this sew along!
: )
Hi, I’m size huge (8) in real life, so it looks to me like I’ll be making the size 18 from the pattern.
Great tips! I am getting ready to cut, and using scraps is what I will do first, for this is my first article of clothing to be made – I have no idea what sizing to follow!
Looks like a fantastic skirt! May have to join in x
Jackie @ Fred-and-Cissy: I have bought this pattern at my local Spotlight in Sydney, Australia. Have you tried Lincraft otherwise?
Well, like many others thank you for the sizing tip. Looking forward to use my new sewing machine and new overlocker with this skirt!
Are you going to open a flickr group so we can share photos??
And cut 🙂 I tested the waistband (thank you so much for the tip) but since I’m still not 100% sure about the size, I’m making a wear-at-home version first, so I won’t be too worried if it’s not an exact fit.
So exited to join this sew along! I will be a day or 2 behind as I only ordered my pattern this morning and will received it tomorrow! Thanks for the back of the envelope pic so atleast I can go and get my material and prep it! Thanks Anna!
I think this sew along tutorial is going to be great 🙂
I’m so excited about this sew along! Managed to get my fabric cut last night after girls went to bed, and am looking forward to tonight’s session. I just found your blog and love it! Thank you!
i bought this pattern awhile ago, i am definitely going to start this. thanks for all the tips!!
This is great info about sewing with patterns. I’ve been sewing for a few years now HOWEVER I’m terrified of sewing with a pattern. After reading your tips… I might just be ready! 🙂
I finally got mine cut out last night and hope to get some time today to sorta get caught up!
Thanks for the sew a long!
Hi! Just wondering what your fabric type is? I saw the multitude of suggested fabrics on the pattern, but was wondering what you were using for this cute skirt. Also, do you think a knit-jersey type of fabric would work? Thanks!
hi mary jo,
I’m using a linen cotton blend by Heather Ross from her Far Far Away III collection. Hmm, a Jersey knit might work, although I haven’t tried it myself.
Wow, wish I had found this blog before I tried sewing this skirt! I have ended up with the most gigantic skirt ever because I followed the package sizing.I’m just going to keep going and see what happens at the end. Love your blog. I’m getting back to sewing after a 20+ year hiatus. Thanks for all the great info!
Great sew along … i hope ;o) I am gonna try this out next week! Really looking forward to this thanks to this sew along, it will be a great help!
Thank you for this post! I was scratching my head about the sizing for this pattern and will test the waistband out today. I am getting started garment sewing again after it didn’t really “take” 20 years ago. The resources I was using back then to learn seemed a lot more fussy about ironing the pattern and other super time consuming stuff. It took me days just to get to the point where I was sewing. So I’m looking forward to sewing “along” (way after the fact anyway) with you with these super cool posts!