Well, hopefully day 1 went well for you, I’m glad to hear some new tips and your excitement in making something for yourself, finally!
Today we’re going to put together the main body of the skirt with pockets. I’ll add some suggestions for finishing the seams as well, but definitely feel free to do whatever works for you.
Please note that this pattern calls for 5/8″ seam allowances throughout. Make sure you know where that is on your machine (and if you don’t, get out a ruler and measure from the needle and mark 5/8″ with a piece of masking tape, etc.)
Sewing pockets:
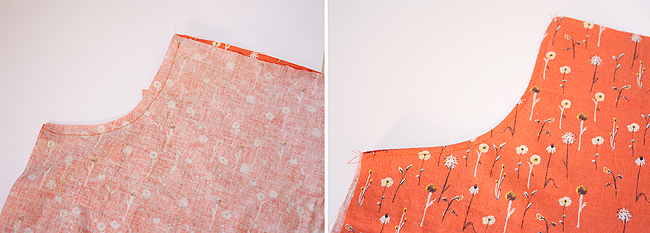
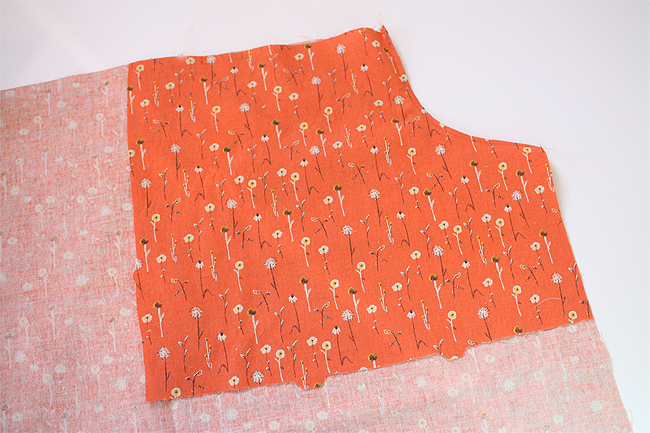
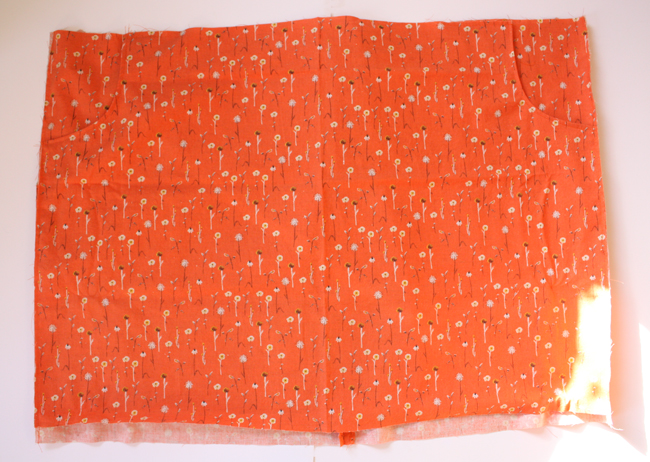
Place pocket facing pieces RIGHT sides together on top of the skirt top.
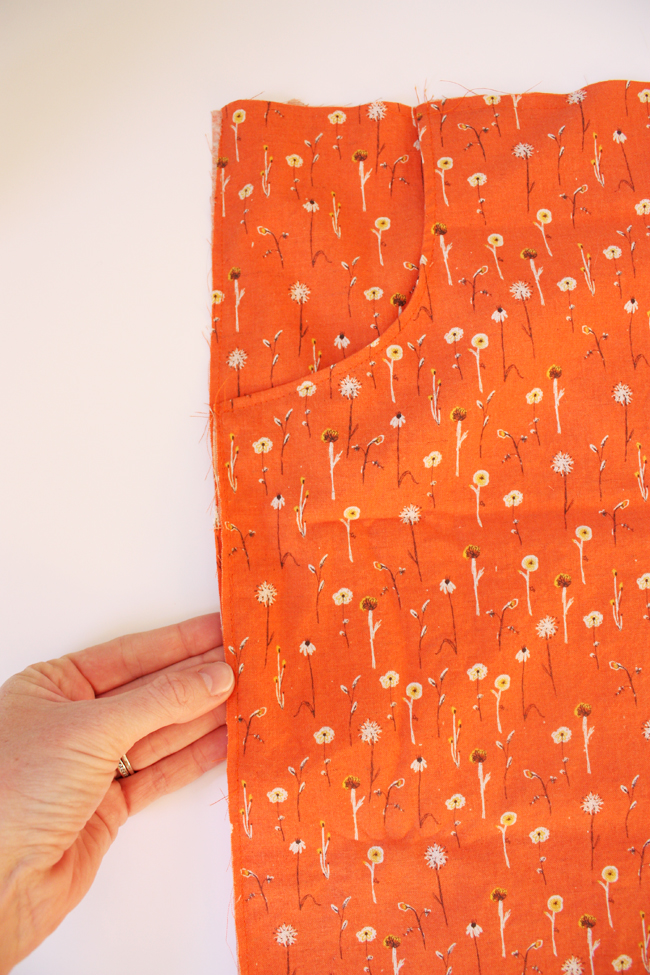
Sew along both curved pocket seams. Flip so that the WRONG sides are touching and topstitch along both both opening edges.
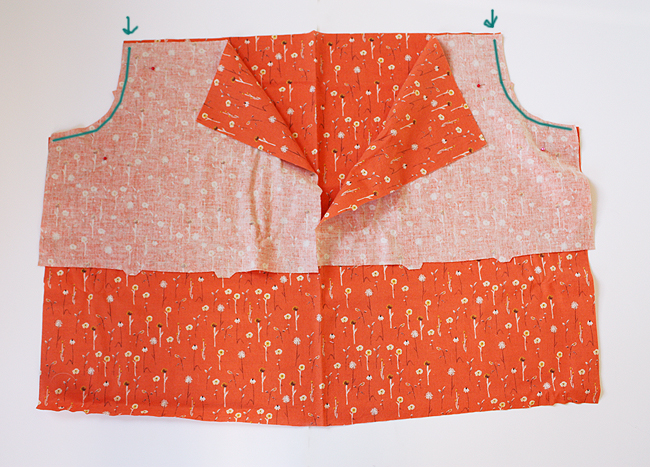
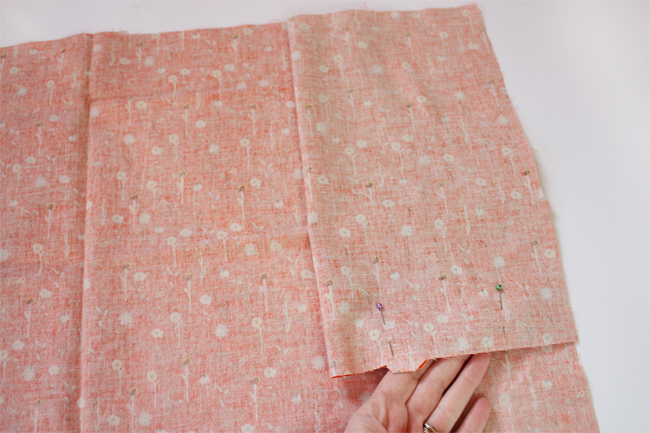
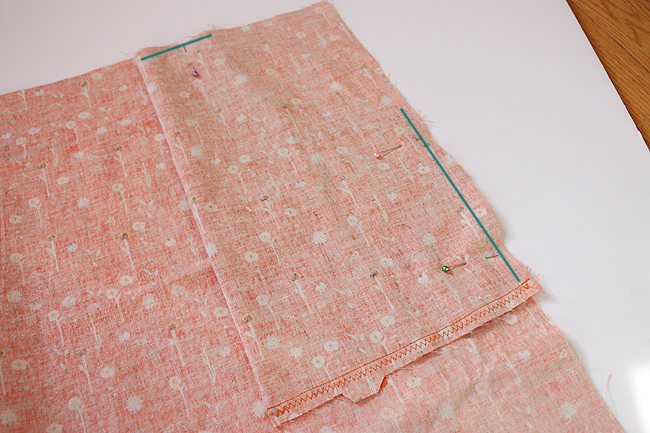
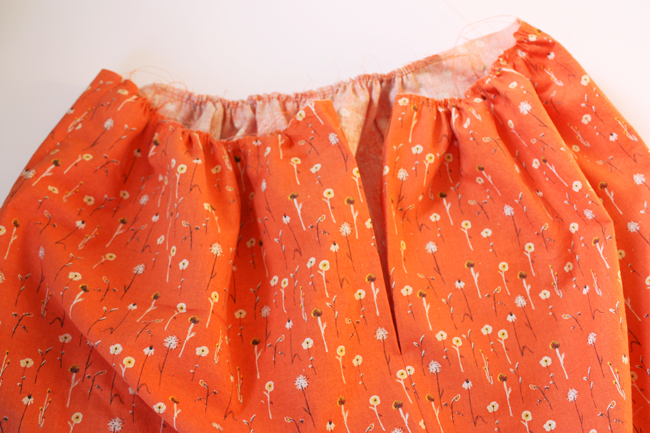
Now flip over the skirt front. You’ll be folding the pocket piece so that the RIGHT sides are facing.
Like this. Pin the bottom edge.
Finish the bottom edge by using a zig zag stitch or serging or using pinking shears, etc. Baste (the longest stitch on your machine) along the top edge and side edges as shown in green.
Sewing main body of skirt:
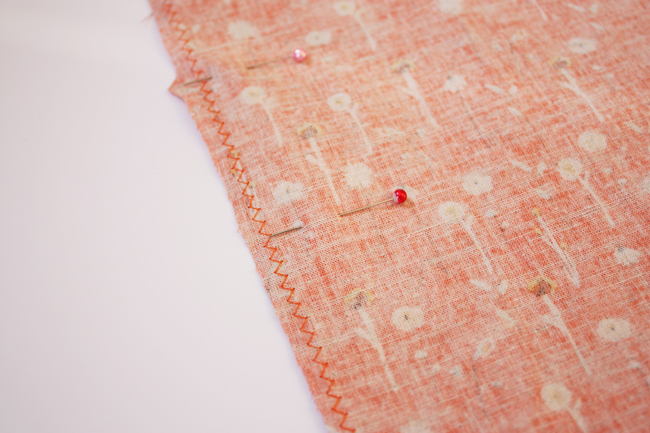
First you’ll want to finish the back seam edges, I chose to do a zig zag stitch on both pieces or you could also use a pinking shears, serge, etc. Since you’ll be pressing the seam open, finish both edges seperately.
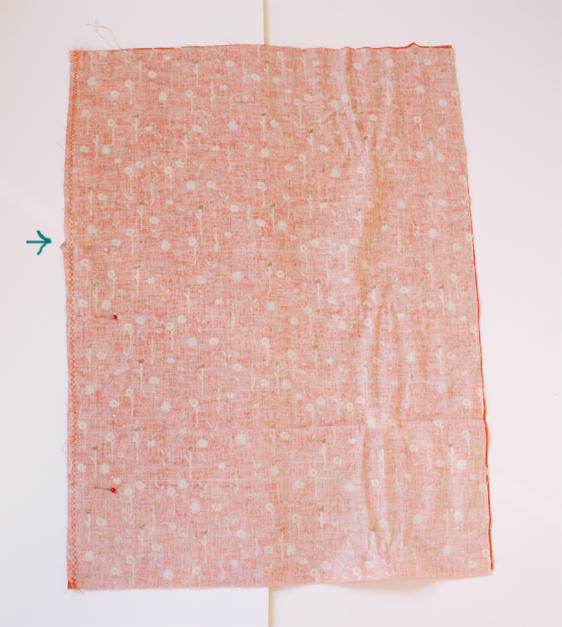
Place skirt back pieces RIGHT sides together and sew together starting at the notch.
Press the seam open.
This step uses a french seam for both side seams, I chose to do this method because it frays less and looks more professional. Place skirt front and assembled skirt back WRONG sides facing. This seems wrong, but don’t worry, it’s easy and painless. Sew down each side seam with a 1/4″ seam allowance (this is instead of the 5/8″ allowance called for).
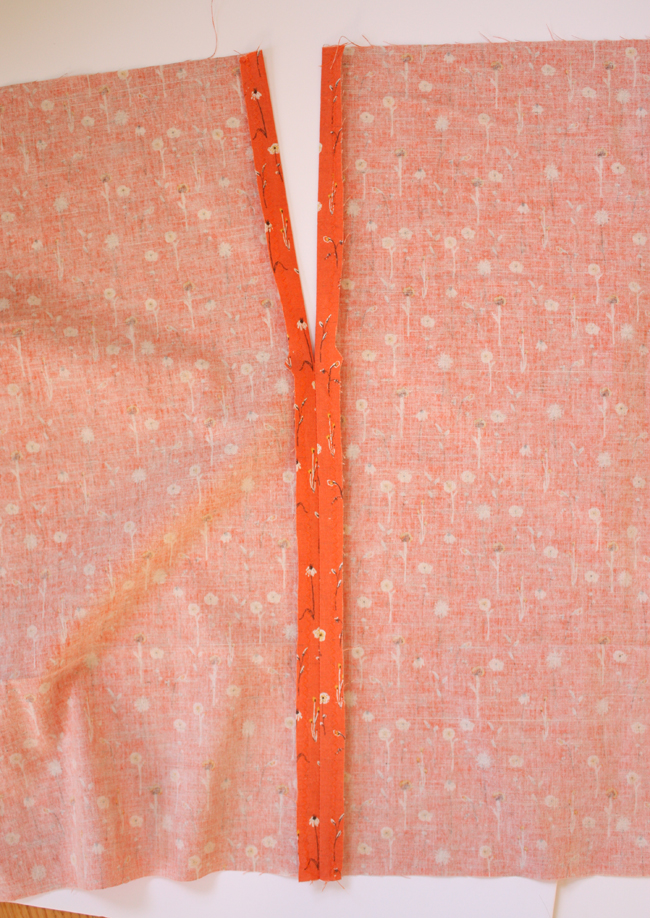
Next, you’ll turn the skirt wrong side out and press both side seams. With RIGHT sides facing this time, sew each side seam again using a 1/2″ seam allowance, thus enclosing the raw edges.
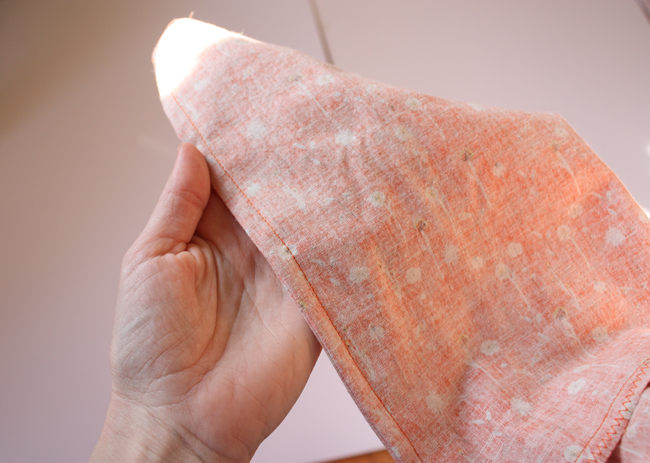
When you turn the skirt right side out the seam will look like this:
Press.
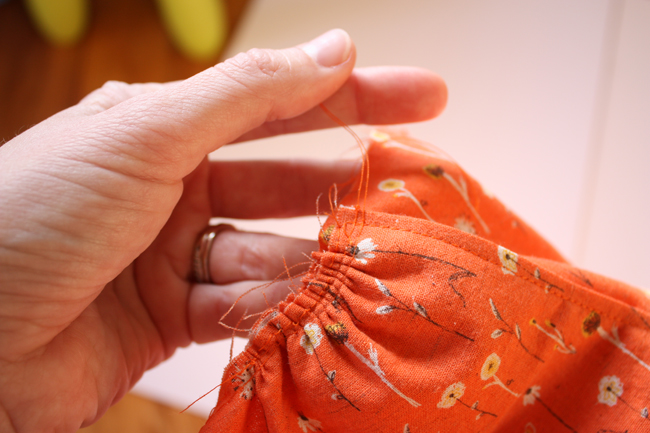
Sew two lines of basting stitches along the indicated areas between the dots. Basically you’ll be gathering along the front of the skirt between the pockets and along each back skirt piece. Set your machine to it’s longest stitch length and do NOT backstitch, simply leave the tails of thread. The directions in the simplicity pattern call for you to gather the fabric in a later step, but I always do it this way out of habit (or probably just trying to rush through things). You can chose to do it now, or save it for another step.
Pull those tails (either the bobbin threads/bottom threads or the spool threads/top threads – not all threads) gently and as evenly as possible to gather the skirt.
It’s starting to look more like a skirt! Hope you join me tomorrow for Day 3. ♥
[I’m going to run this sew along a little differently than my typical blog posts, if you have any questions or comments or suggestions/tips please leave them in the comments section and I’ll respond to them there. Usually I like to reply to comments directly by email when time allows, but this way the info will be there for anyone who joins along.]


The pockets add such a nice touch! Thanks for the great tutorial!
Oh now I can’t wait for my pattern to arrive! Thanks for all the great explanations!
Too funny: I just bought the pattern yesterday, not realising you were doing a sew-along! It will be great to follow your instructions! 🙂
Anna, what’s the purpose of the finishing the back seam edges? Is that to help prevent fraying? Thanks for the great pictures and descriptions. I definitely didn’t initially get the pocket instructions just reading through the pattern. And the french seam directions – awesome!
I just hope the skirt fits – I didn’t try out the waistband ahead of time and think that it might not work out. Thankfully I got 2 fabrics to make the skirt in, so if I mess up the first one, I’ll have the 2nd to adjust! Thanks again!
Hey LT, yep, finishing the edges helps prevent fraying. Some fabrics fray more than others though.
Hope you have success though with figuring out your sizing!
This sew along is so cool! You make it look easy.
I’m not following along because I look atrocious in skirts, but it’s still fun to see how you are going about making it. It gives me an idea of how garment construction works.
It certainly was much easier with your instructions, thank you 🙂 The only thing I’m not so good at so far is gathering the skirt – maybe because my fabric is rather thick. I’d be grateful for some more hints on that, if possible (it’s my first time, you know).
Anna, one question on sewing the center back seam together. Looking at the pattern pictures, shouldn’t the side that is being sewn together be the side closest to the notch on the top of the skirt? In your picture it looks opposite. The pattern makes it look like it should be the side with the notch closer to the top instead of the middle right?
Hey LT, I think the picture might just make it look that way? or it could be wrong. It works , but that’s because the pattern piece for that is basically a rectangle. But yes, you’ll want to make sure you’re sewing the back seam as indicated on the pattern pieces…
I bought the pattern and fabric but now I’ve got flu and my daughter has tonsillitis so definitely no sewing for me this week! Plenty of time to read your great guidance so when I do get around to it, it’ll be easy, right?
I’m just about to do my sewing for the day, excited to try a french seam for the first time. Thanks for all the tips. I love your fabric choice for this skirt!
I’m one day ahead of you here in Australia, so it’s fun to compare how you did it and what I did last night!
All good for now. I will try the french seams next time, great idea.
Yipee Anna. After thinking I wouldn’t find the pattern, I managed to find one locally on ebay. I’ve cut out my pieces and am ready to go on this bit of the sew-along. Thanks….
I second Tusen’s question. Any tips on gathering the fabric when using a heavier fabric? I am using a thicker twill. I thought about piecing part of the pocket from a lighter cotton to reduce the bulk, but wanted to wait and see if you had any suggestions first. Thanks for doing this SAL!
I fully intended to do this sew along this week, but then life happened and i never got around to getting the materials. BUT I do planning on following along with these posts when I get around to it. I can’t wait! I’m seeing a lot of techniques that are new to me so it should be really educational!
I haven’t started yet. This maybe a do at the weekend project for me. I’m kind of worried about the gathers though. When I made my first gathered clutch I just couldn’t get the basting stitches to pull enough through the material to gather. The second clutch I ended up doing the gathering bit by hand…I’m hoping I can figure out why it wouldn’t work when I come to the skirt.
hi Isisjem,
I think possibly that you might be trying to pull both threads when you gather? You’ll only pull on either the bobbin thread(s) or the spool thread(s), not both. Hopefully that makes sense.
I also used a slightly heavier fabric. I don’t know what it is exactly (isn’t that bad, haha). But it was in the area of the apparel fabrics called “suiting.” I had trouble at first but just kept gently tugging each thread until one finally started to give. I had to work it on the front panel for like five minutes before one finally tugged a little, then it was easy.
Um, okay, when you lay out the front skirt piece and the back piece to sew the side seams, is the back part of the skirt supposed to be substantially wider than the front? Please say yes. : )
If no, then I’m having trouble even earlier in this process than I expected! LOL.
gosh I am running a day behind but will be up to speed and finish in time just after you 😉 thank you for all the great tips and the step by step photos!
hey lee, I think you should be okay. You’ll be doing a lot of gathering, so I think if you hang in there, it’ll work out.
oh Anna just found you, and the pics of the sewing the Zipper with the skirt made my day as i have looked and looked for a better tute and yours is the best, of course i like the blogs and their time given yipes am so excited will keep you posted as too my try . renee thanx
Thanks for showing us the french seam–I’ve never used one before. I’m just now making my skirt out of corduroy and that stuff sheds like crazy! French seams make it nice and clean on the inside. 🙂
So what size did you actually use?
size 6 initially, then a size 8
And is the part where you put the zipper cut down the center of the skirt, or on a side by one of the pockets?
The zipper is in the back center of the skirt.