
I remember what it was like inserting my first magnetic snap. I was sweating bullets! It’s one of those last steps when making a tote or bag or other project. All I could think of was how was I going to fix it once I messed it up?! But you know what, all the worry was really over nothing. Anyway, I’ll show you how to insert a magnetic snap, no sweat, promise.
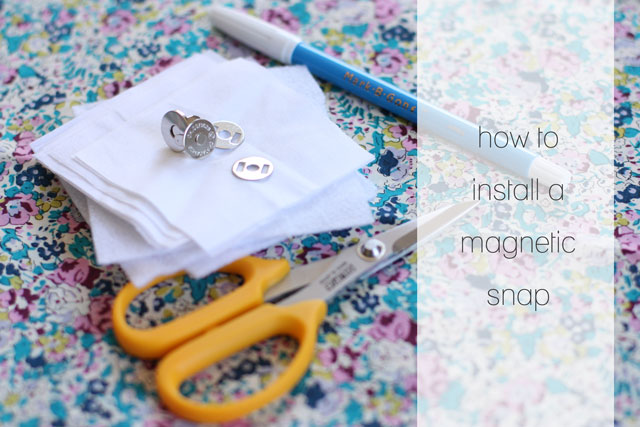
+ Supplies +
- sharp scissors
- some kind of fabric marking tool (I used a water soluble pen)
- scraps of fusible interfacing
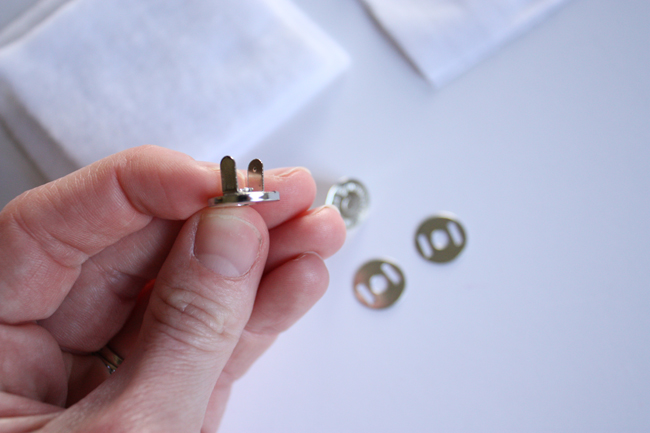
+ Interfacing +
One of the little tricks I’ve come up with for myself is having those little scraps of fusible interfacing ready to go. Whenever I’m cutting interfacing and I have a few smaller pieces, I’ll take the time and cut them into little 2″ squares. I stuff those squares in a baggie with my magnetic snaps so the next time I’m ready to insert a snap – it’s ready to go! Most frequently I keep Pellon SF101 (a fusible woven) and Pellon 81F (a fusible fleece) and I use them in combination.
+ Size/Type +
Now I should mention that you’ll want to make sure you have the appropriate size magnetic snap for your project. Most patterns/tutorials call for a certain size. I do like to use a smaller 14mm size snap for pockets. Some even have a lighter magnetic strength which is nice if you’re sick of trying to pry open a pocket for the millionth time. I also really like working with a sew-in magnet (which is sandwiched between exterior/lining layers), they seem to hold things together nicely, but at the same time are really easy to open. I can save that for another post though if you’re interested.
+ Where to Shop +
I now carry 18mm magnetic snaps in my shop in both Antique Brass and Nickel finishes (available in a 3-pack). You can also find smaller sizes on Etsy.
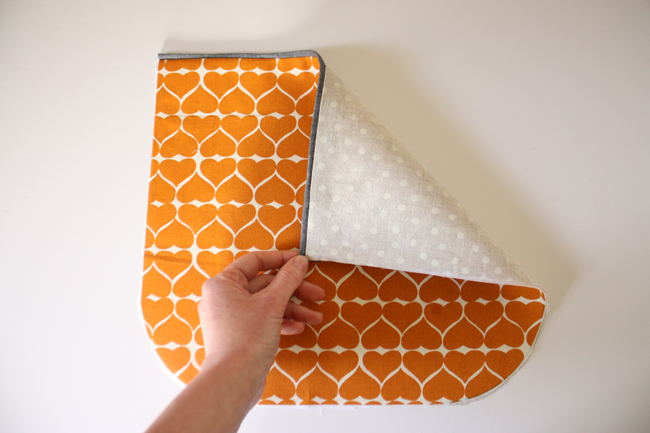
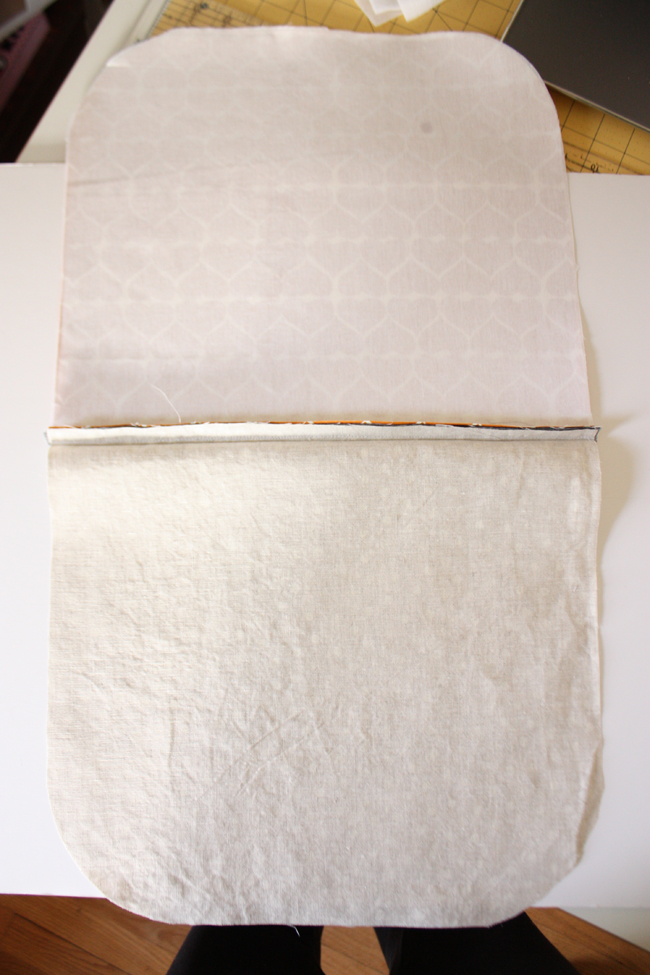
So we’ll start off with a little project in progress. For this example I’m using a front pocket from my Super Tote. I’ve assembled the pocket (pocket exterior, piping, and pocket lining).
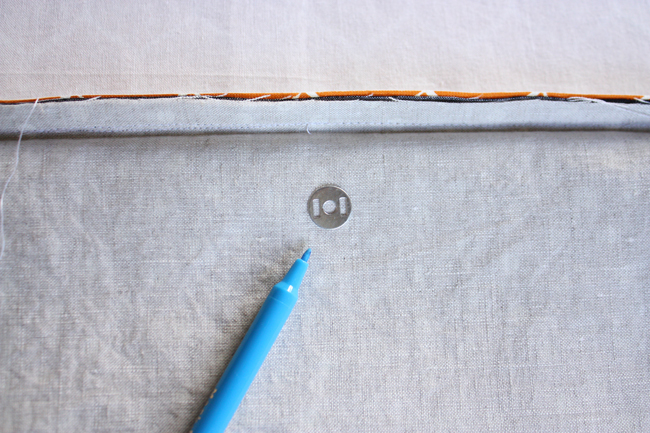
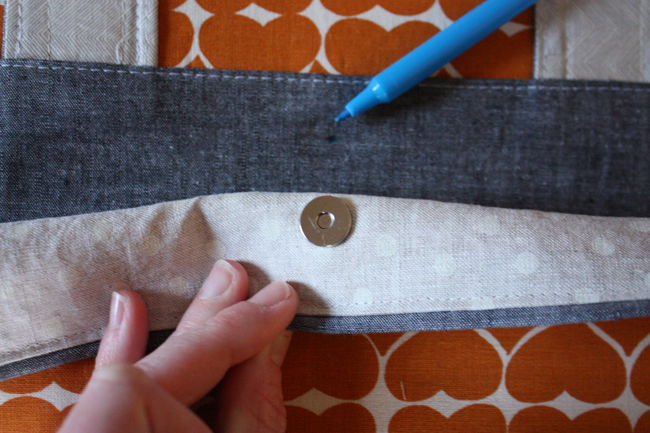
Step 1:
Mark snap placement. Using whatever marking tool you’ve got around. a pencil works great too. Make a mark in both of those little rectangles.
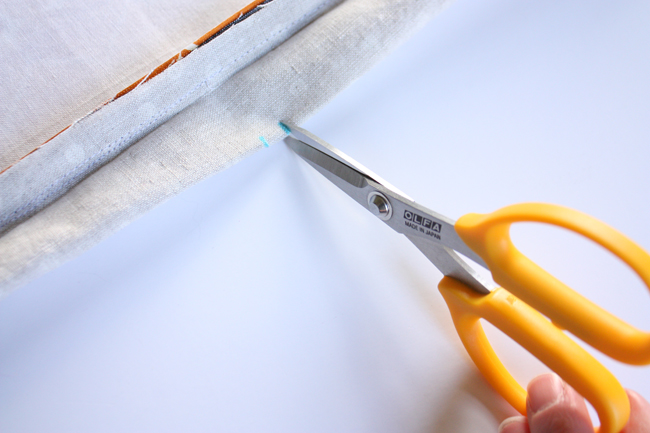
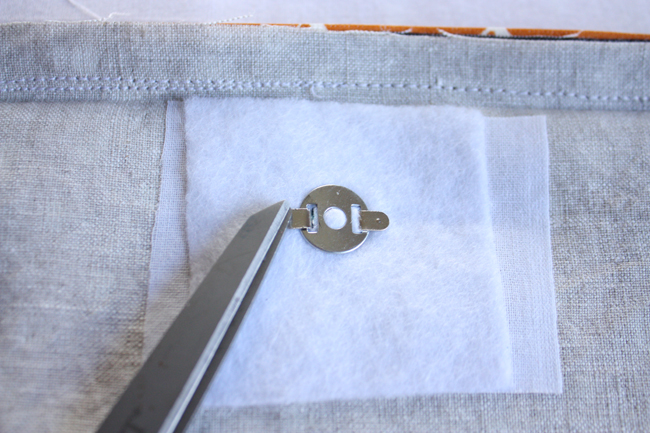
Step 2:
Cut slits where you marked to insert prongs. Make sure to use a sharp scissors! And try to cut as small of a slit as possible. I’ve also seen where people make small buttonholes where the prongs will go. If you’re worried about fraying you can always dab on a little Fray Check.
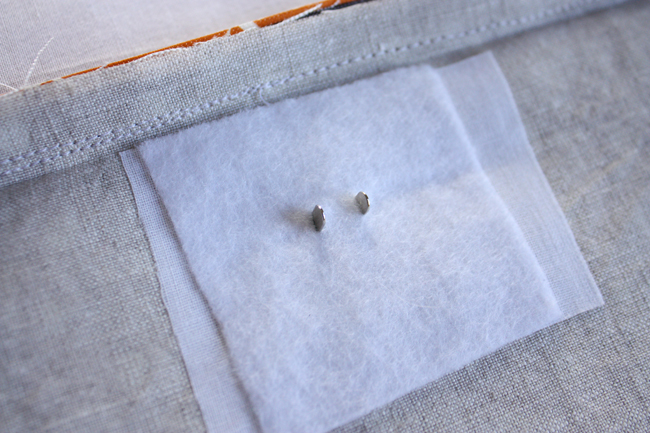
Step 3:
Insert snap. Push prongs through the slits from the right side of the fabric. You can then take out the prongs and fuse on a layer of fusible interfacing. It helps stabilize everything and holds up better for wear and tear. I’ve fused on SF101 and then fusible fleece on top (gives the snap a little extra padding). You can either then push the prong back through the slits or snip through the interfacing carefully.
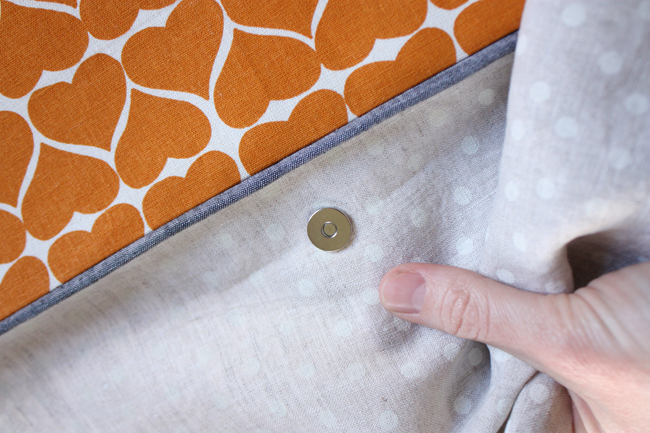
Push the prong back through.
Slide washer over prongs. Using the edge of your scissors blade, bend over the prongs. I’ve seen where people bend them inwards too, I haven’t noticed a difference either way, so I usually just bend them outwards.
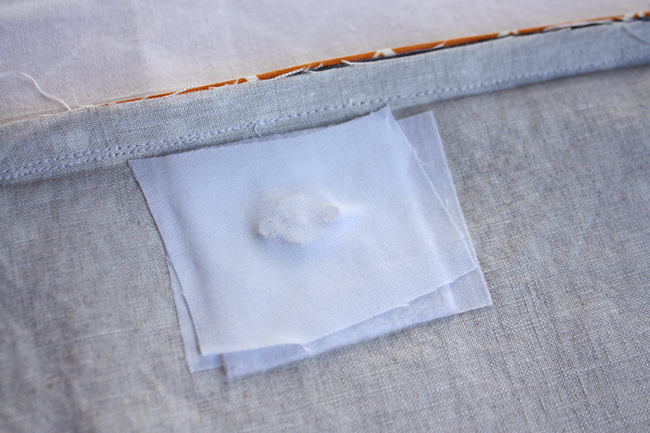
Step 4:
Fuse on more interfacing. Yep! Go ahead and take another scrap of SF101 and lay it over the top of everything and give it a good press.
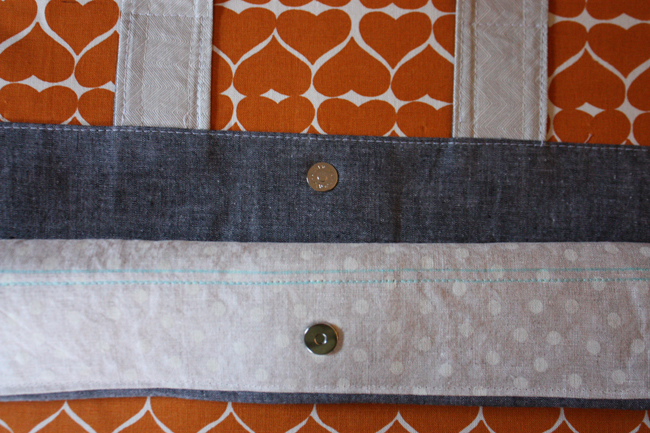
Step 5:
Repeat steps 1-4 for installing remaining half of snap on project. Marking placement, cutting, inserting prongs, interface, bend over prongs, adding more interfacing and that’s all!
You’re all set! I love to sit and open and close snaps (and zippers) when I’m done, it’s so fun and feels like a pat on the back. You did it! And I should mention, if this kind of magnetic snap isn’t your cup of tea, there are some really cute sew-in style snaps that I definitely want to try. They seem like they’d make a really nice handmade touch to a project. Okay, if you have any additional tips feel free to leave them in the comments. ♥

I have a super sharp craft knife that works perfect for slicing open the little holes you need. It makes it easy to be precise 🙂
THANK YOU for posting this! I’m getting ready to sew a Super Tote and was wondering when and how to put in the magnetic snap. Thanks for doing the brain work for us!!
Genevieve
Thank yoy! Exactly what I needed. I bought some magnetic snaps a while back, and I have not figured out how to install them. With this tutorial it doesn’t look too hard!
I have installed so many of these, but have never felt like they were secure. I love how you fuse a piece of interfacing over the entire back! So smart! Thanks Anna!
Thank you! I will be attempting my first bag – the Super Tote! – next month, and I was wondering how you put these in.
thanks for the tutorial. I have all my material ready and hope to start my super tote soon.
Great tutorial! On the other hand, I tried once with sew in snaps, and after some intense use, they aren’t that nice anymore… and I also hate how the floss shows on them, as i’ve sewn only balck or white snaps.
Mary @ http://handmadebymaryall.blogspot.it/
Great job, Anna! The extra interfacing on top of each side of the magnetic snap is such a great solution for long-term use!! I can’t wait to start one of your super totes for my grown-up daughter in Chicago!
thank you, great tutorial
I just had a lightbulb moment while reading this– like, DUH! That wasn’t too scary– and yet I have been avoiding this very thing! thanks Anna!
What the other Krista said about the final piece of interfacing – excellent idea. I have had prongs wear thru the lining fabric in the past!
I’ve also used a small piece of lightweight plastic behind these magnets. Love the Super Tote….have made 2 so far.
Anna, Thank you so much for this tutorial … I am going to attempt to do one myself when I make my next bag. I really love your blogg and your patterns! Regards, Wendy (Australia)
Nice Tute! I love Being Bags! Great selection and customer service…just like Zippit! I’m so glad you help promote the awesome Etsy sites out there. If it weren’t for you, I’d still be a zipper idiot!
Thank you so much Anna!
Who has told you, that I need even this tutorial next :-)?
Greetings from Germany
Ines
Hi! This tutorial is perfect timing for me because I sucked it up and bought a pack of magnetic closures just the other day and they’ve been mocking me from my desk. I’ve been meaning to reinvent this wheel, likely with interfacing, but I’ve been in avoidance mode. So. THANK YOU!
Karin
Thank you soooo much for this tutorial! I have magnetic snaps in my sewing box, have for at least a month now, and have just been to scared to try them out. I’m a visual person so reading through the written instructions on the package just wasn’t cutting it. Now I can actually attempt to use them! <3
Can I put the magnetic snaps on a bag I bought from 31, I love the bag but hate that it does not have a way to close it?????
Yes! totally possible to do that. You’ll have to get a little creative. Perhaps install the magnetic snap onto small squares of fabric (iron under the raw edges) and sew those onto the bag. or you could try a sew in version of a magnetic snap – you can find them on etsy. 🙂
Thank you for this! I have been wondering the same thing about a Retro Metro bag I just purchased from 31! I want to add a magnetic snap, but didn’t want have to cut into the fabric if I didn’t have to. I’ll try the sew-in magnetic snap!
Thank you for the clear and concise tutorial, it just calms me down as I read it and take in your great photos. Ahhh… : )
This is great! I’ve installed these before, but they always seem to eat through the fabric after a short period of use. Using the extra interfacing seems like a great idea. I’ve been hesitant to use these again, but now with your idea I think I will try to use them again. Thanks for posting this!
I love little snaps like this – I like the idea of the extra interfacing over the top … clever.
Can’t wait to make your bag … be on the lookout in a couple of months … 🙂
This isn’t going to be earth shattering or new but:
I love your bag work so hard.
Yeah. So hard. I find myself crushing on every new version.
So…there’s that.
Thanks for this tutorial! I bought a Super Tote pattern the other day, and all the materials, and then I started wondering how to do that snap. Glad I started catching up on emails because there it was! Woot! Now to work on that bag!!
Thanks I watched a tutoriol on U Tube yesterday and it all looked easy so inserted my first ever magnetic in a little bag I had decided to make and then discovered that I had it on the outside instead of inside. Have now read through your tutorial and he presto I think I can manage it and will give it another go many thanks for your simple and easy to follow instructions
What if the bag is ready made? It’s just that the magnet snaps on the bag fell off..
Thanks this was simple and clear to follow!
Got a question for you–do you know who would have the best pricing on invisible sew-in neodymium magnetic –I will be sewing it between 2 pieces of leather
Sorry I just spotted your question! I’m not sure where you’d find that, maybe Tandy Leather Factory?
Thank you for an excellent tutorial. I am in the process of making the Super Tote and got stuck at the magnet step. I noticed that in the last picture of the tutorial, there appears to be 2 stitching lines below the pocket snap, but I only see one line on the outside pocket fnished bag photo. Did you stitch the exterior pocket to the lining to prevent the lining of the pocket from separating from the exterior pocket? I was wondering if the snap attached to the lining would pull away from the exterior pocket with use. What is your experience?
Also, would you consider doing a tutorial on the sew-in flat magnetic closures in the future? Thank you!
Yep, it’s a stitching line that normally would normally catch the ‘pocket facing piece’. I added it below the magnetic snap on my fully lined totes as well, just felt like it would be extra secure for the snap. I think if you add it, you’ll definitely appreciate having it. Just use a water soluble pen/or whatever marking tool that disappears, and mark a line on the front of the pocket to get a nice straight line. 🙂
Hope that helps!
Easy peasy lemon squeezy…………thanks so much for a super easy tutorial
Applying the extra batting and interfacing works great! My bags get a lot of wear and tear and this solved the problem os snaps ripping out.
Thanks for the tutorial! Very clear and helpful.
Thank you for taking the time to share this! I got a package of magentic snaps for 50 cents, and want to put one on the sunglasses case that I’m making. These directions are terrific!
Thanks a bunch for this tutorial. I am trying to make the double zipper wallet and have never worked with magnetic snaps before. Even after reading the directions, I was nervous to try and install the snaps but feel more confident now after seeing this tutorial. I can’t wait to finish my project.